


The pictures above and below display the rear tail light housings for the light assemblies. With the replacement parts in hand,
We cut out the old and corroded housings and weld new ones in.


The pictures above and below are of the new
OEM Mercedes Benz panels.
be fitted and spot welded in place
to match the factory correct look.


The light shining through are actually perforations in the trunk floor.


together and prepped for spot welding.


factory look, fit and feel.


rear tail light housings
welded and fitted into place.


The spot welds above show the attention to detail that is involved with
a quality panel replacement. We spot weld every panel to carefully match the craftsmanship
that originally left the factory some 55 years ago.


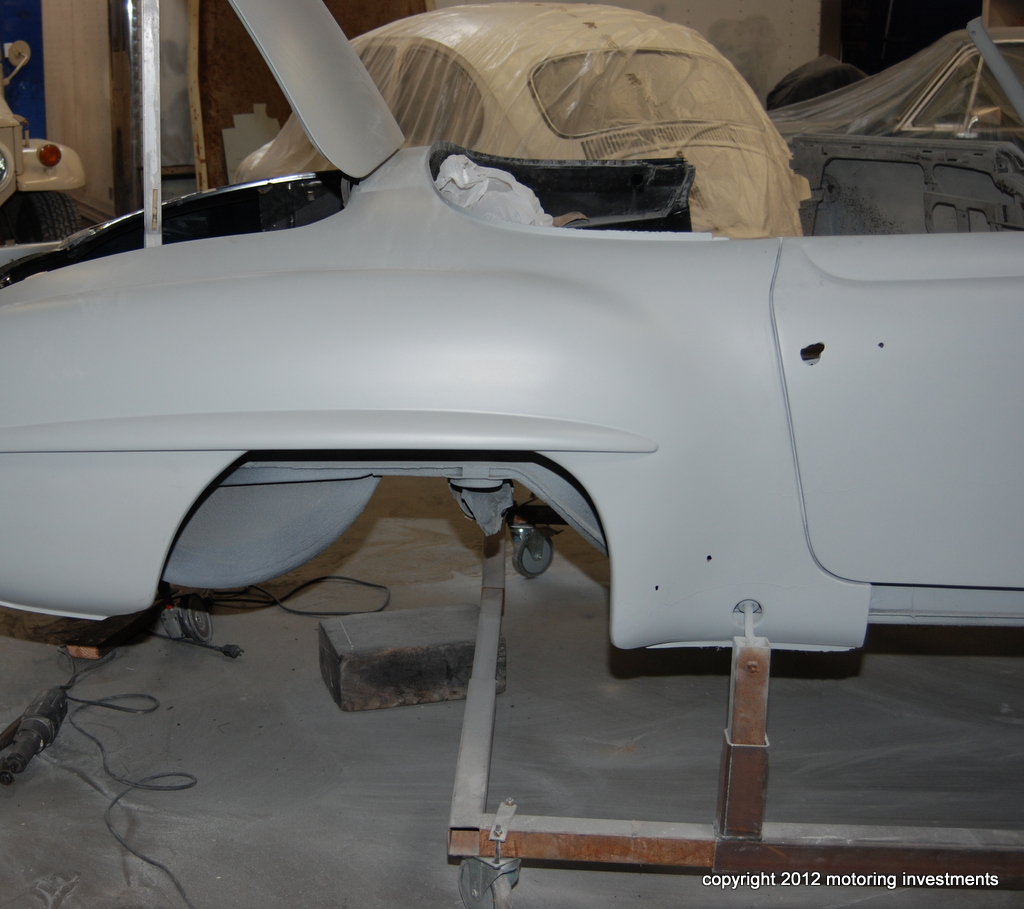


The pictures below display the progress in our body shop.


The pictures above and below display the progress during the engine and front suspension rebuild.


bushings and new hardware.


The pictures above and below show the base coat painted sprayed over the primer coat. This coat helps to sand and
eliminate any and all imperfections.


These pictures below display the paint process at the finished stage.


Notice the hard top, trunk. and hood. All the panels are done with the paint process and ready
for re-assembly.


refinished state with body color.
Scroll down further to see the undercarriage
pictures with the correct paint finish
applied.


fitted with all new rubber
boots and bushings, also refinished
in the correct semi gloss black.


presentable appearance with the correct semi gloss black
paint.


refinished floor and trunk lid.


Now with the undercarriage floor finished in "sandalwood" (DB169) we
will start the assembly process underneath.
All brackets, clamps, rubber buffers or fasteners will be replaced or renewed.


.JPG)


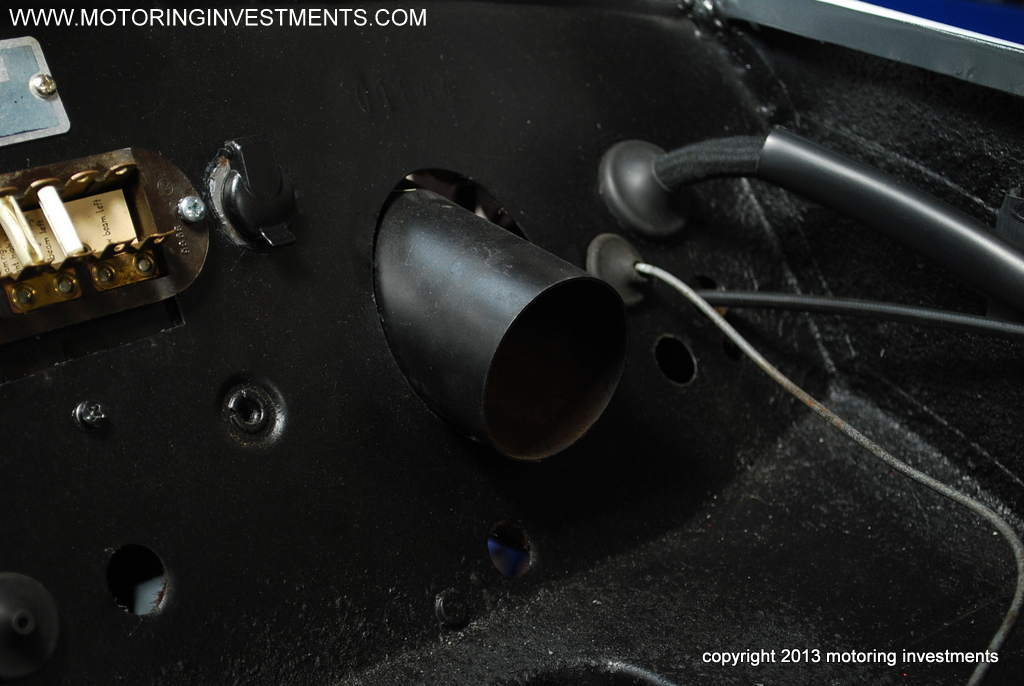
A very important step in completing a proper restoration is to use the
correct engine bay and firewall grommets. A snug fit eliminates the road noise, wind,
and engine temperature from entering the cabin.


The front parking light lenses pictured below are new and ready for wiring ,
The brake and clutch pedal pads are pictured above.


The dash wiring goes in and routed to the fuse box. Installed with the correct
waffle pattern insulation the dash underside will be complete and correct.


The doors pictured below, will receive new guides onto the mechanisms,
clips and fasteners to eliminate any rattles.


are installed.
the protective rubber boot. These
rubber boots (sleeves) protect the wiring
from the outside elements.


bay and reduce the outside noise as well as
protect from corrosion.
Below are some of the new grommets that
are going in the engine bay, notice the
wax still covers most of the grommet.


The pictures above show the heater boxes arriving and the initial stages of assembly.


The pictures above are of the new OEM brake and OEM fuel lines.
The photos below show progression of the engine bay.


ready for further installation.
The new heater boxes and ventilation parts
will make this engine bay
a sight to behold.


place and ready for the final installation
surrounding components.


bare frame and repair any and all issues. The securing frame bolts, wood pieces, and frame
will all be replaced or refinished to
look and service like new.


bumpers before any re-plating has been completed.
After plating the bumpers, we refinish the backsides
with white-grey paint to
look absolutely factory correct.


The photos below are of the rubber sleeves to the vents.


The OEM (Original Equipment Manufacturer) windshield is new and chrome windshield frame is re-plated to look like new.
A close up of the windshield logo is pictured below.

The new windshield is then set into the chrome channels and
frame surround with the new seal in place. The A-pillar
posts are also installed onto the frame surround.


front sub-frame are all in place. Heating pipes, hoses, fuel lines and such will be installed next.


The exhaust manifold is media blasted and recoated to look factory correct.
Also the fuel hoses, and surrounding parts are installed.


carburetors installation.


(available through Mercedes Benz) looks sort of like heavy tar paper.
The above pictures show the material being cut and applied to the transmission hump
and center console area.


have been replaced.


to allow for the compound curves that need to be wrapped.


wiring. All the connectors are ready for installation.
correct metal (unpainted) finish.


sits flush with the body.
after the skived leather is wrapped around the
dash. The remaining interior panel
installation can begin.


Below are pictures of the reconditioned tail light assemblies, outfitted with all new bulbs and ready for installation.


light housings fully assembled
and then installed onto the car.
We also show the new OEM tail light lenses.
against the body.


and shift knob combination.
horn ring in its original packaging.


and the brake booster going together.


Fuel supply lines are now in place, then mounted to carburetors.


the brake booster is mounted into place
and ready to receive the surrounding
hardware.
of clamps are used to
achieve a factory correct look.


the radiator installation. Notice the correct type of clamps at the radiator hoses.


nuts, the dash chrome pictured above will go into the car.


mount to the chrome windshield frame.


As shown above, any mechanical parts within
the gauges or clock
showing wear, are replaced.


speedometer/odometer gauges are shown above.
The complete set of gauges shown below.
shows the detail of the gauges,
all the gauges are show quality.
The picture below shows the headlight
trim rings.


A close up picture to the right, shows 5-56 (May 1956).


you can see the traces of the factory white paint on the backside of the wheel cap.


The image below displays the steel hubcaps after the re-plating process is completed.

the trunk lid.
sit on the trunk lid as well.


All OEM Mercedes Benz parts ensures a proper fit.


One hide is shown skived. That is the process where leather is split or shaved down, thus
allowing us to wrap the dash and other interior components that possess compound curves.


and soon will be ready to accept the windshield and frame surround.


This light weight aluminum panel separates the interior
cockpit from the folding top stowage compartment.
We will strip all the old leather and glue from the panel and recover with new leather shown in the
rows above.


door panels.


stripped and cleaned of any old glue or materials. The images above are before the glue is removed.
Notice below the seat back panels are stripped and ready to be re-wrapped.


will be sandblasted and all the rust will be removed.


Notice the contoured shaped of the old pads? We will fit the new pads and add some padding to fill in the seat skins correctly.


details that go into completing a full restoration.
Below we have the seat bottoms during disassembly.


