
Mercedes Benz 280SL Restoration Log
Follow the journey as we take this nice, honest 280SL through the steps of returning it to world class status.
(Note: the previous owner had changed the original beige-grey to tobacco many years earlier. We returned her to her original color.)
Please scroll all the way down for the restoration process.
BEFORE PHOTOS:
|
|
 |
 |
|||
 |
 |
 |
|||
 |
 |
 |
|||
 |
 |
 |
|||
|
|
 |
 |
|||
| Code 726 H equals Beige-Grey ( H stands for the paint supplier at the time, Herberts) | |||||
 |
 |
 |
|||
| All numbers match. | |||||
 |
 |
 |
|||
 |
 |
 |
|||
 |
 |
||||
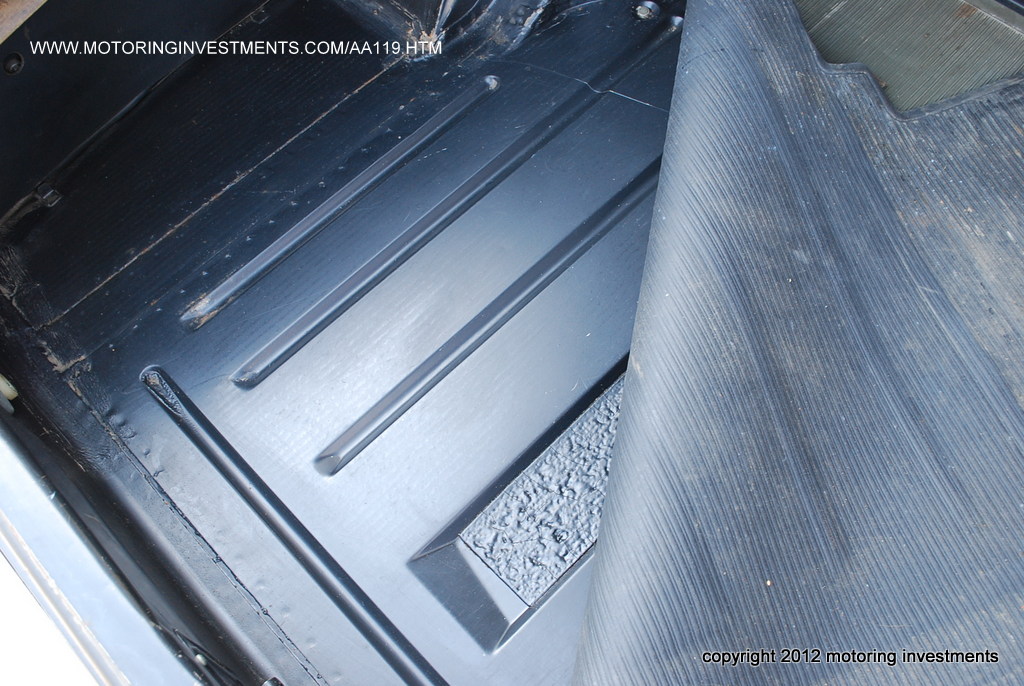
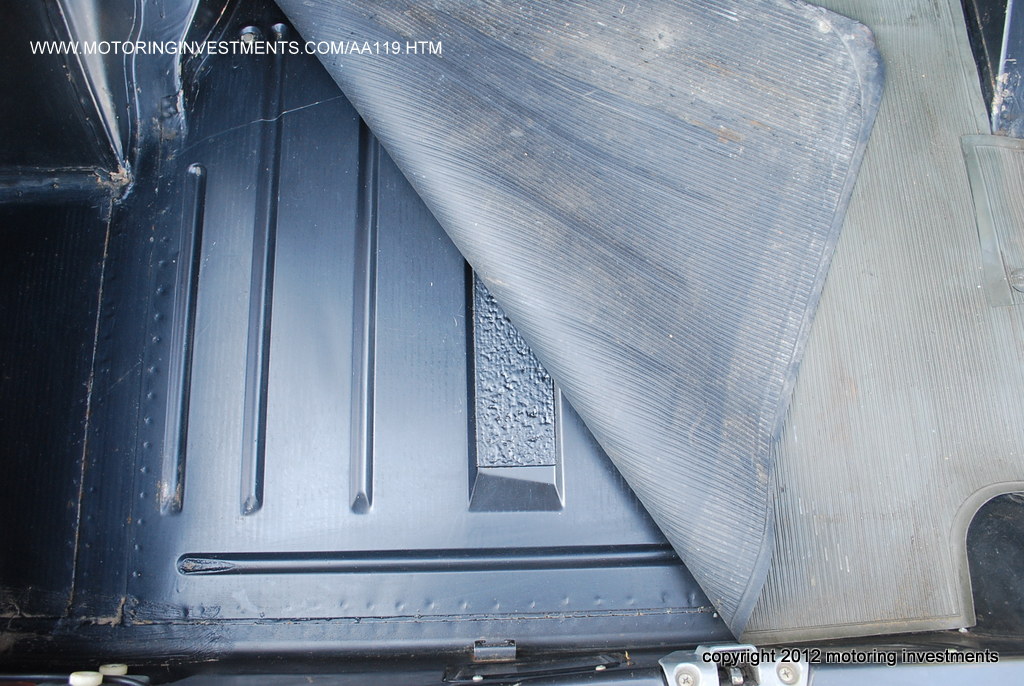
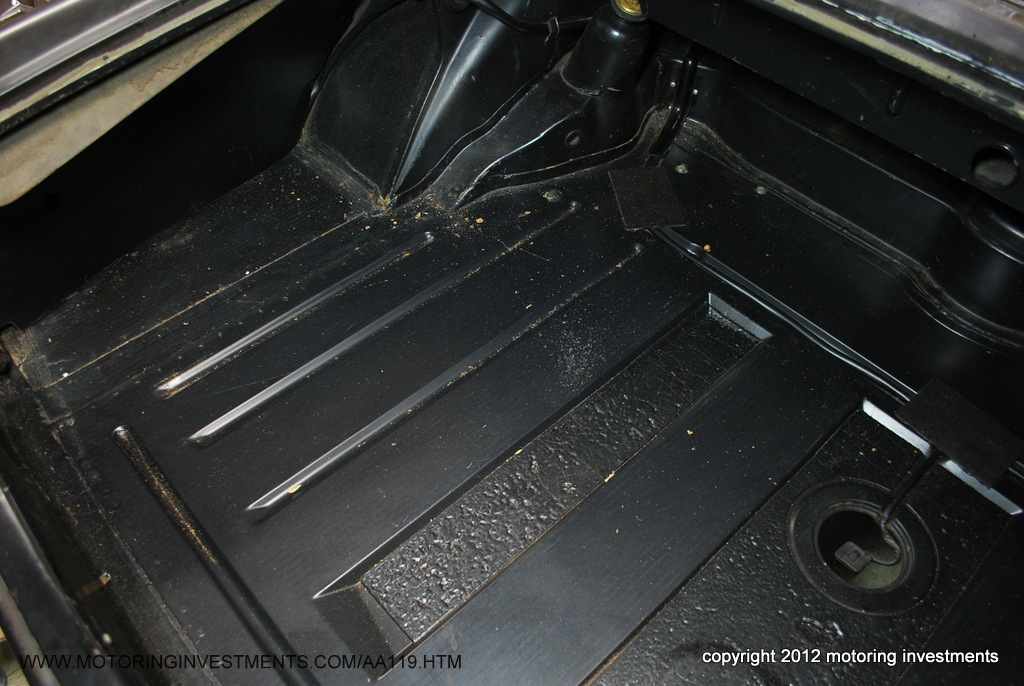
| Very unusual virginal trunk floor. Typically even dry California cars have surface rust here. | |||||
 |
 |
||||
|
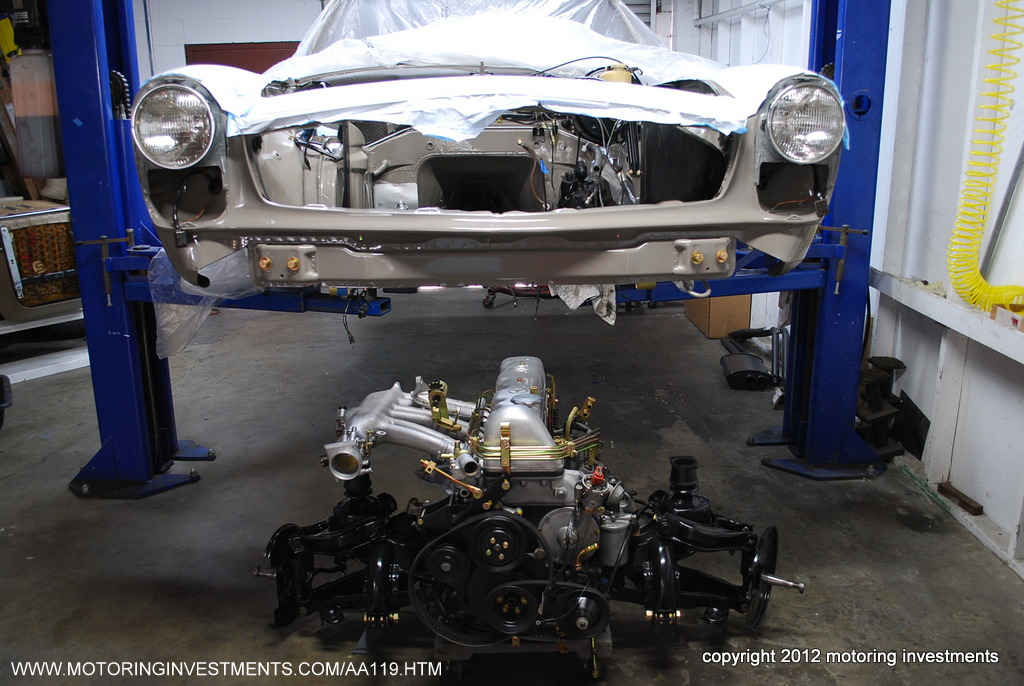
With our Motoring Investments inspection report now completed, we begin the restoration. It is imperative to begin the restoration process with the most solid example you can find. Below are some photographs documenting the extensive restoration this car is undergoing. |
|||||
 |
 |
 |
|||
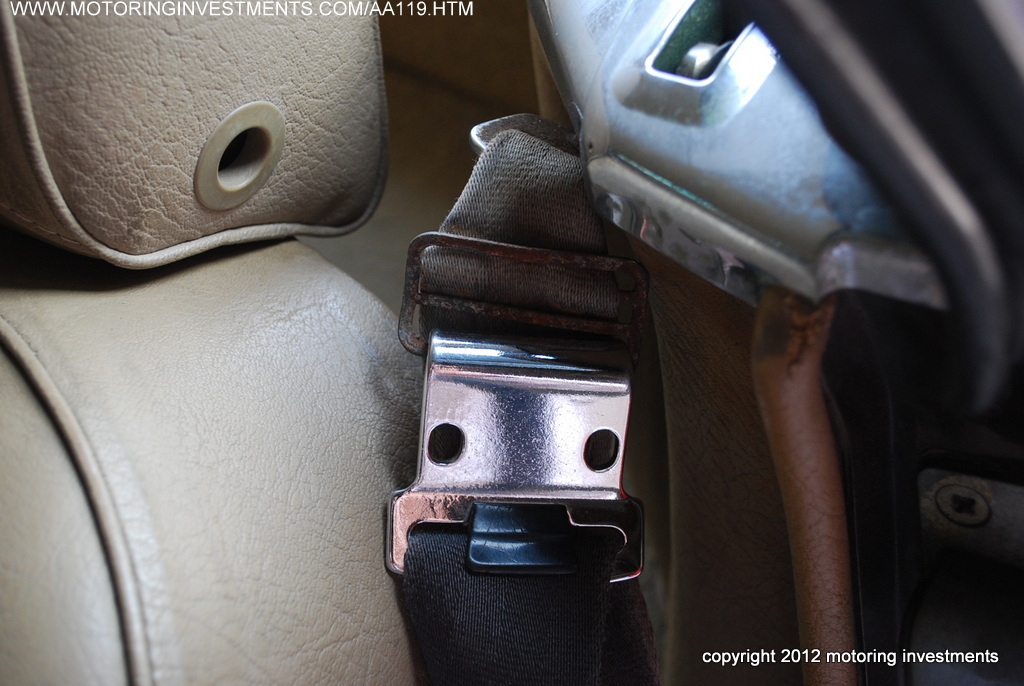 |
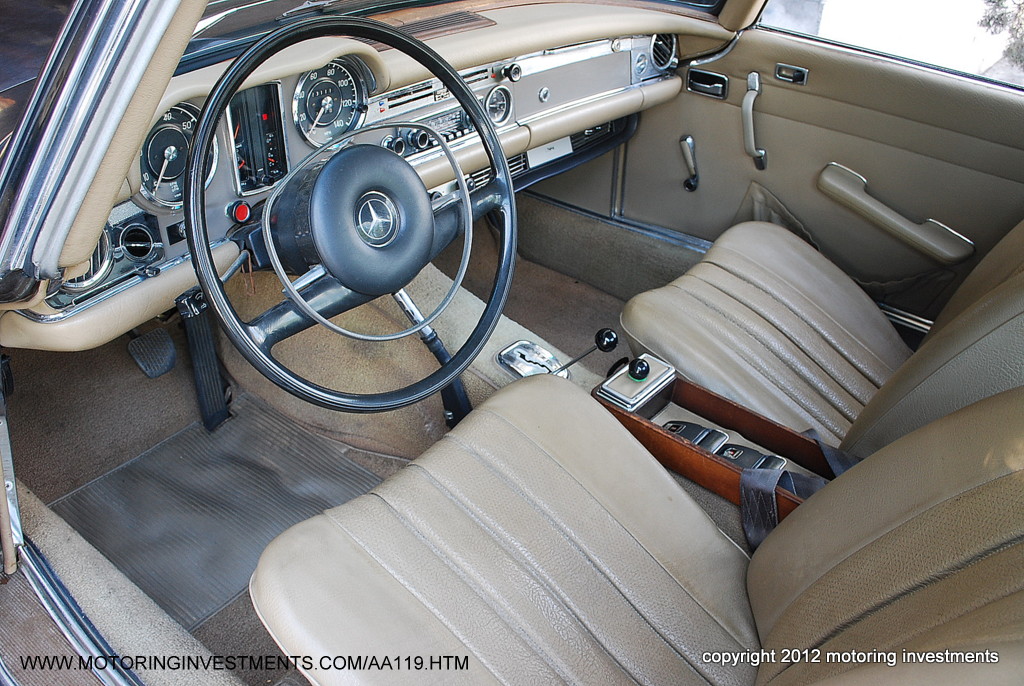
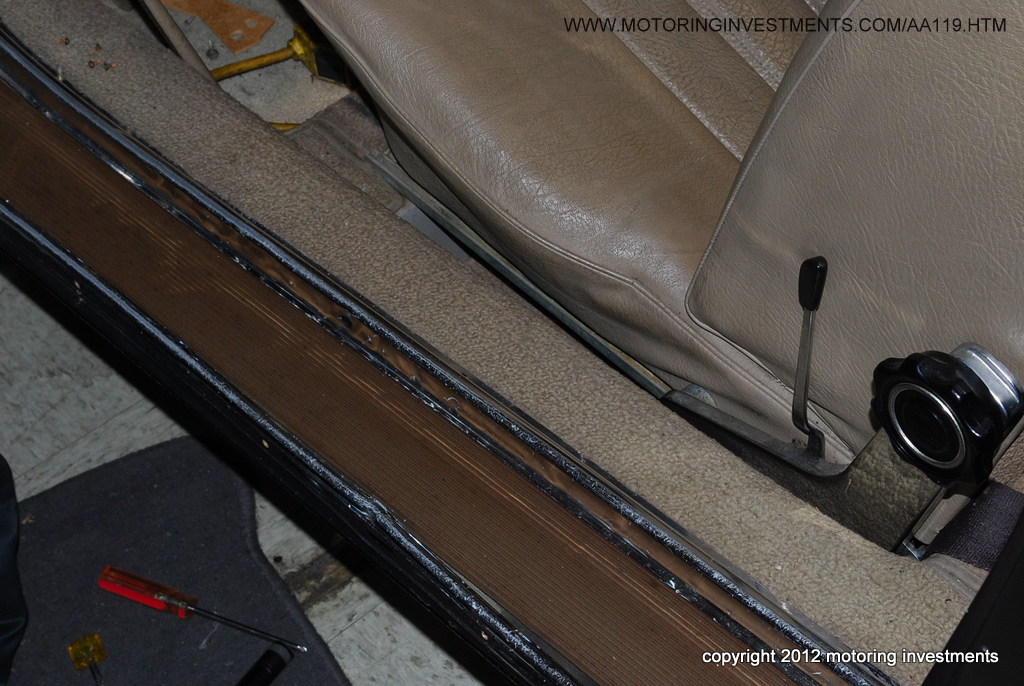
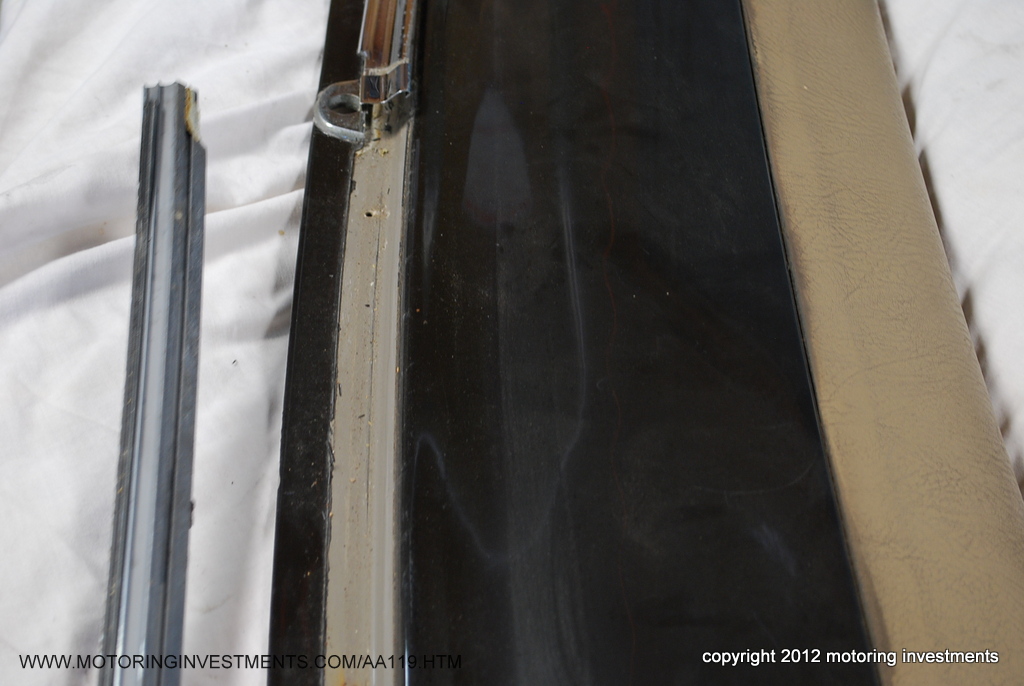
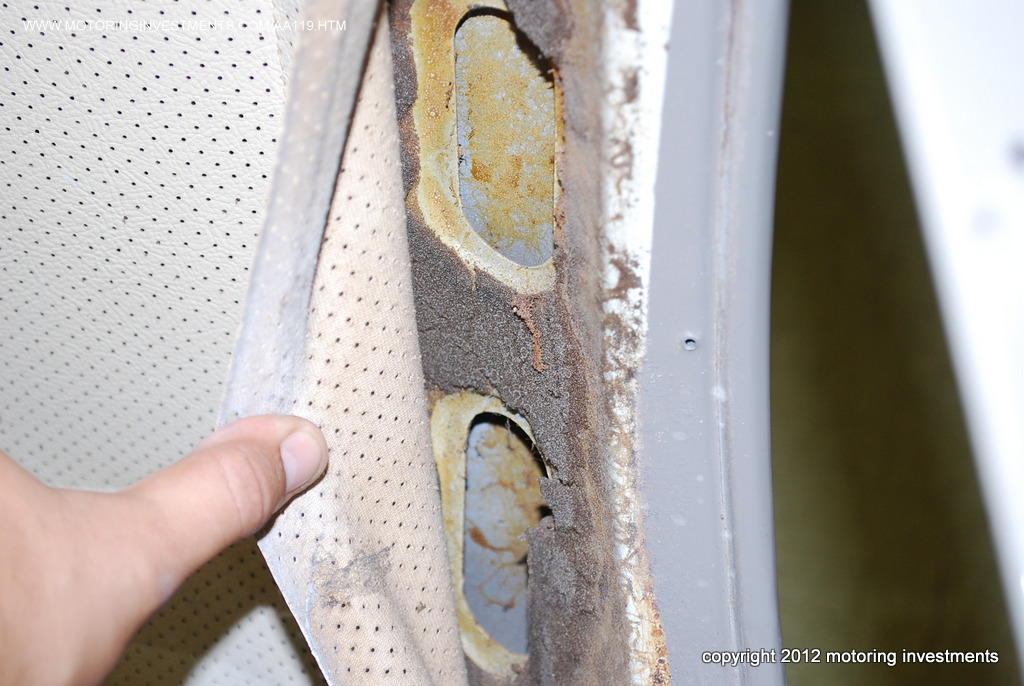
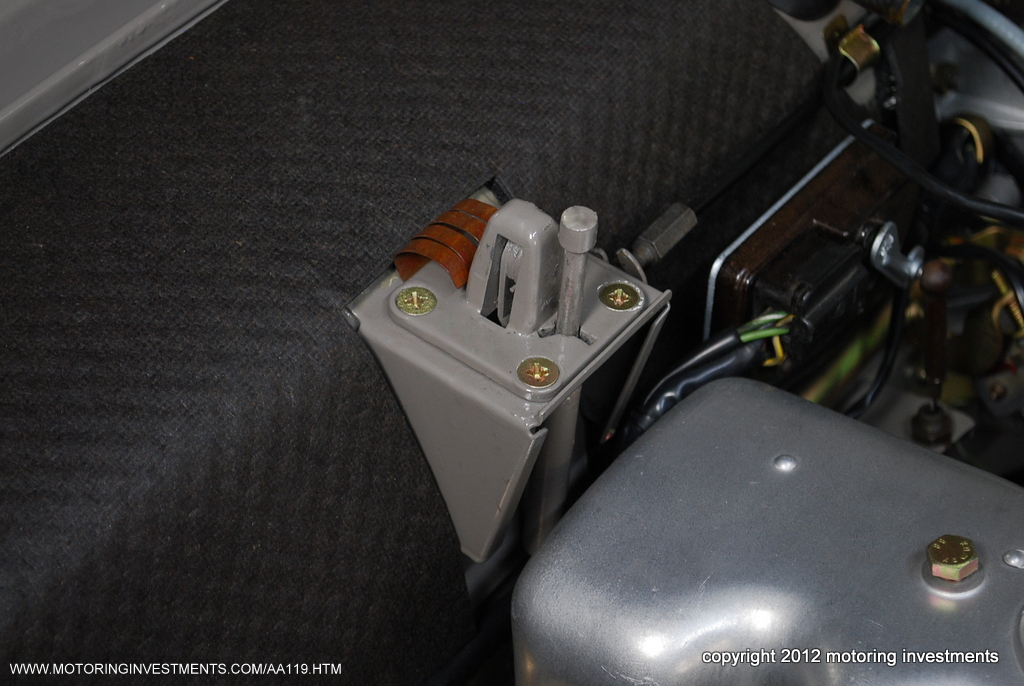
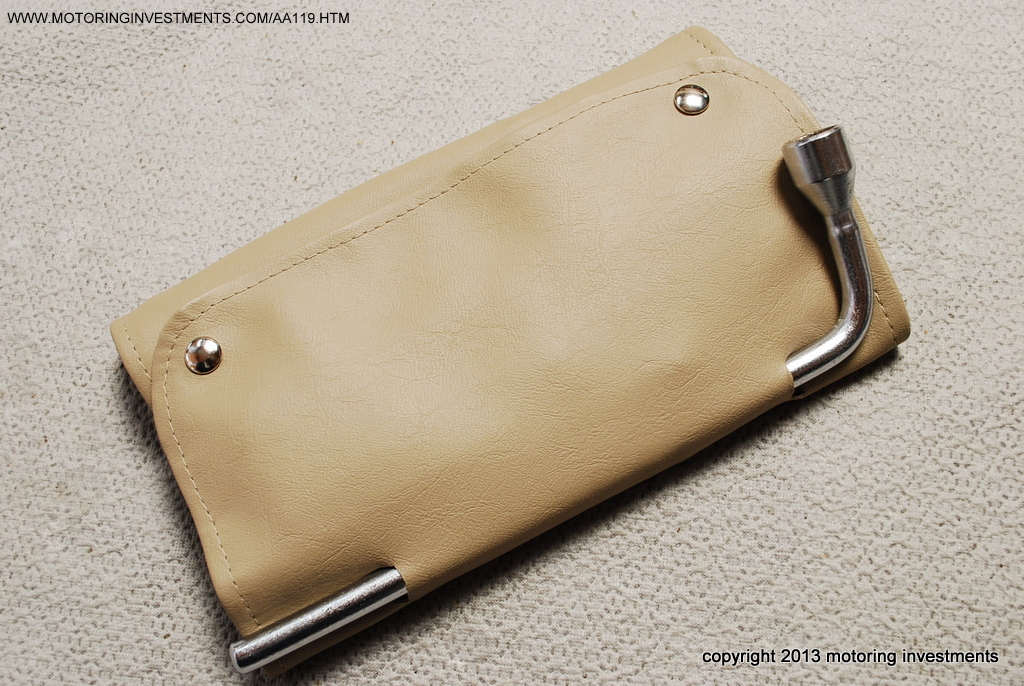
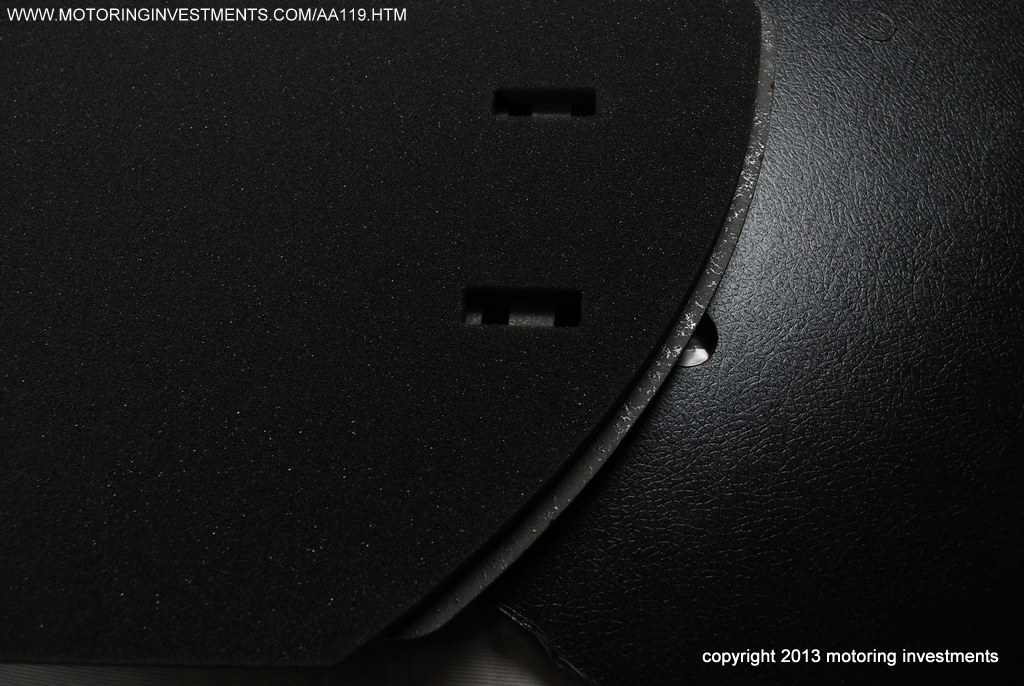
The picture
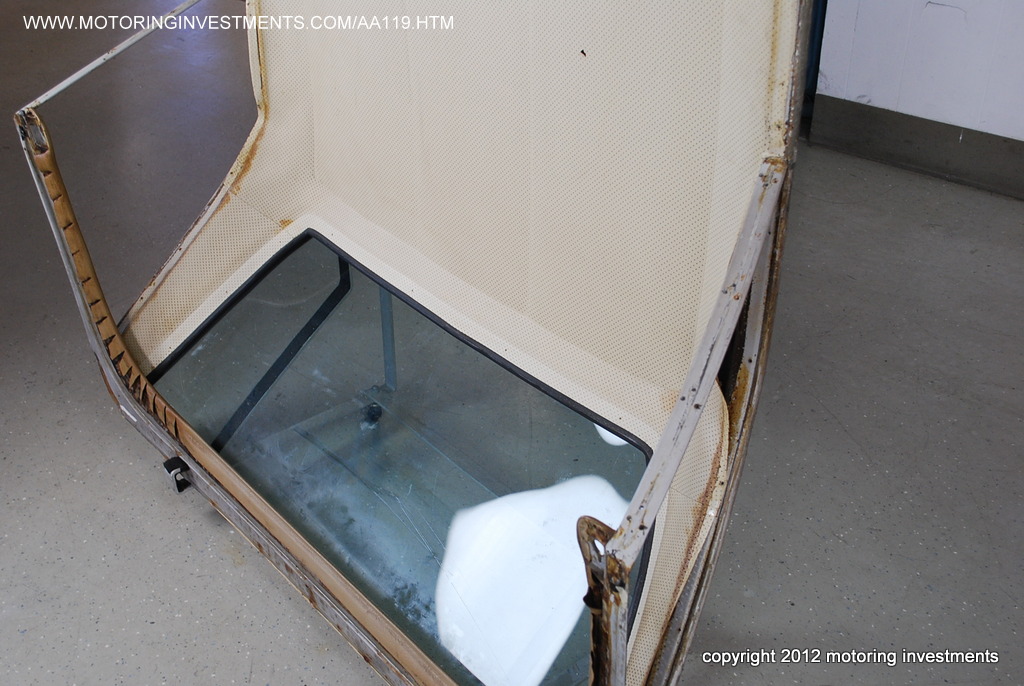
to the left is of the rare and still present, seat belt hook. The image to the right is of the original color coordinated threshold sill pad. Notice that it is beige. (M-B only supplies new replacements in black). We may have to be creative here. |
 |
|||
 |
 |
 |
|||
 |
 |
 |
|||
 |
 |
 |
|||
 |
 |
 |
|||
 |
 |
 |
|||
 |
 |
 |
|||
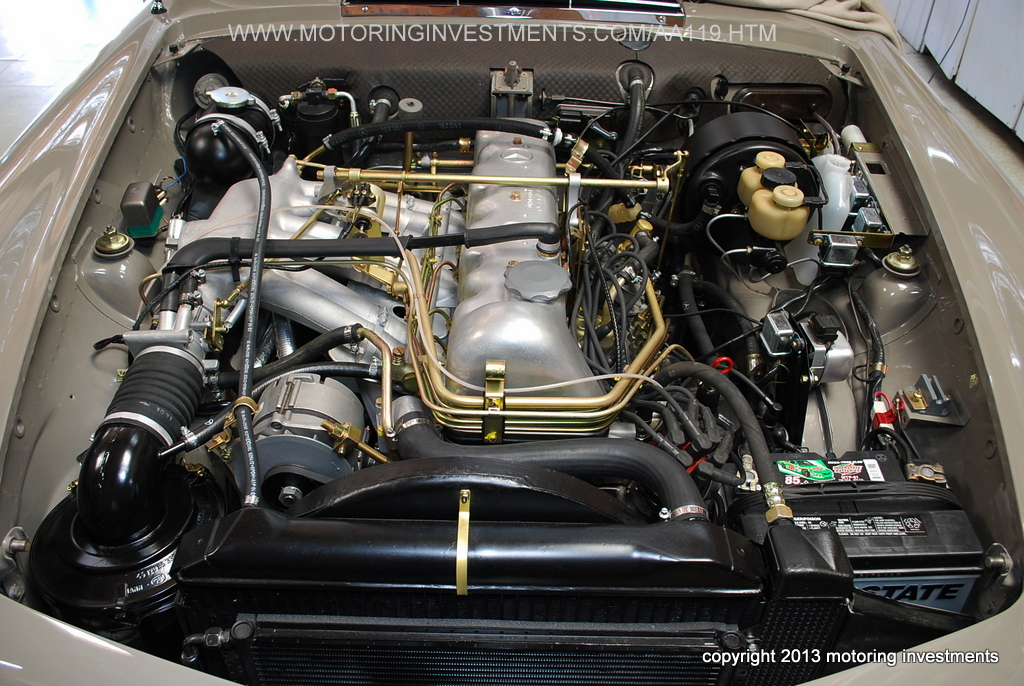
 |
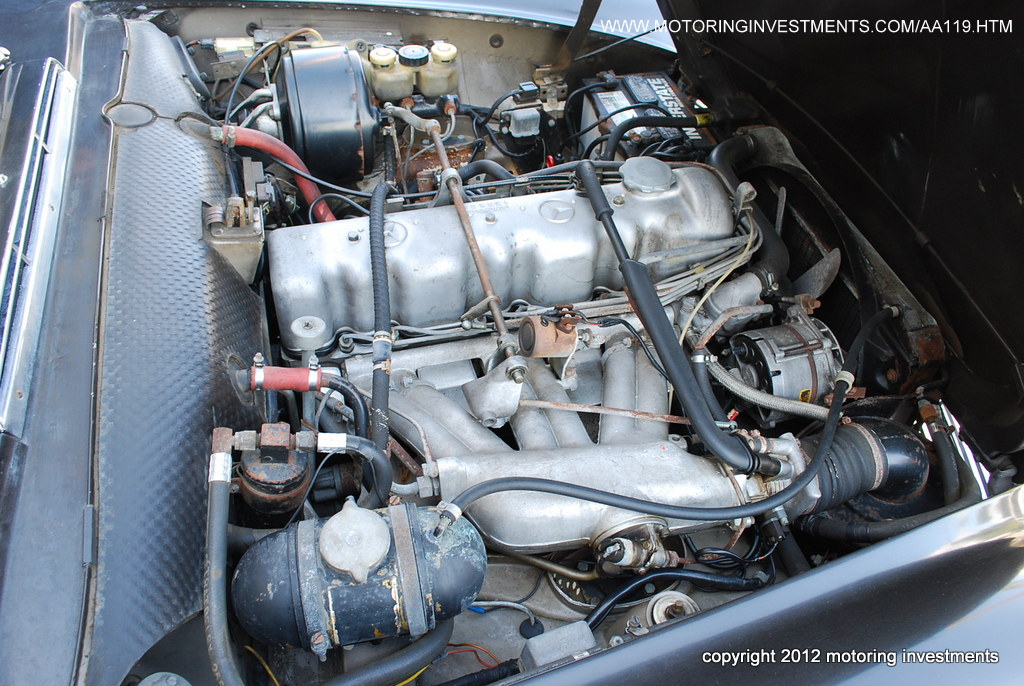
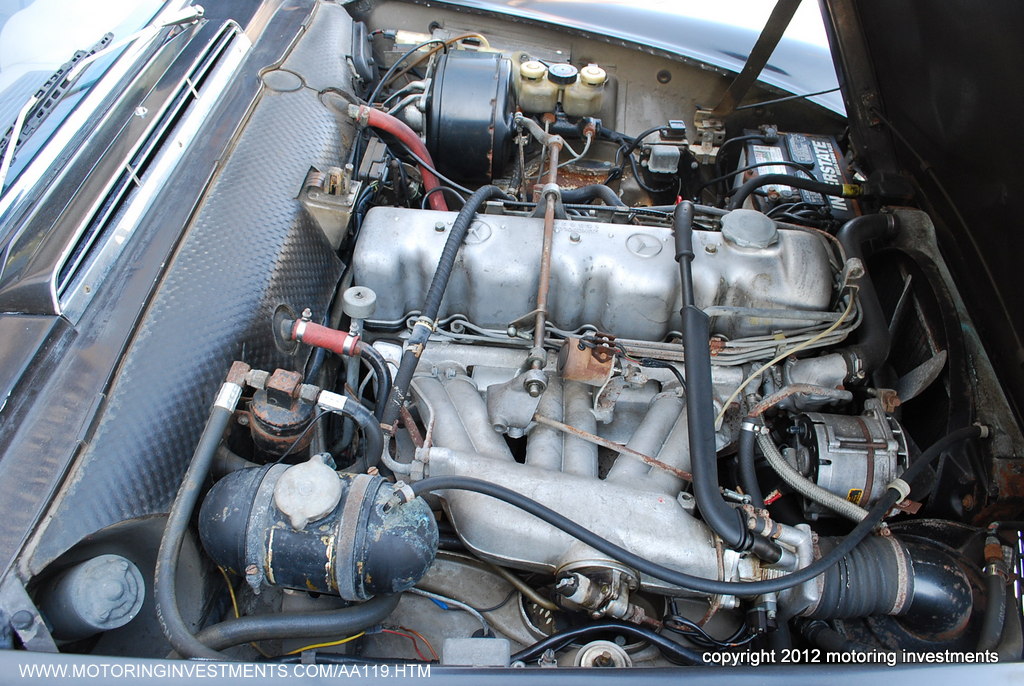
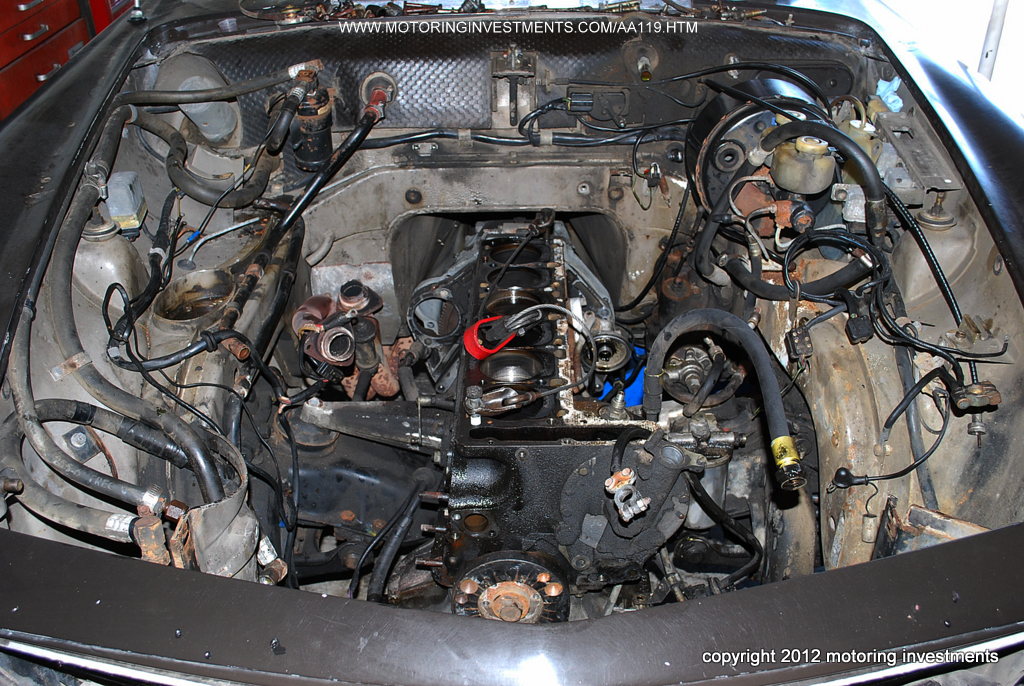
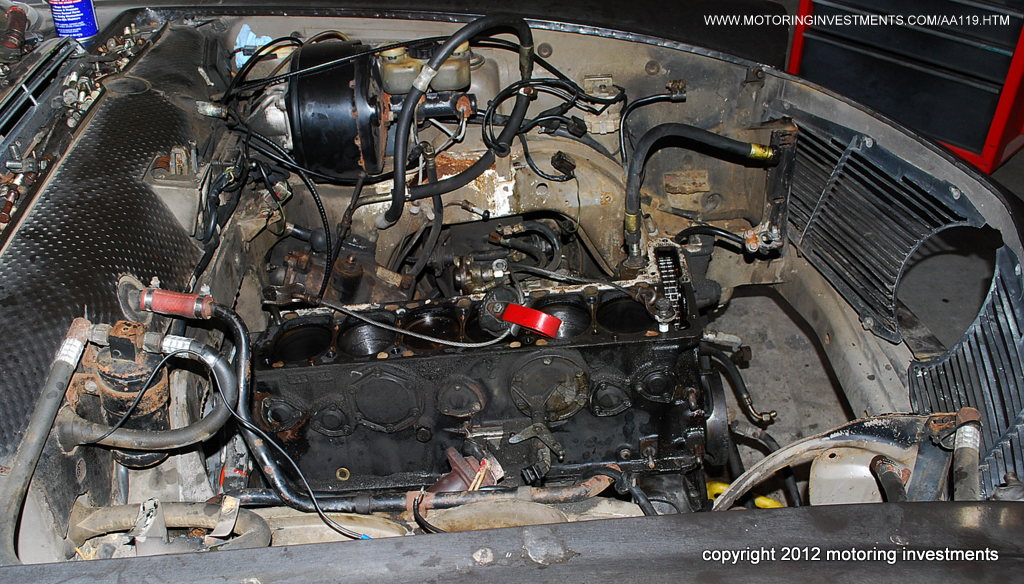
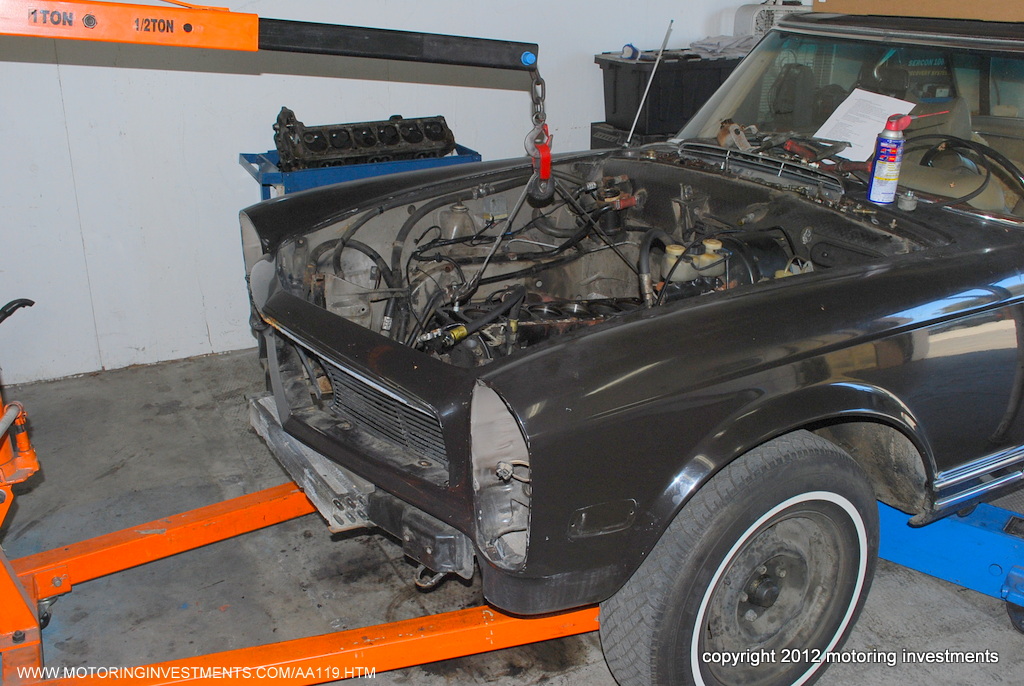
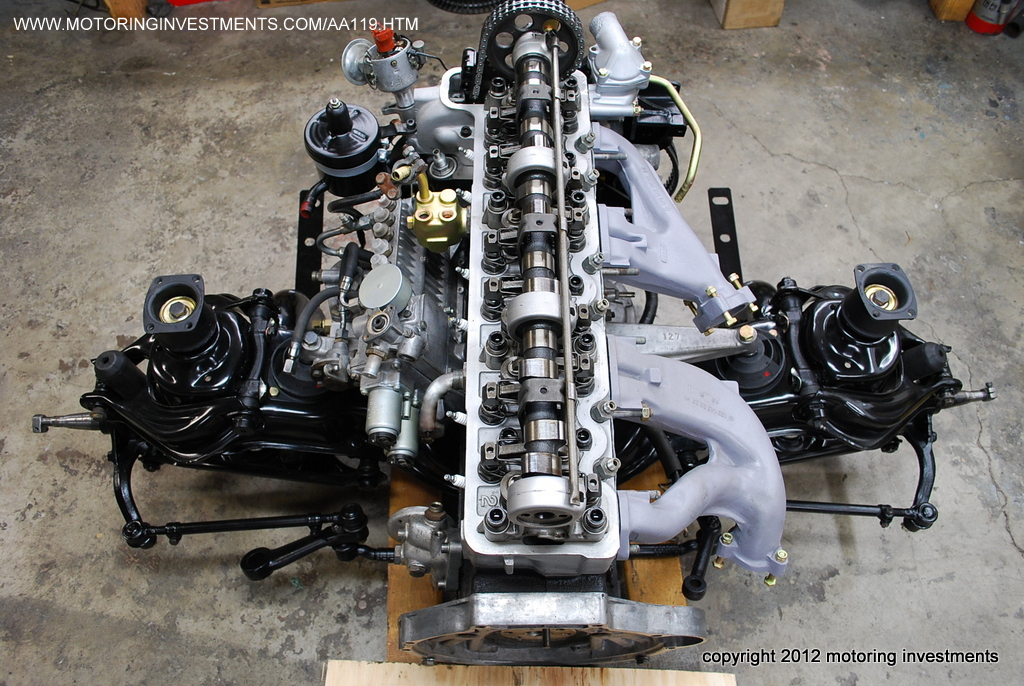
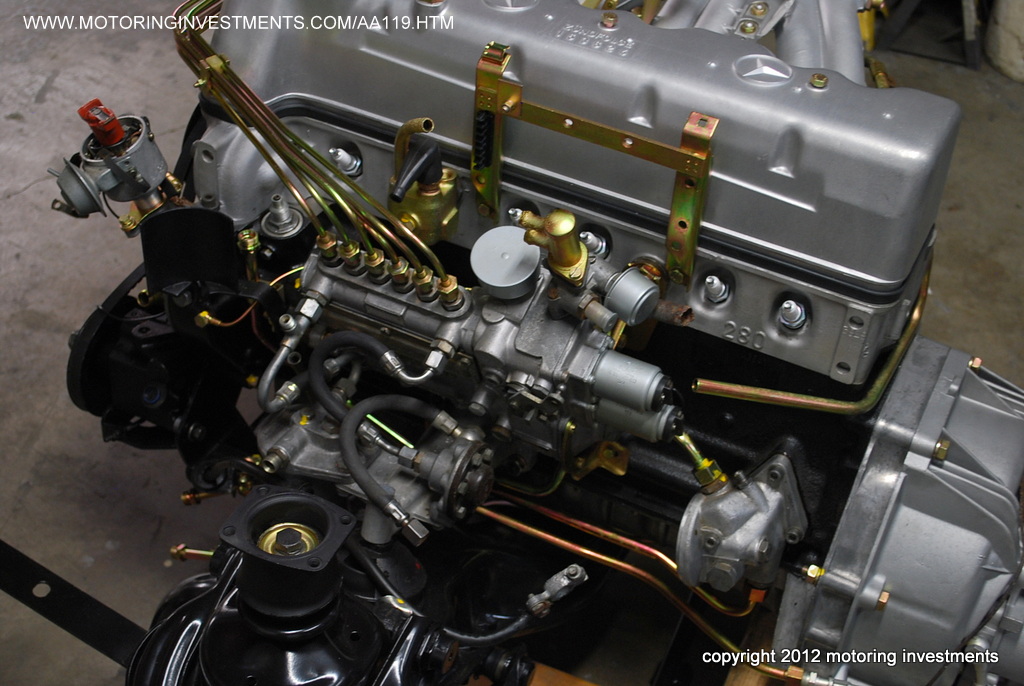
These photos
are of the engine stripped down to the bare block. All parts are removed, catalogued, inspected, and replaced or reconditioned to look and function as new. |
 |
|||
|
|
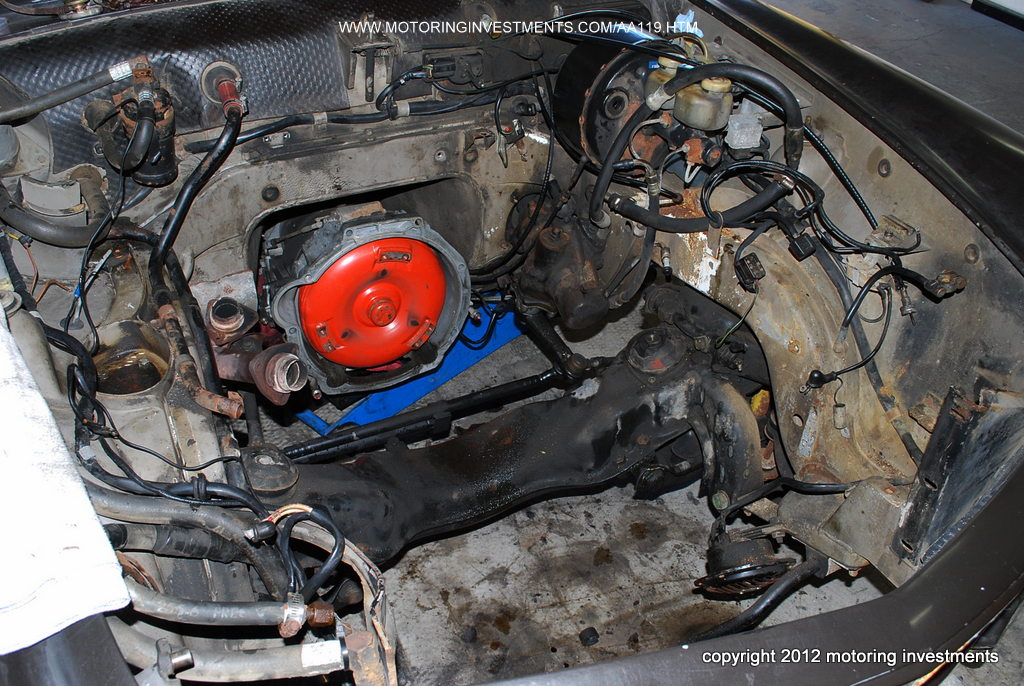
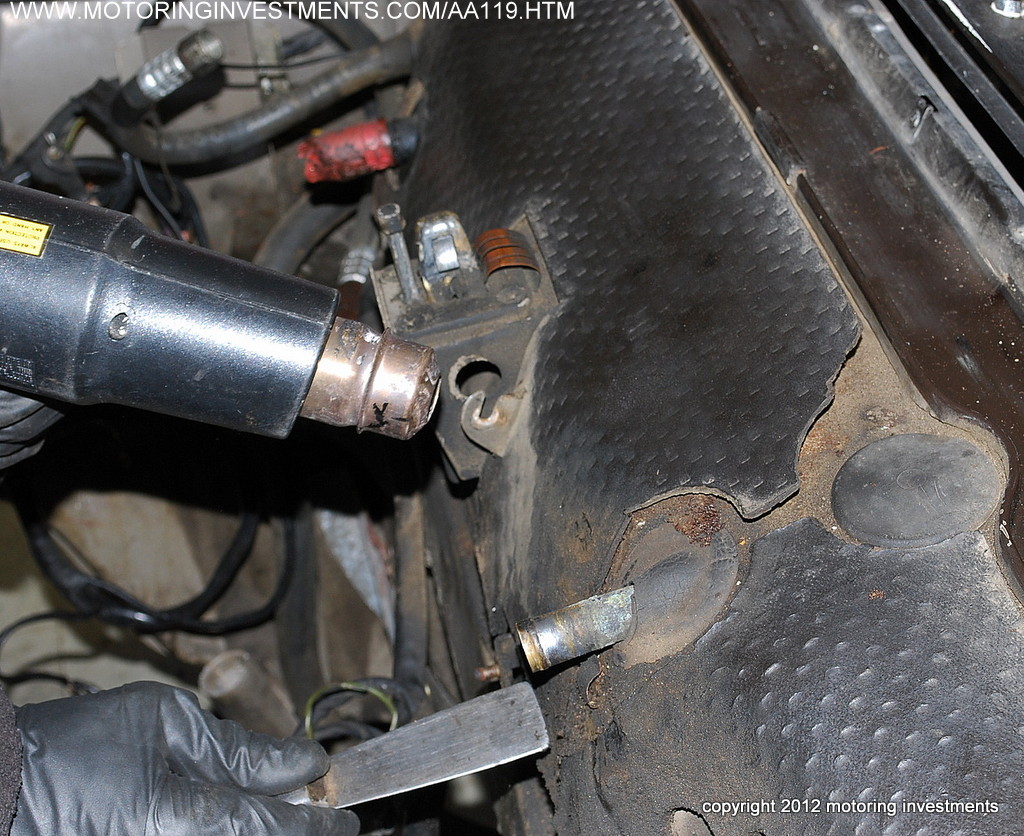
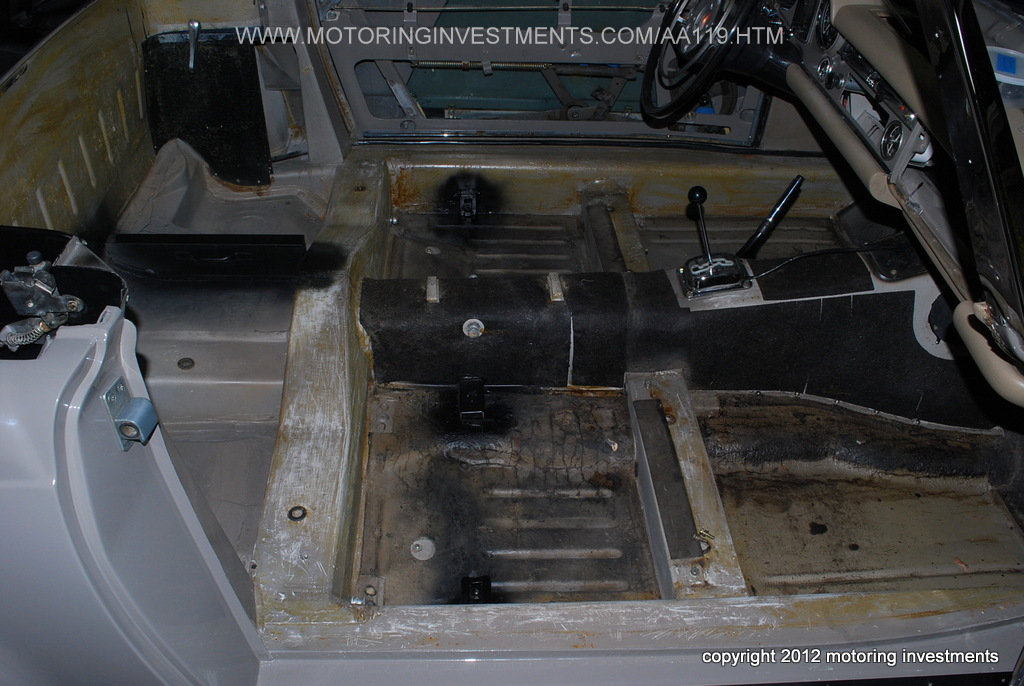
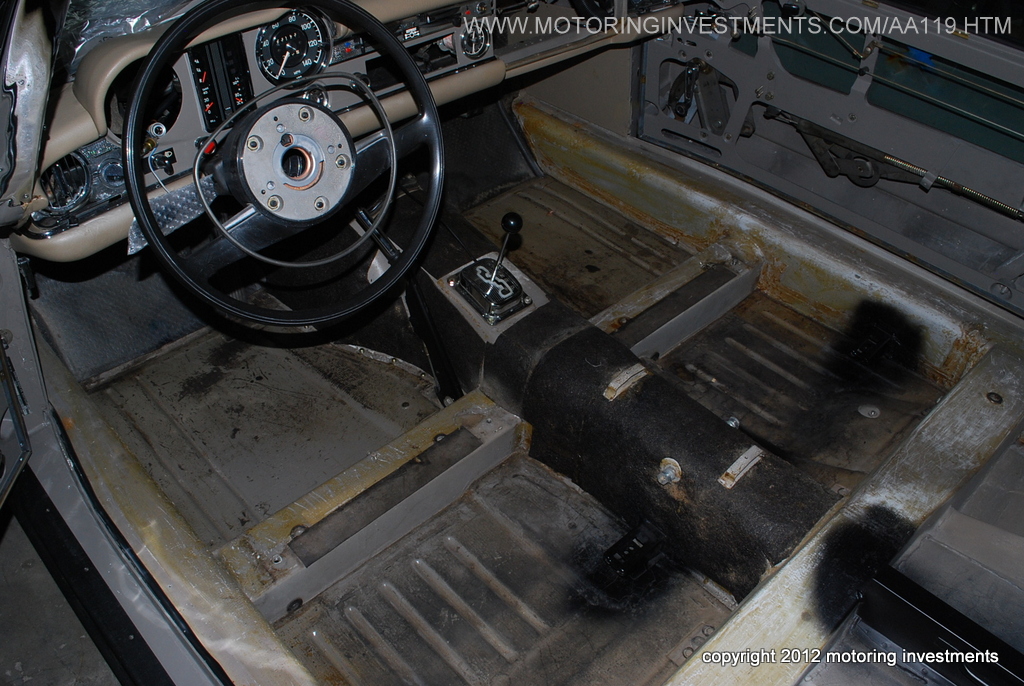
The photos to
the left and right are of the transmission tunnel area with the transmission out of the car. The transmission will also undergo a complete and detailed restoration, both mechanical and cosmetic. |
|
|||
 |
 |
 |
|||
The above picture shows the exhaust manifolds before being sent out for coating. We have them coated in a high grade aerospace ceramic finish. This process lowers the temperature in the engine bay and extends the life of neighboring components. |
|||||
 |
 |
 |
|||
 |
 |
 |
|||
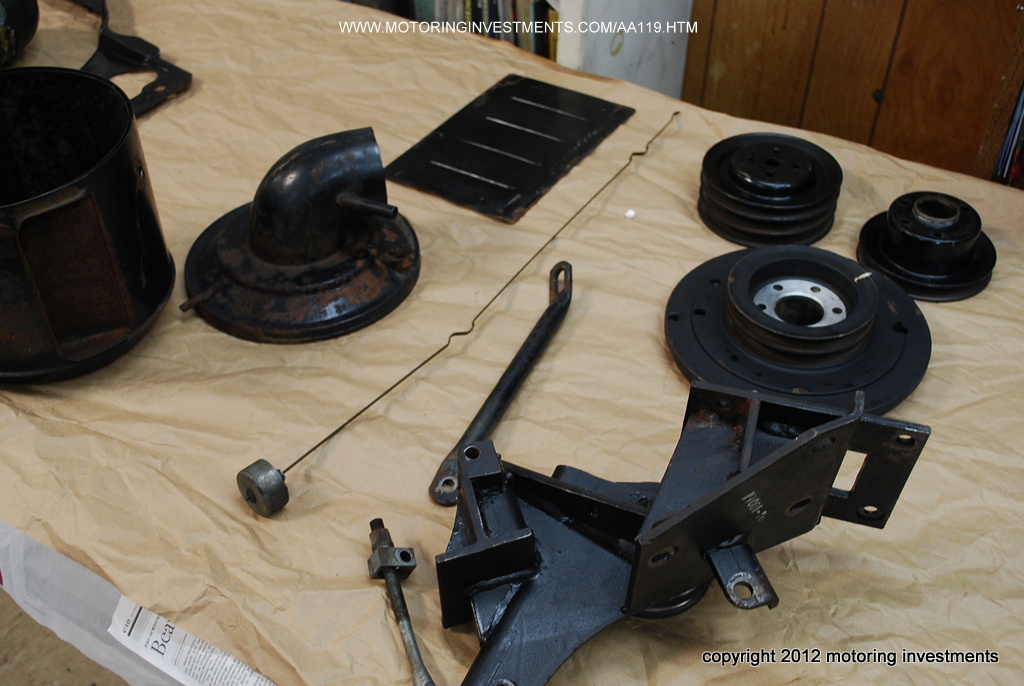 |
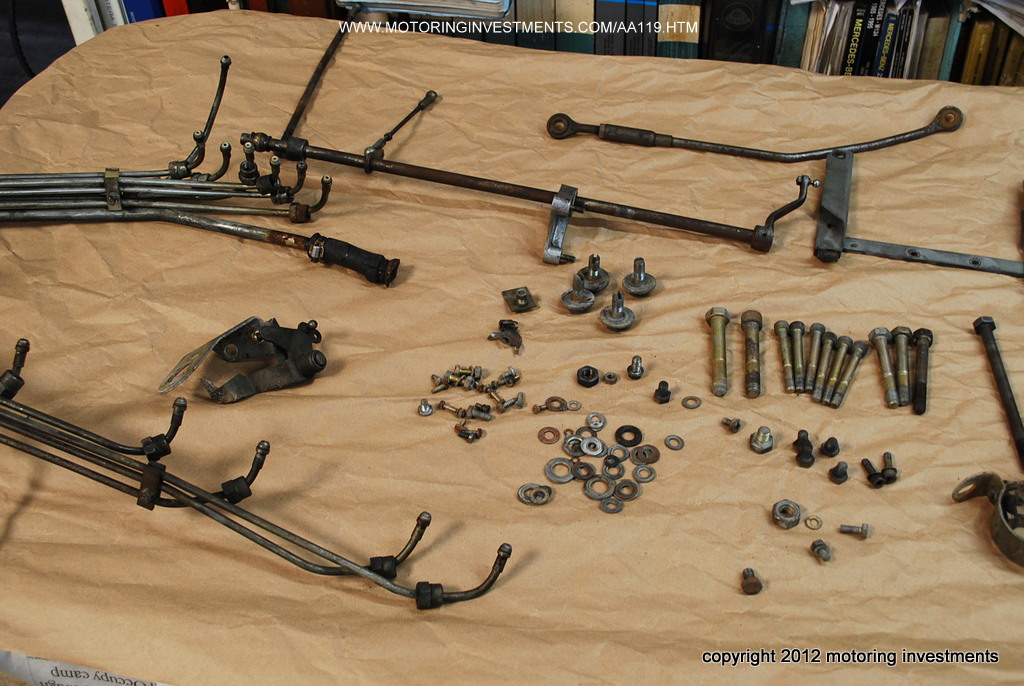
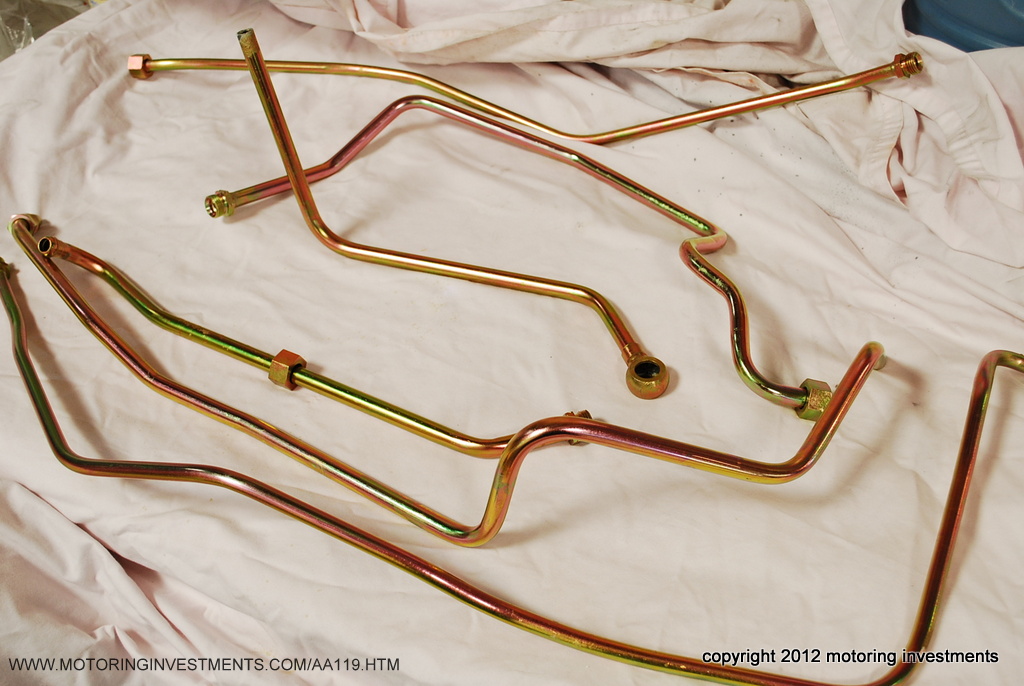
The images
above are of all the hardware, fuel lines, and fasteners being sent out to undergo a cleaning and re-plating process. |
 |
|||
 |
 |
 |
|||
|
|
|
 |
|||
 |
 |
 |
|||
 |
 |
 |
|||
 |
 |
 |
|||
 |
These
pictures to the left and right display the tape that Mercedes Benz factory technicians used to protect the body and bug grills from rubs and rattles. As per Motoring Investments' standards, we will duplicate every detail the factory technicians completed over 40 years ago. |
 |
|||
 |
 |
 |
|||
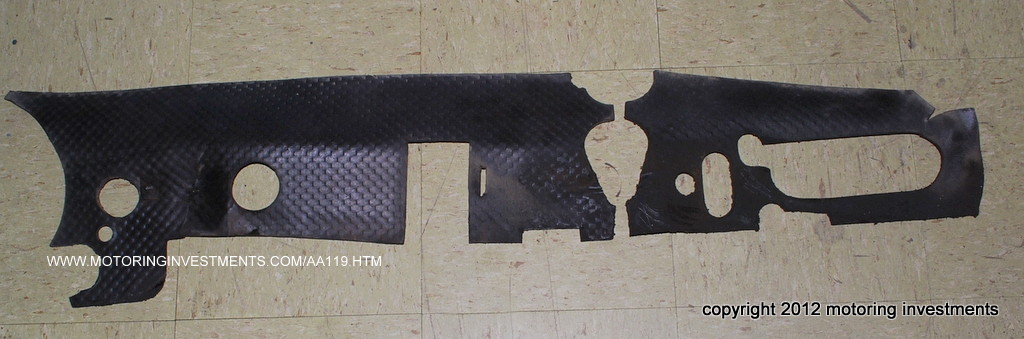 |
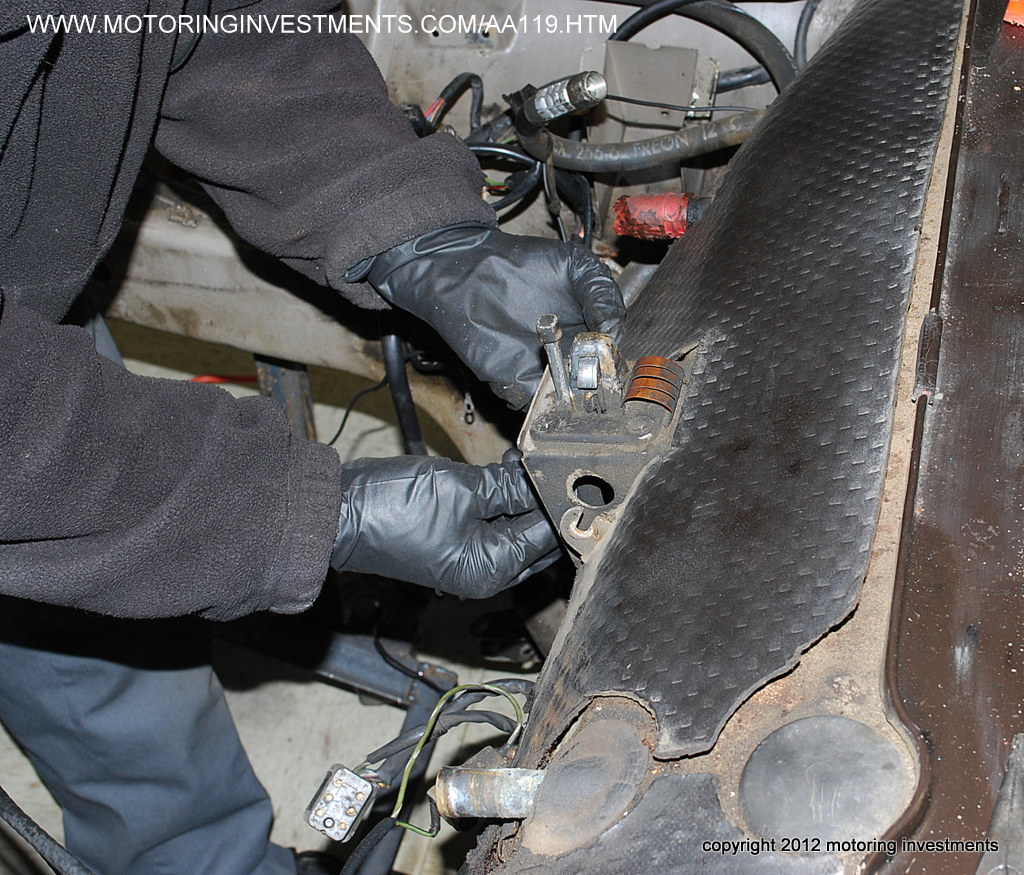
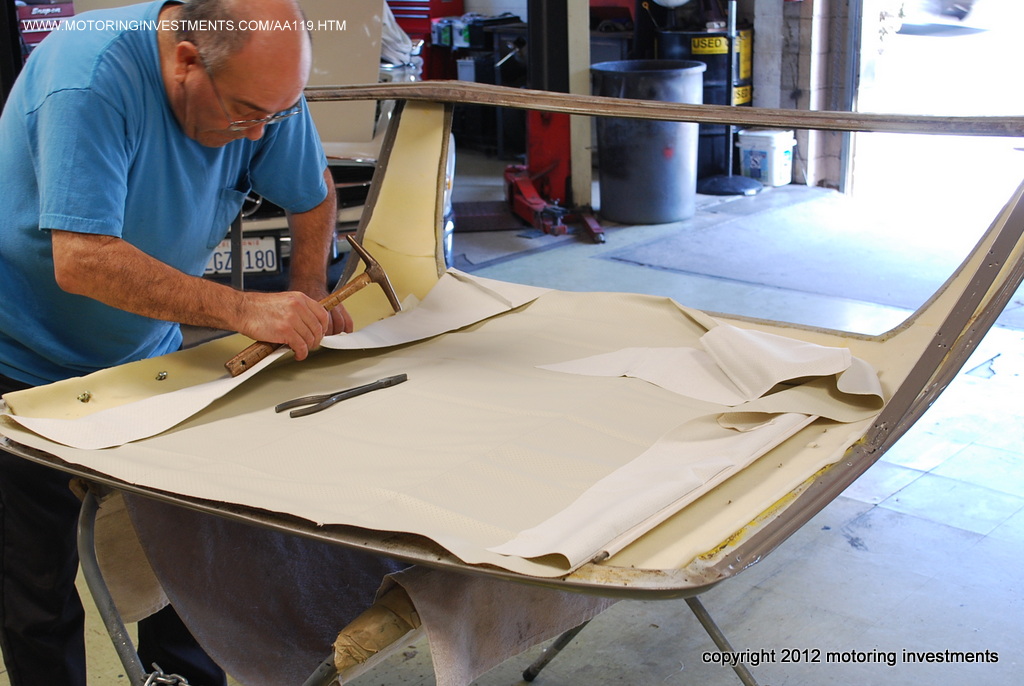
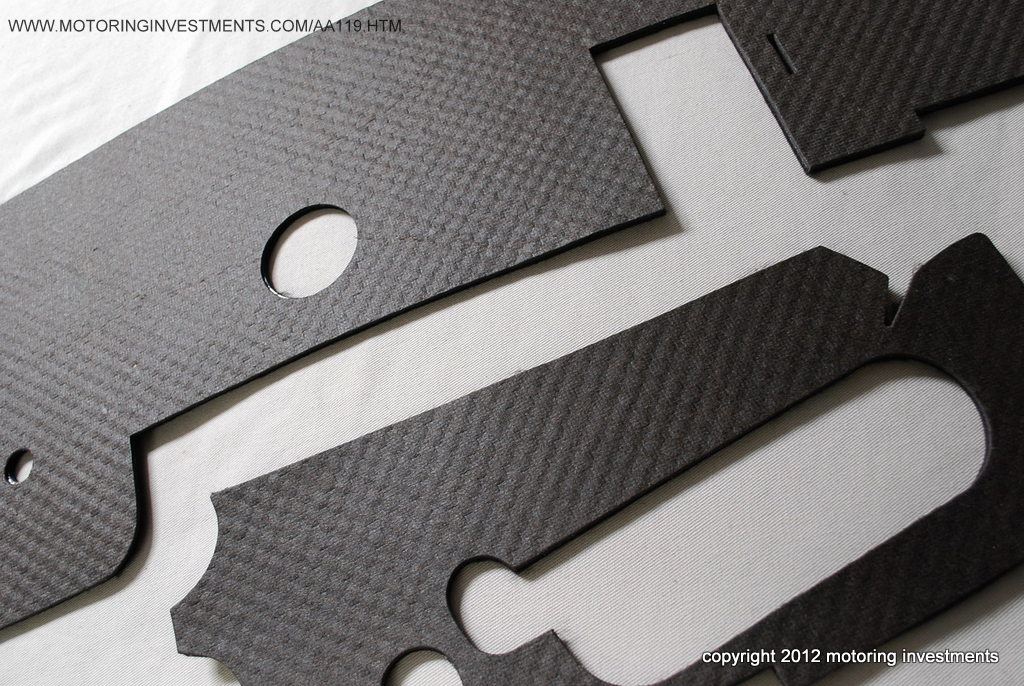
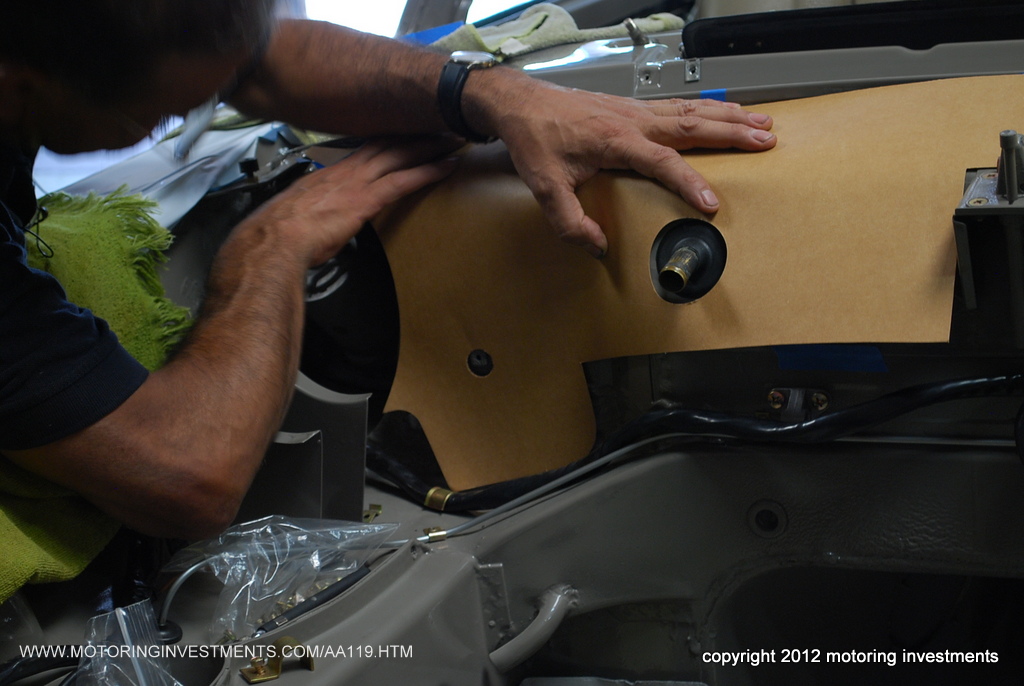
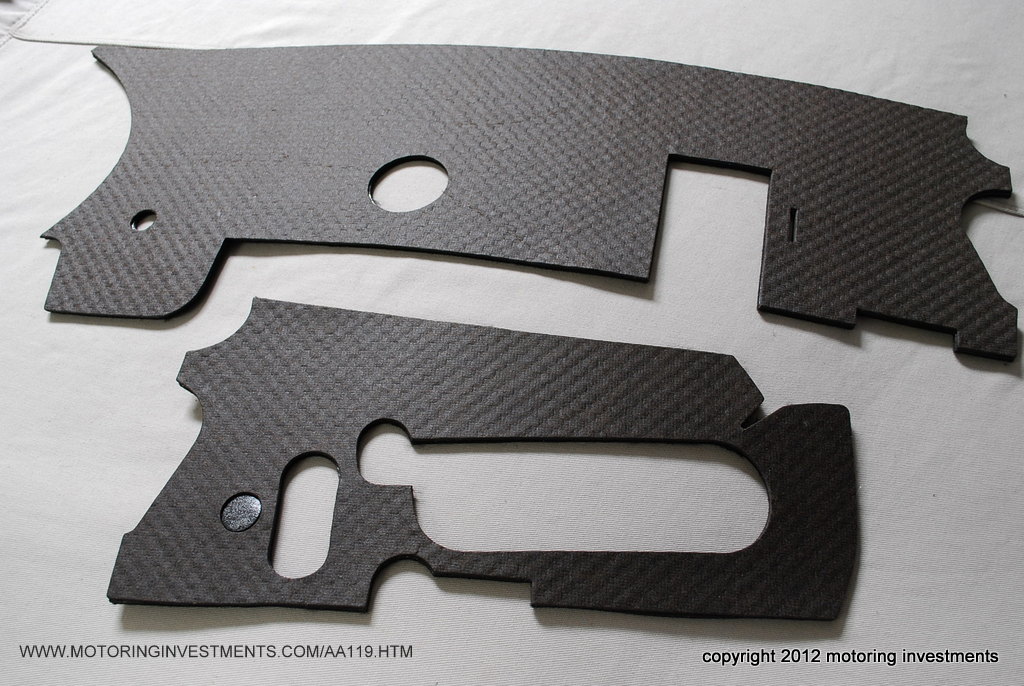
We carefully
removed the original firewall pad. |
 |
|||
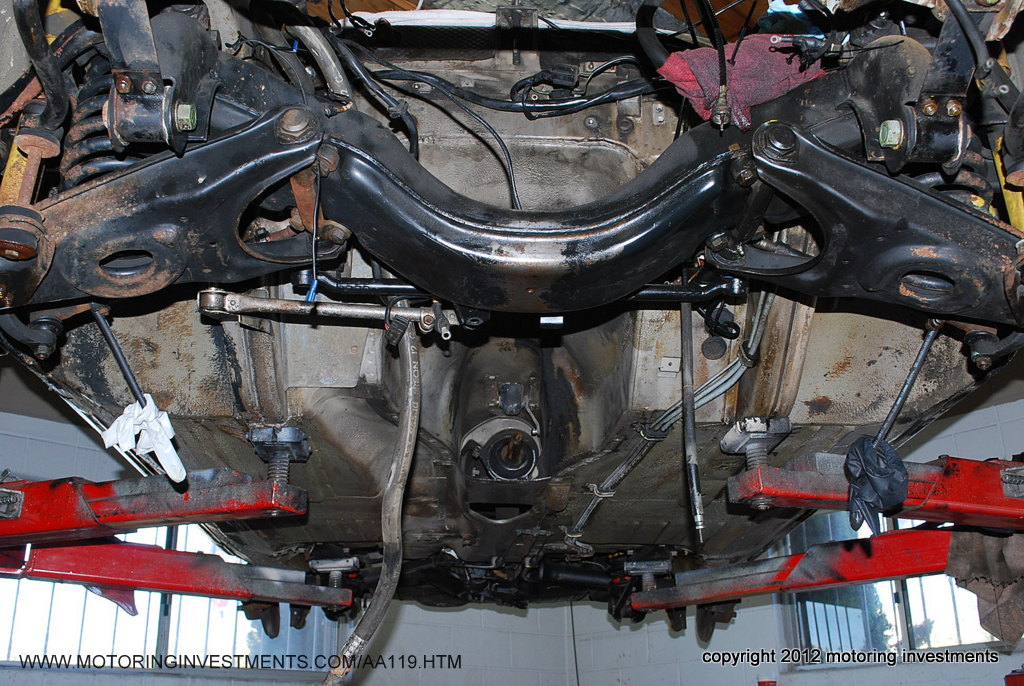
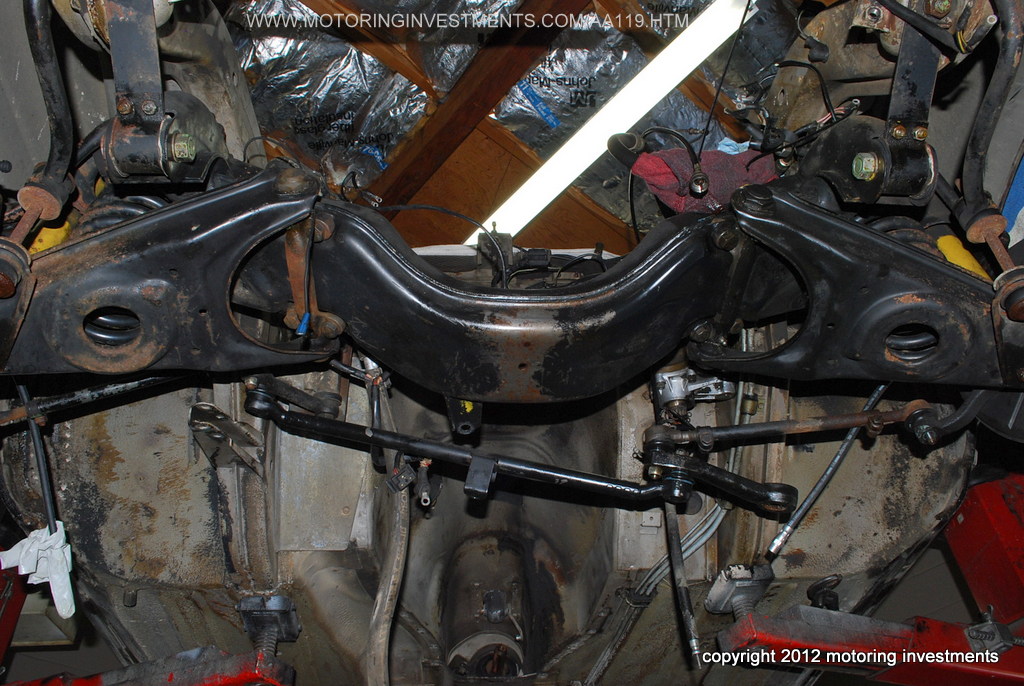
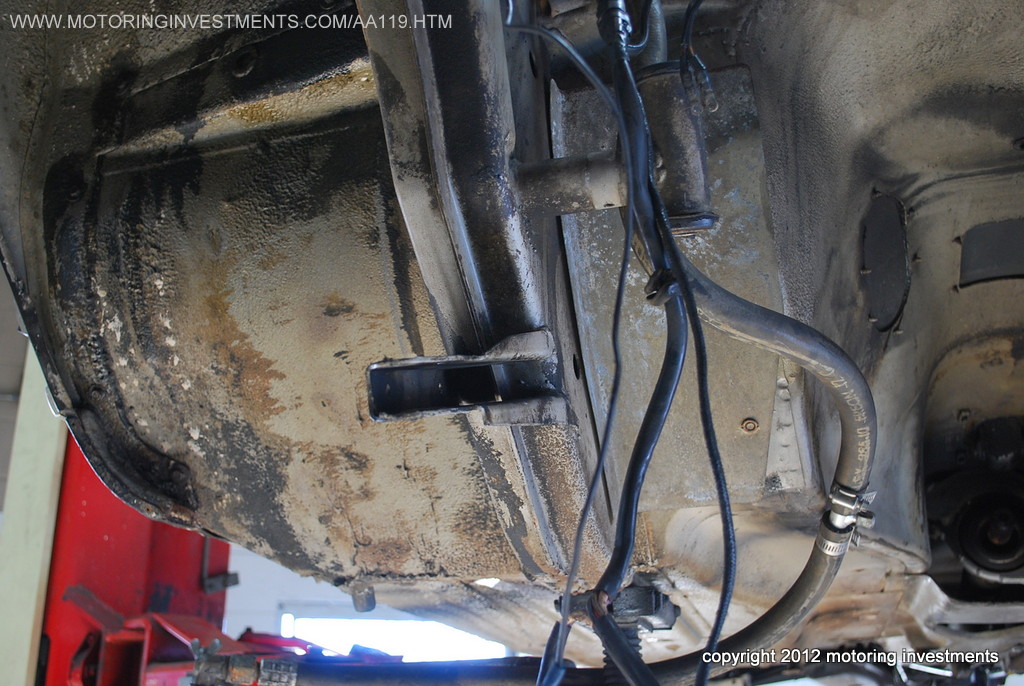
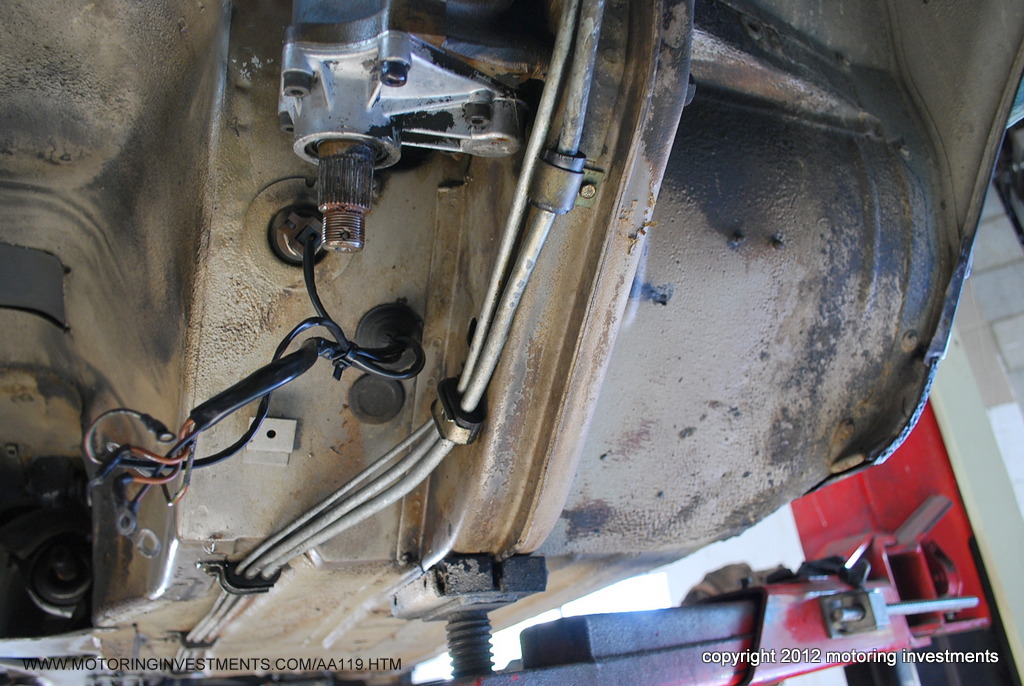
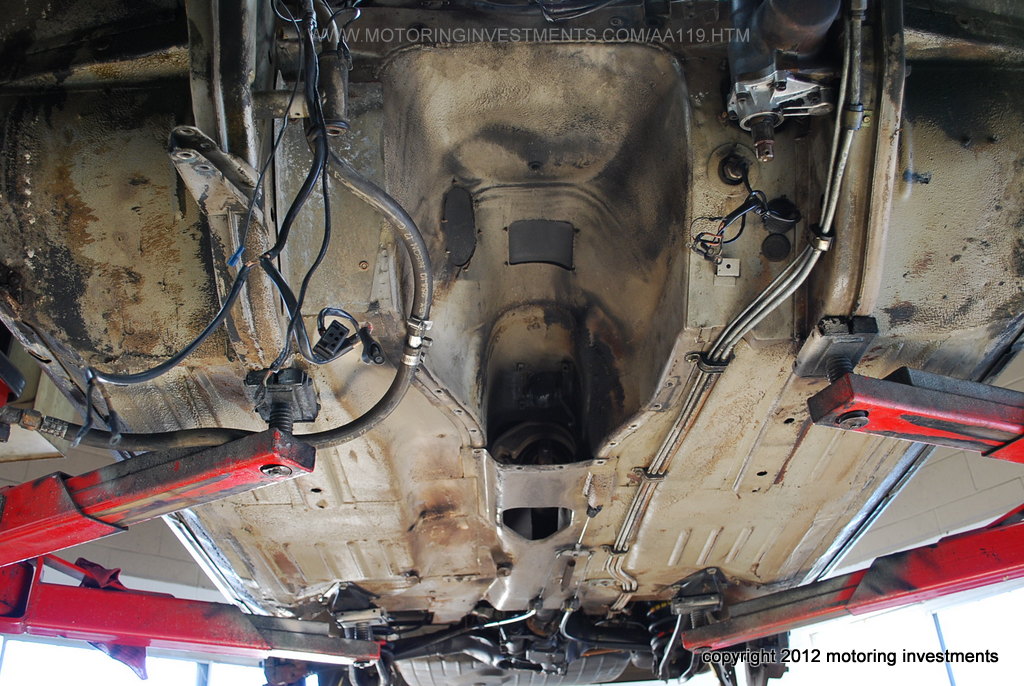
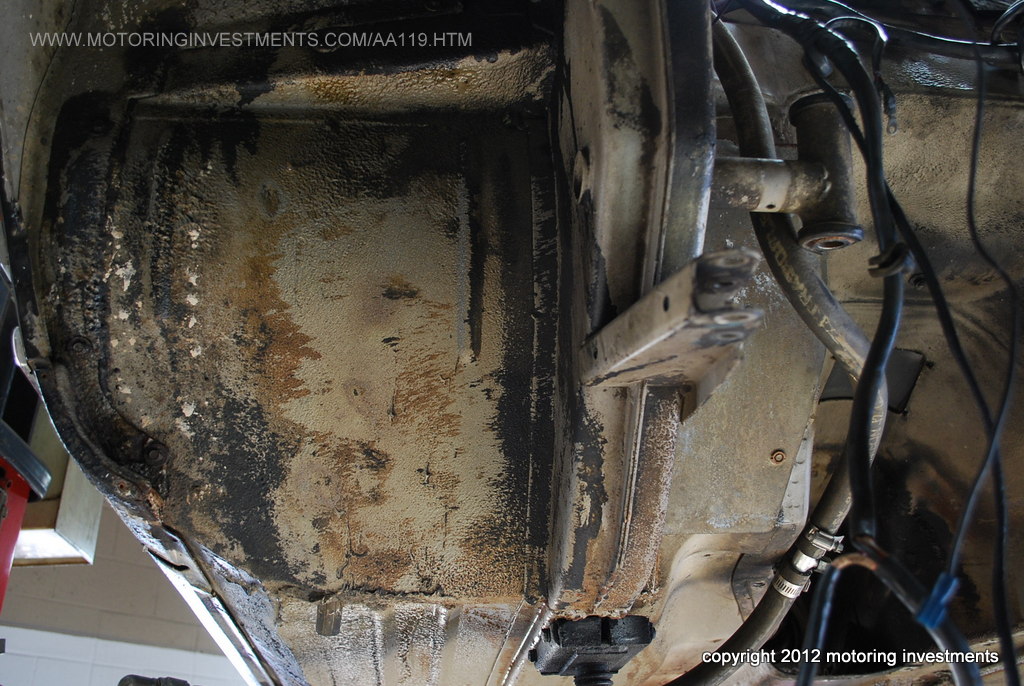
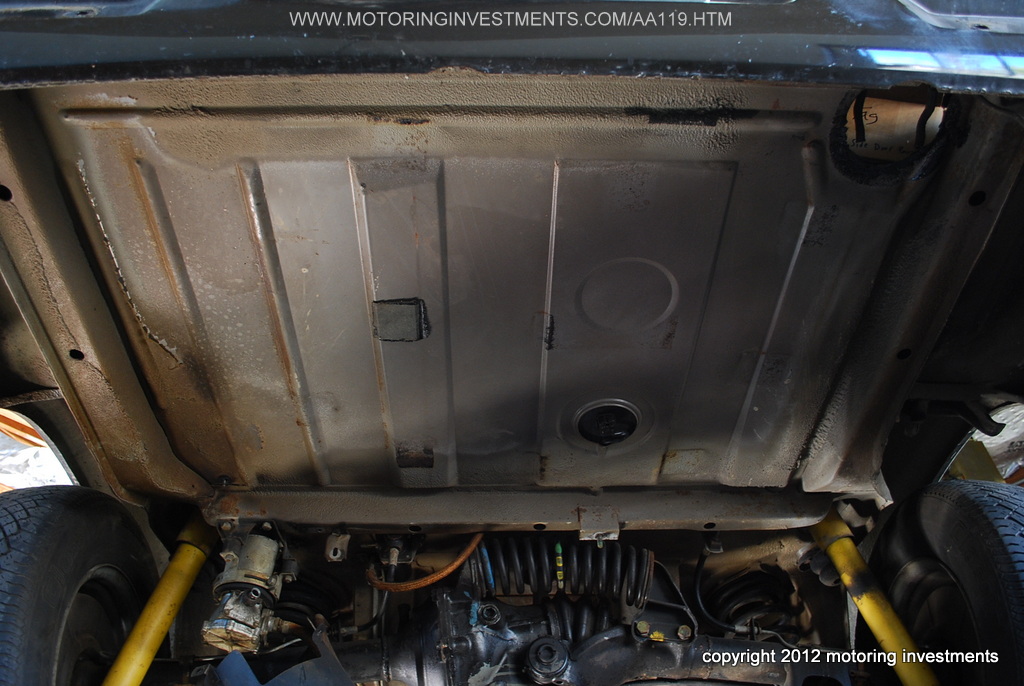
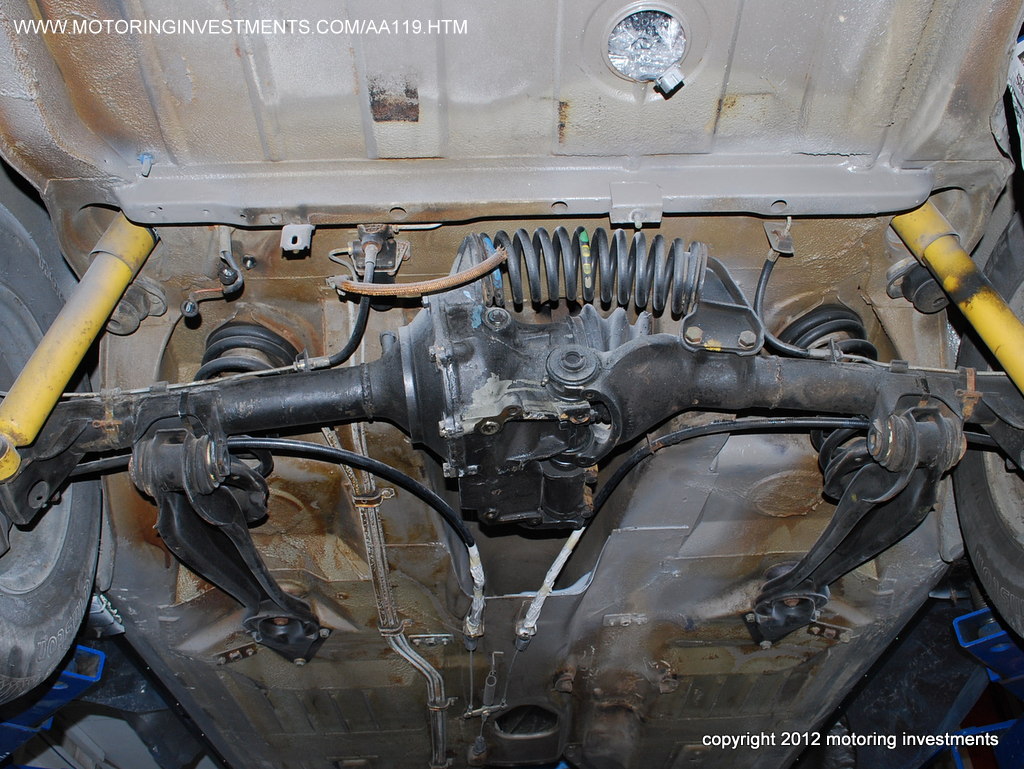
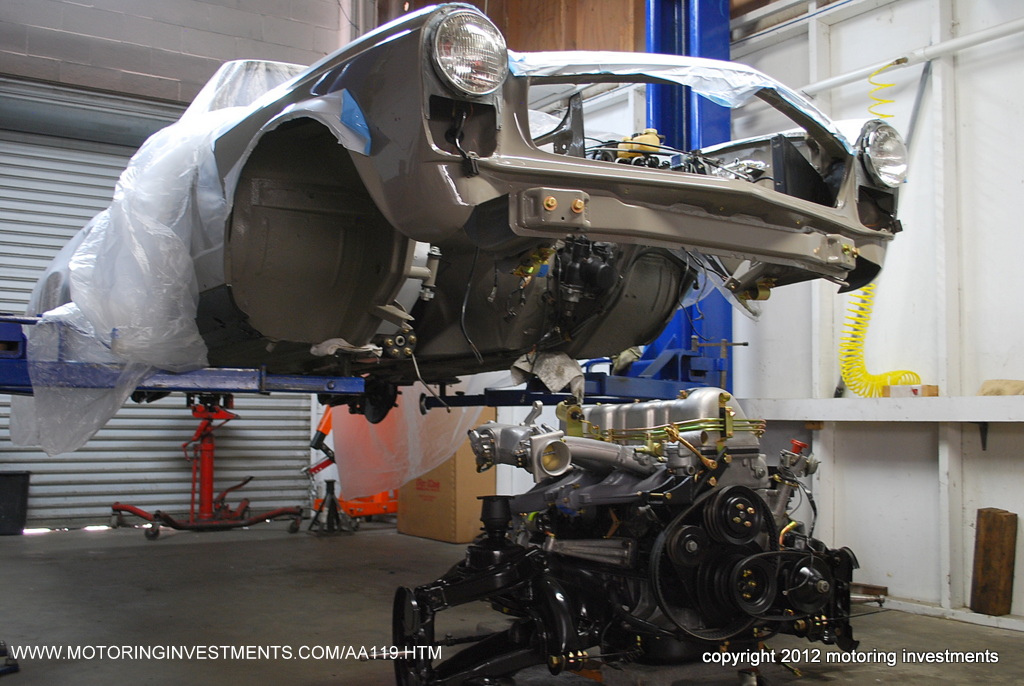
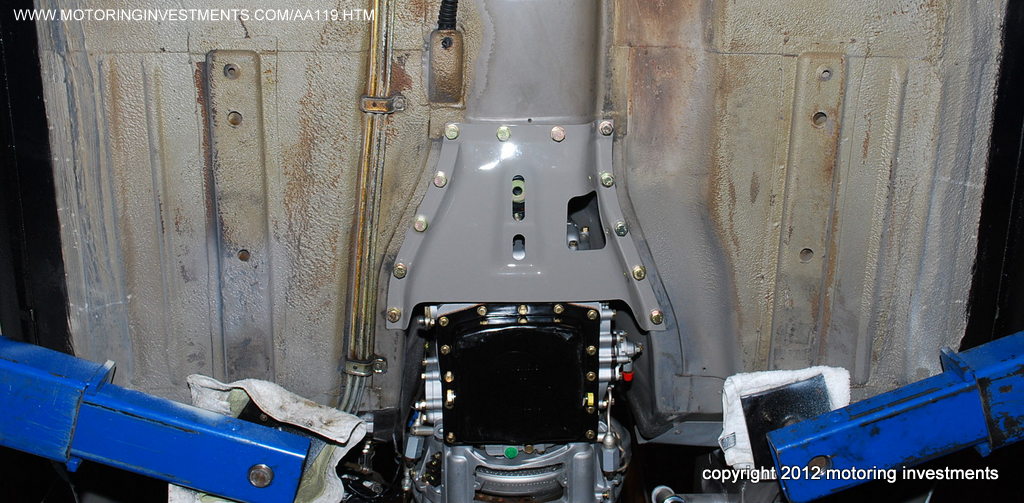
The undercarriage pictures below show the rust free state of the car. We remove all suspension components and rebuild the entire car. |
|||||
 |
 |
 |
|||
 |
 |
 |
|||
 |
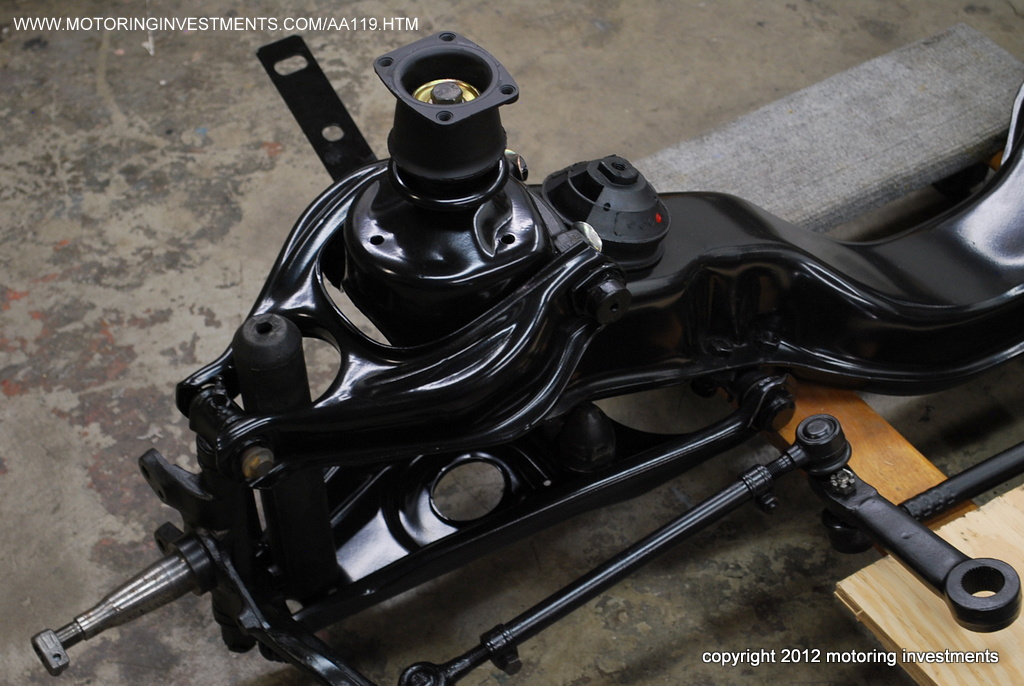
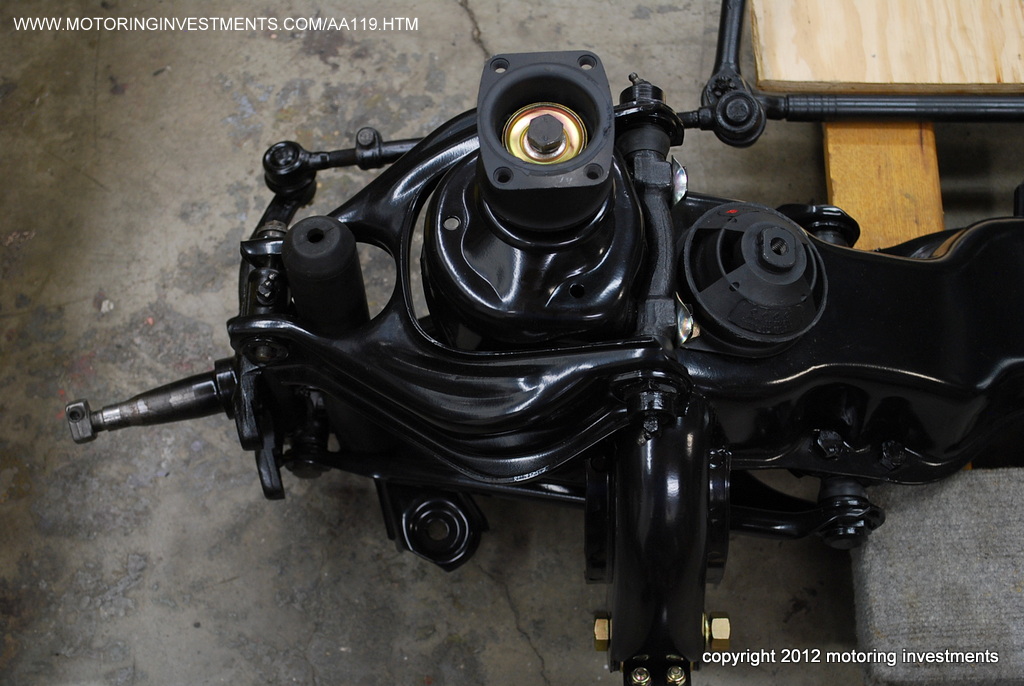
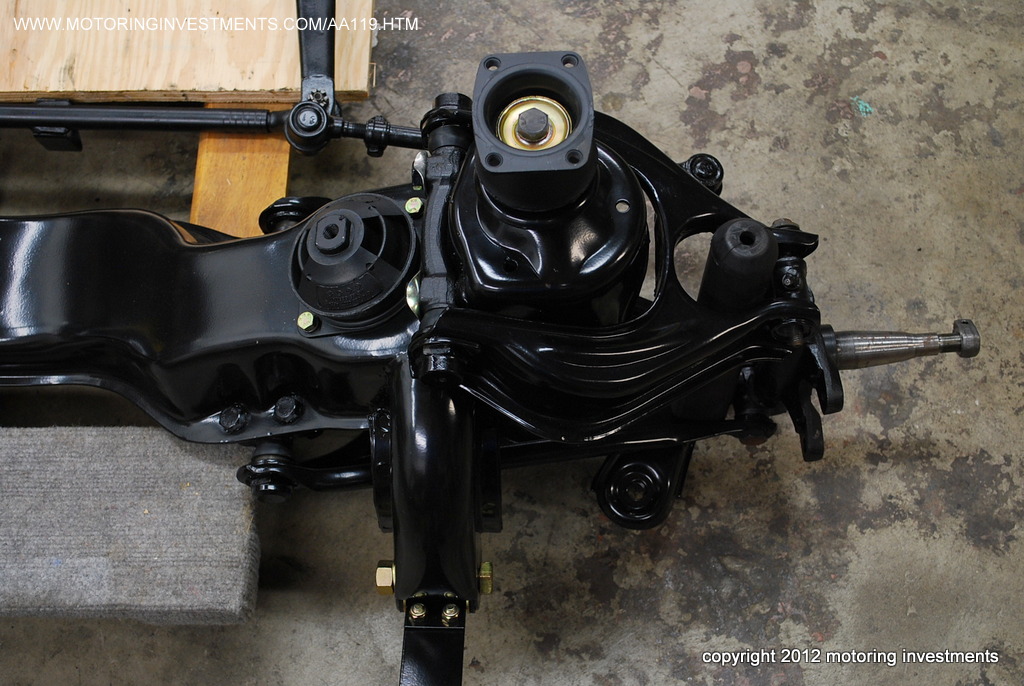
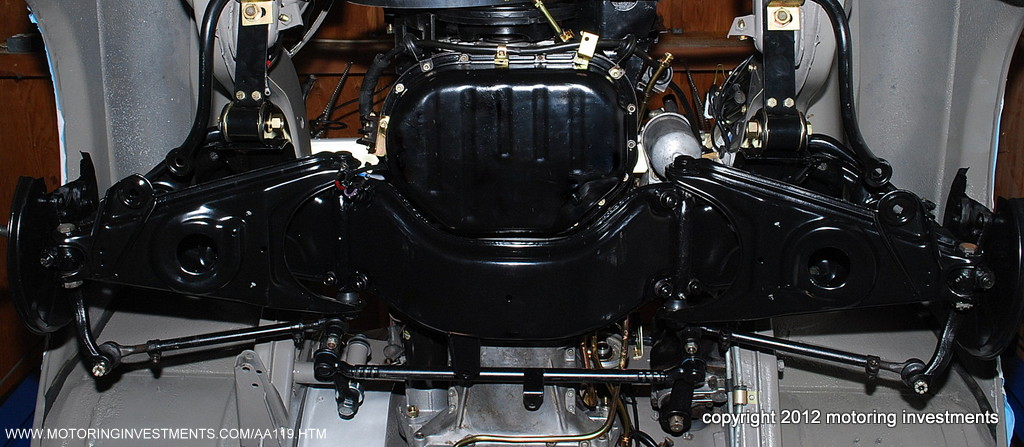
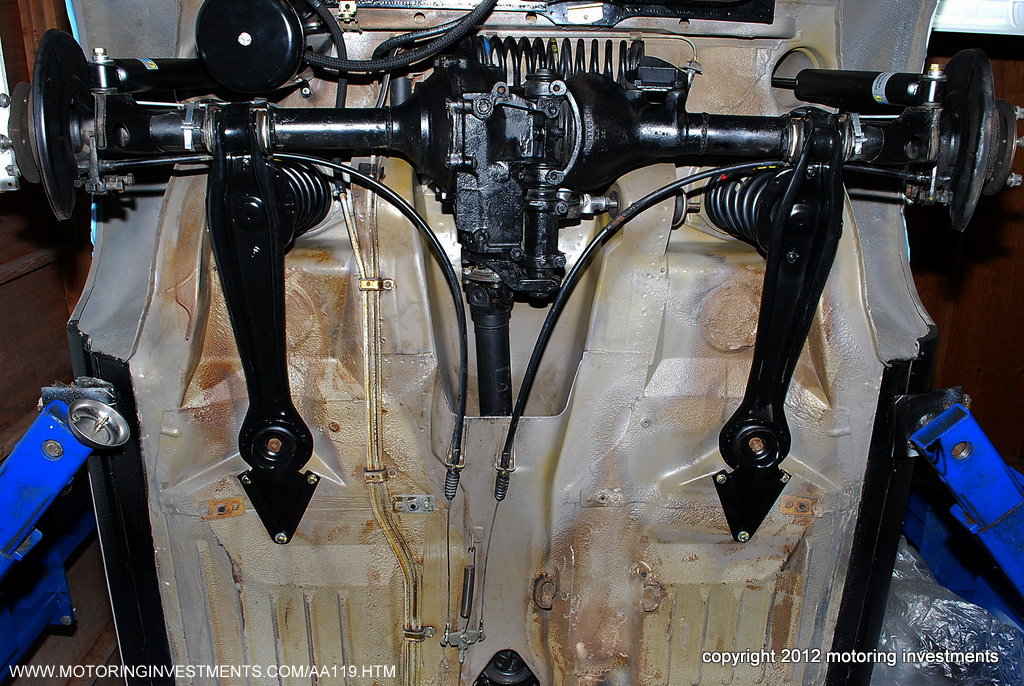
The pictures
shown here are
with the front suspension in place, below we have photos of the front suspension and rear end components removed from the car. These pictures are key to completing a full inspection of the undercarriage and all aspects of the rebuild can be addressed. |
 |
|||
 |
 |
 |
|||
 |
 |
 |
|||
 |
 |
 |
|||
 |
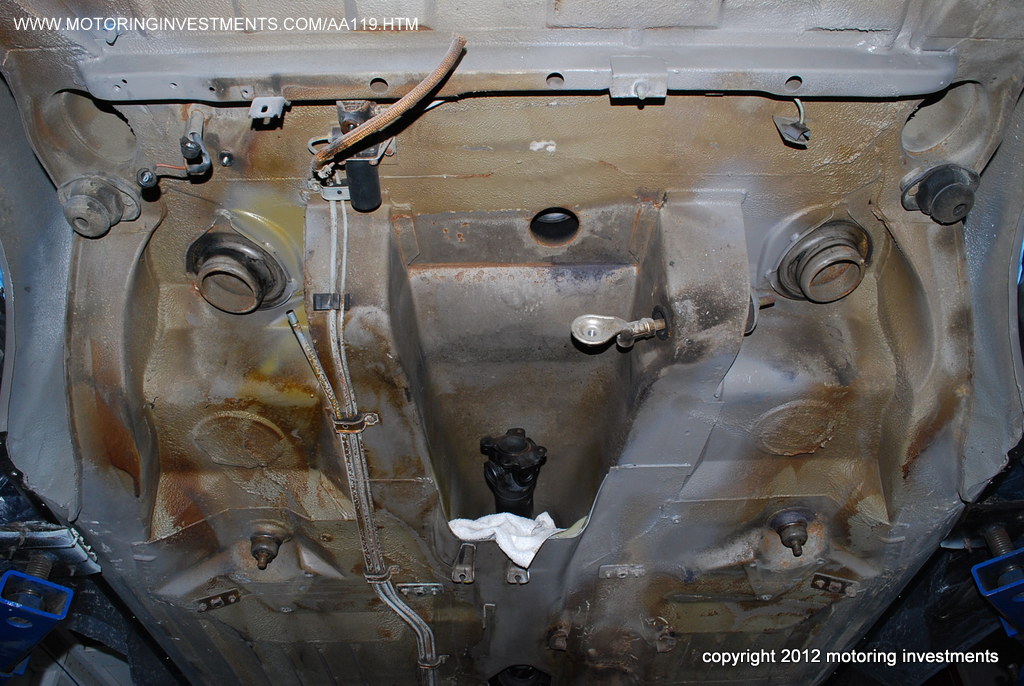
Below, the fuel tank is removed. |
 |
|||
 |
 |
 |
|||
 |
 |
 |
|||
 |
 |
 |
|||
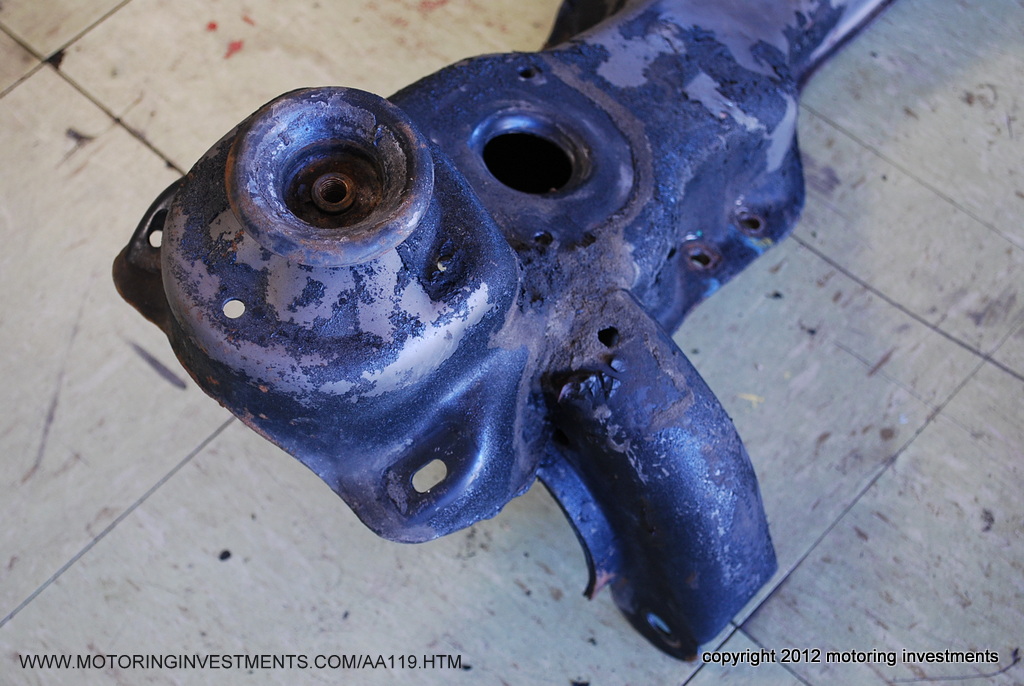
Before the powder coating |
|||||
 |
 |
 |
|||
 |
 |
 |
|||
 |
 |
||||
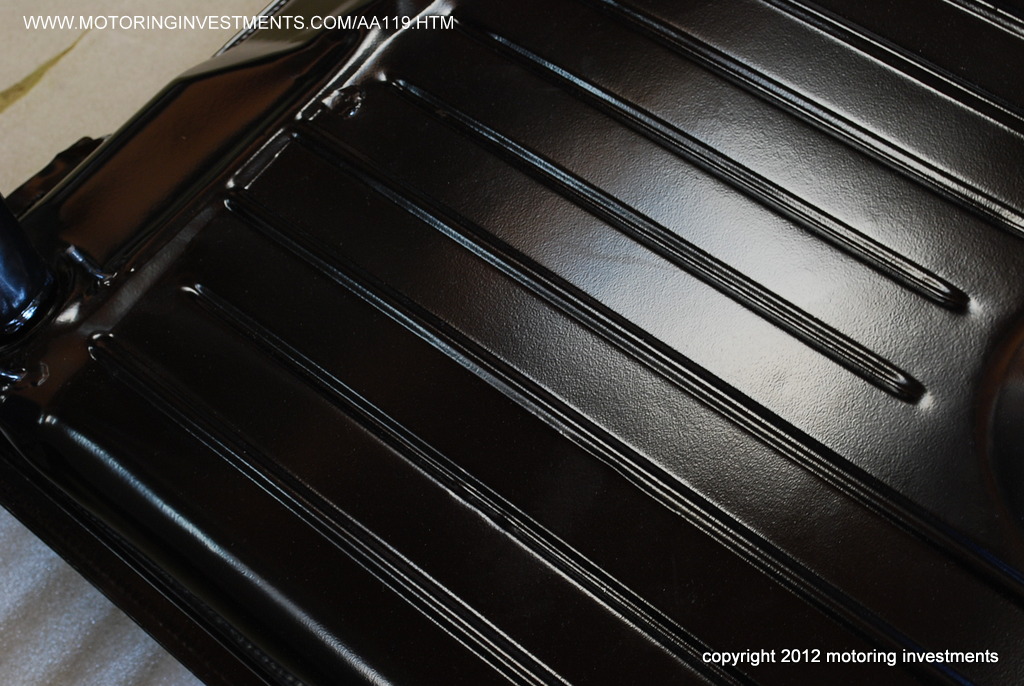
After the powder coating is completed |
|||||
 |
 |
 |
|||
| The pictures
below, left and right show the wheels and valves. The correct air valve is taller than the standard version to allow for clearance from scratches as you check and fill your tire pressure. |
|||||
 |
 |
 |
|||
 |
 |
||||
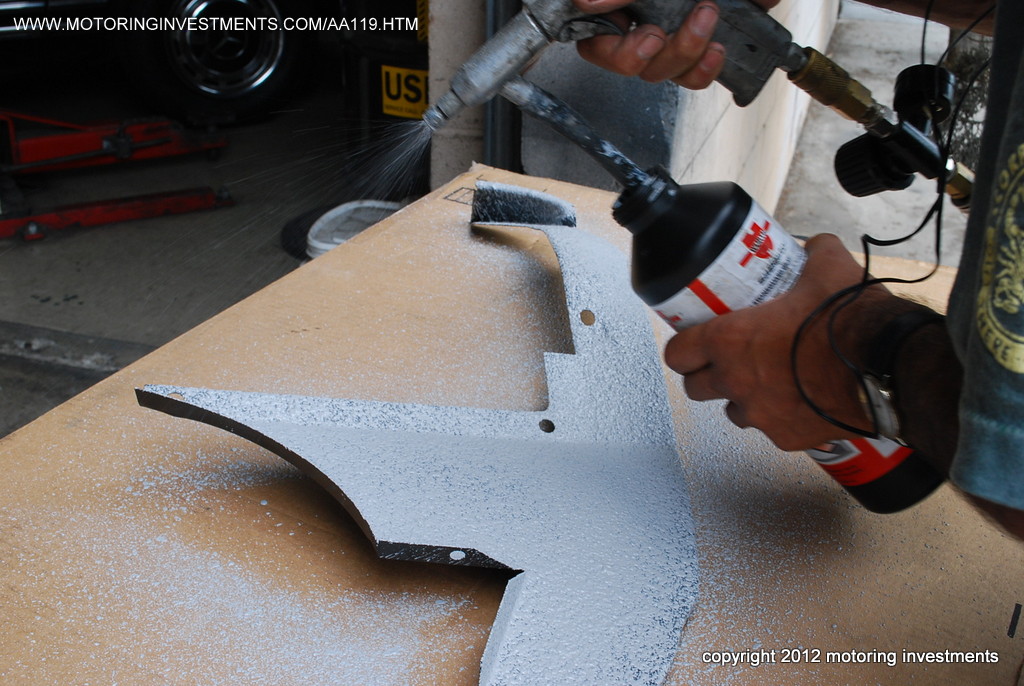
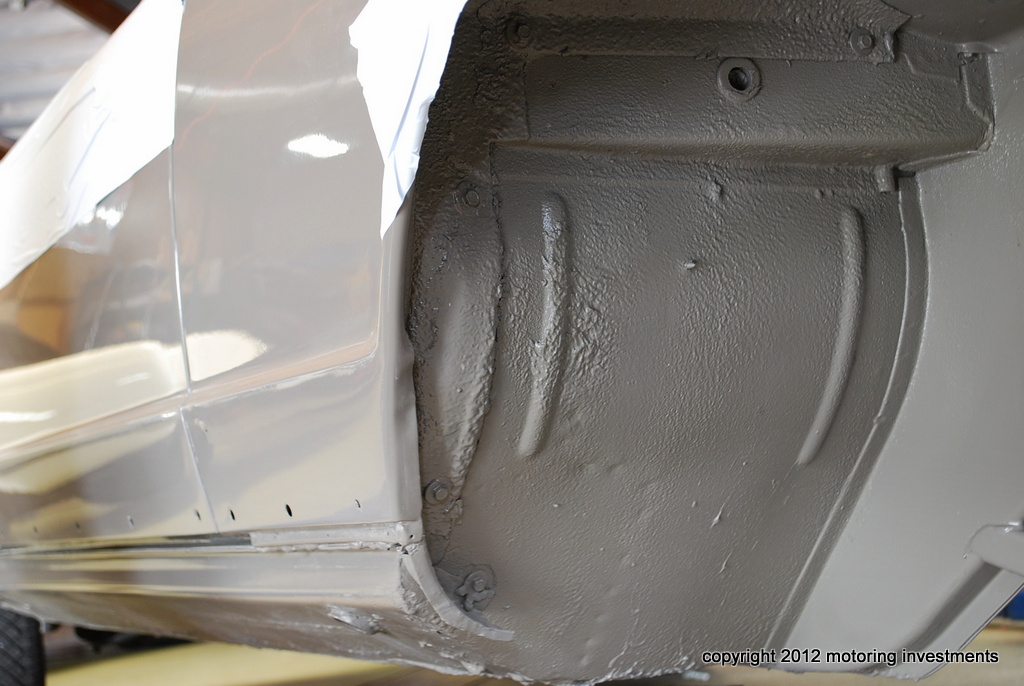
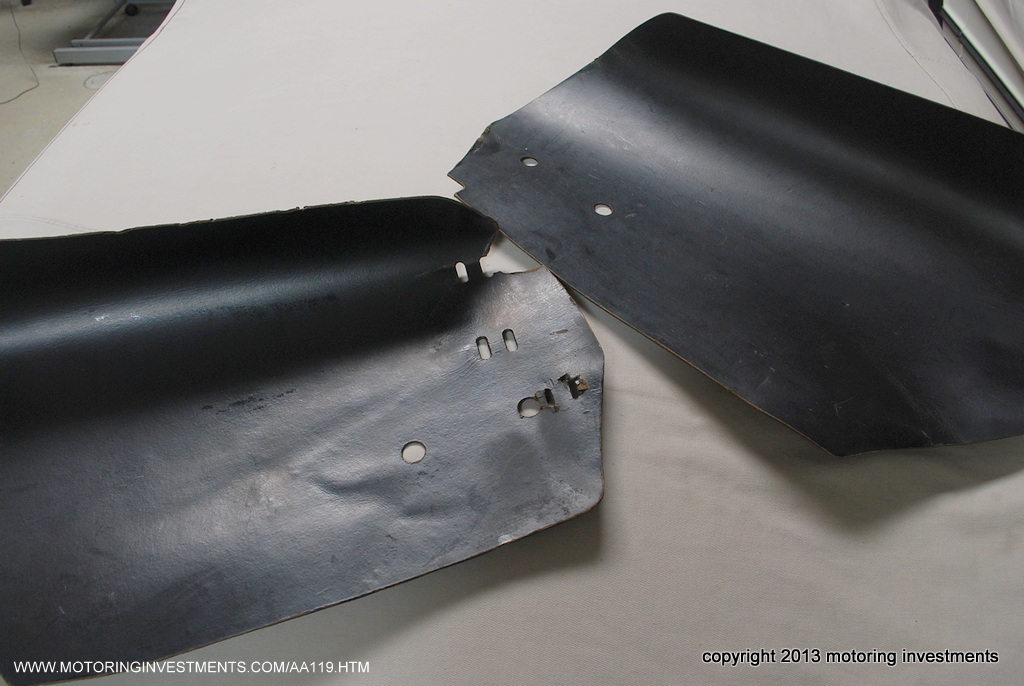
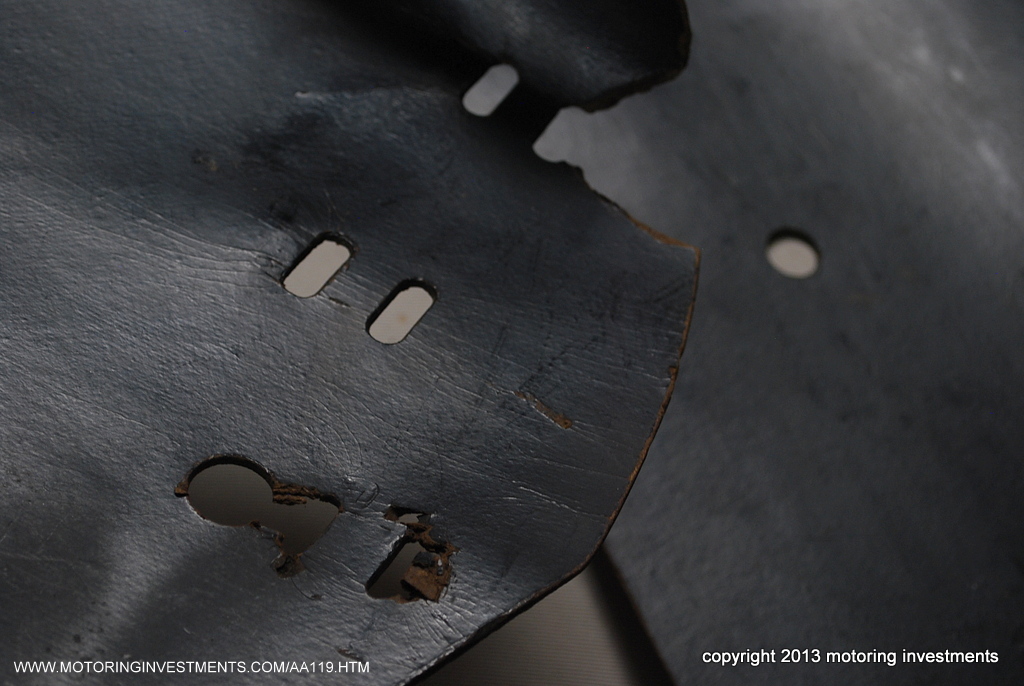
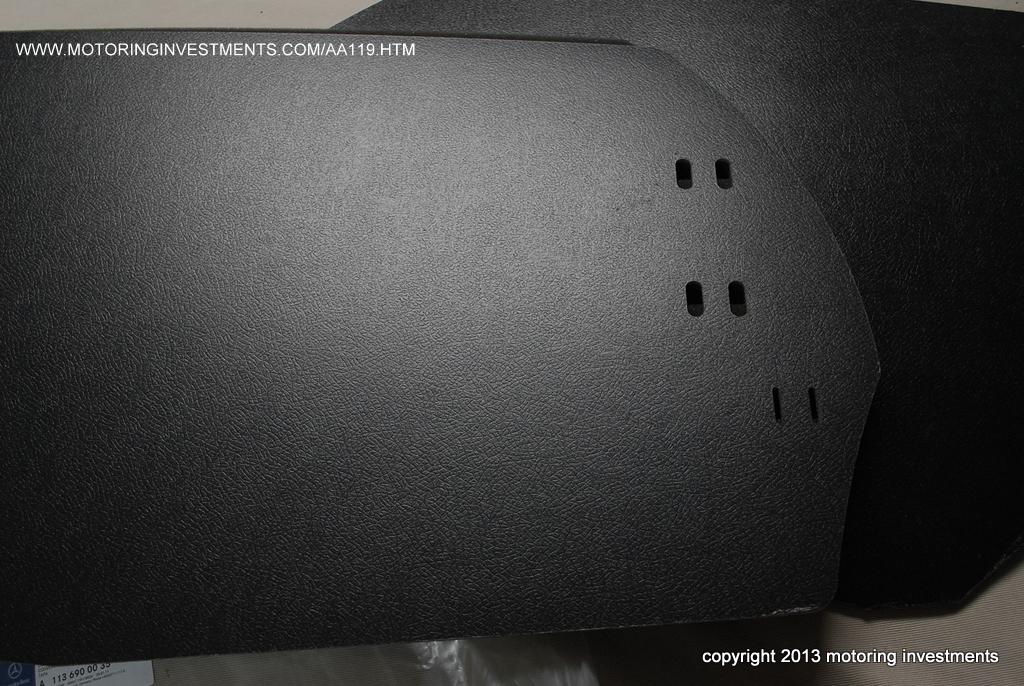
| The pictures
above and below are of the wheelhouse partition panels. These panels are often
susceptible to corrosion. They arrive from Mercedes Benz in a satin black finish with no undercoating applied. We spray them and paint them body color to match. |
|||||
 |
 |
||||
 |
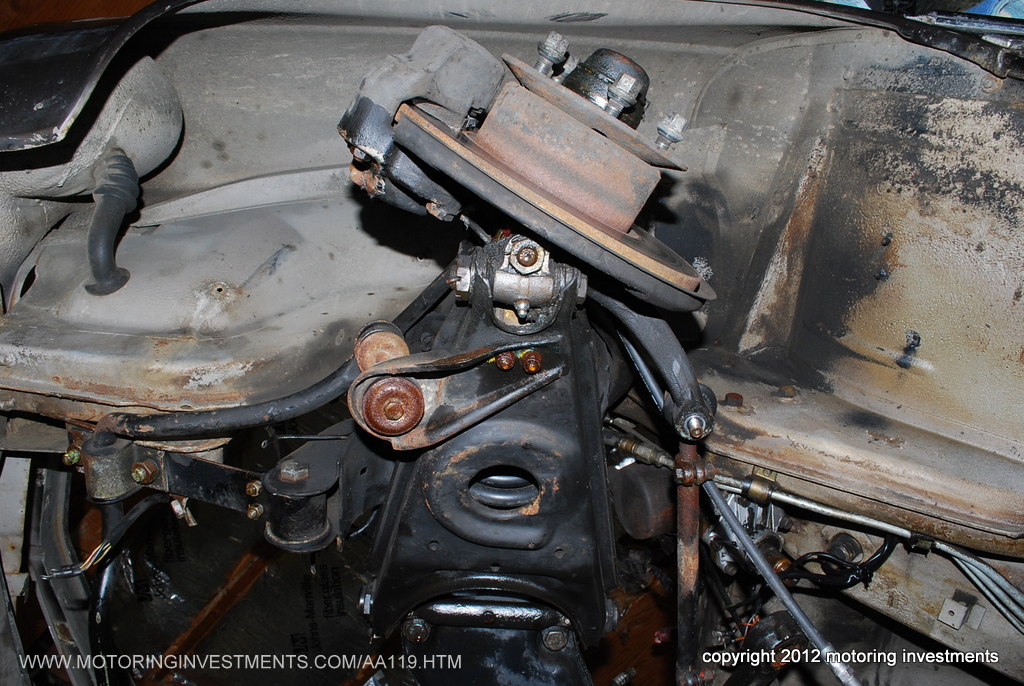
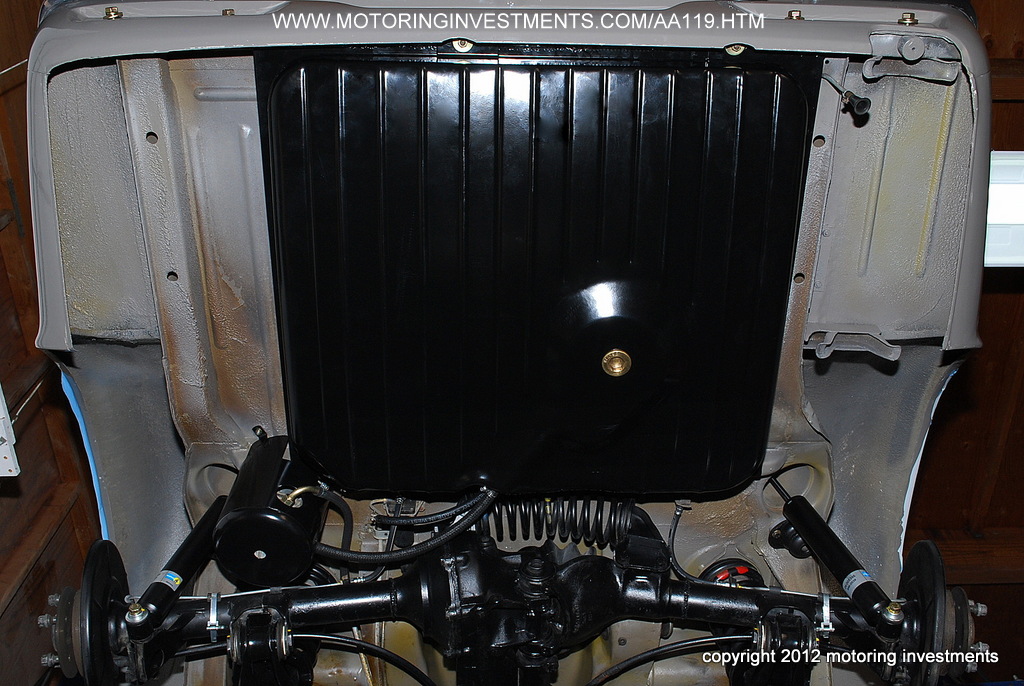
The rear end
will be removed. Completely serviced and any issues will be addressed. The pictures on the right show the bottom side of the trunk floor. Removing the gas tank facilitates inspection and allows for proper restoration of all components.
|
 |
|||
 |
 |
||||
 |
 |
 |
|||
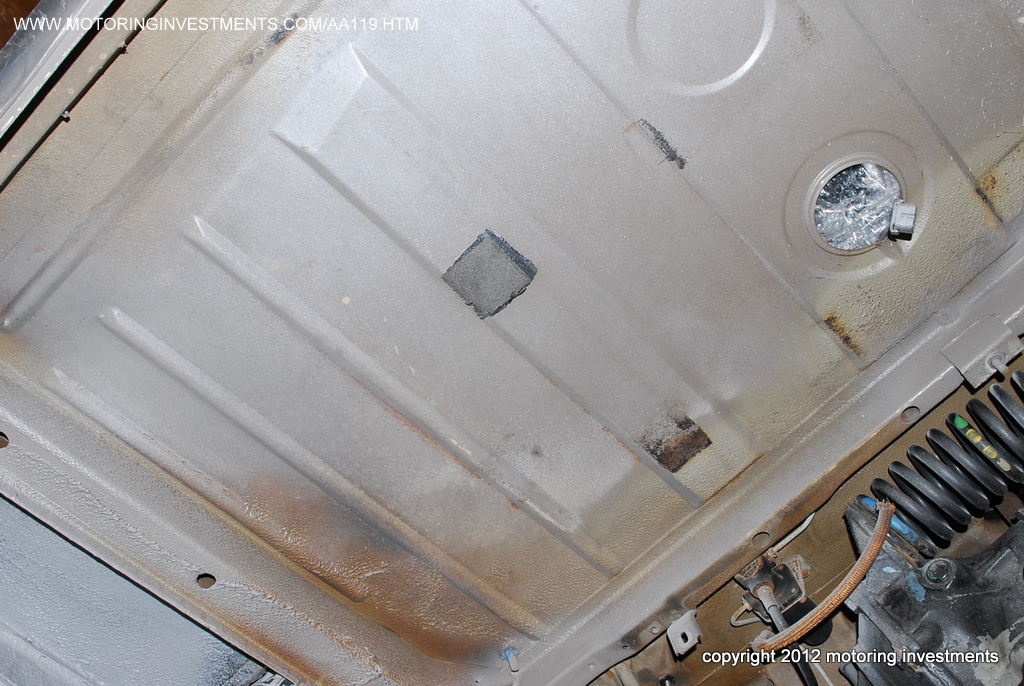
Notice the trunk floor and its condition. This area is often prone to corrosion. Even dry climate cars are known to have light surface rust from condensation improperly evaporating. This trunk floor is in great condition. |
|||||
 |
 |
 |
|||
The dash disassembly is documented and parts are meticulously inspected. |
|||||
 |
 |
 |
|||
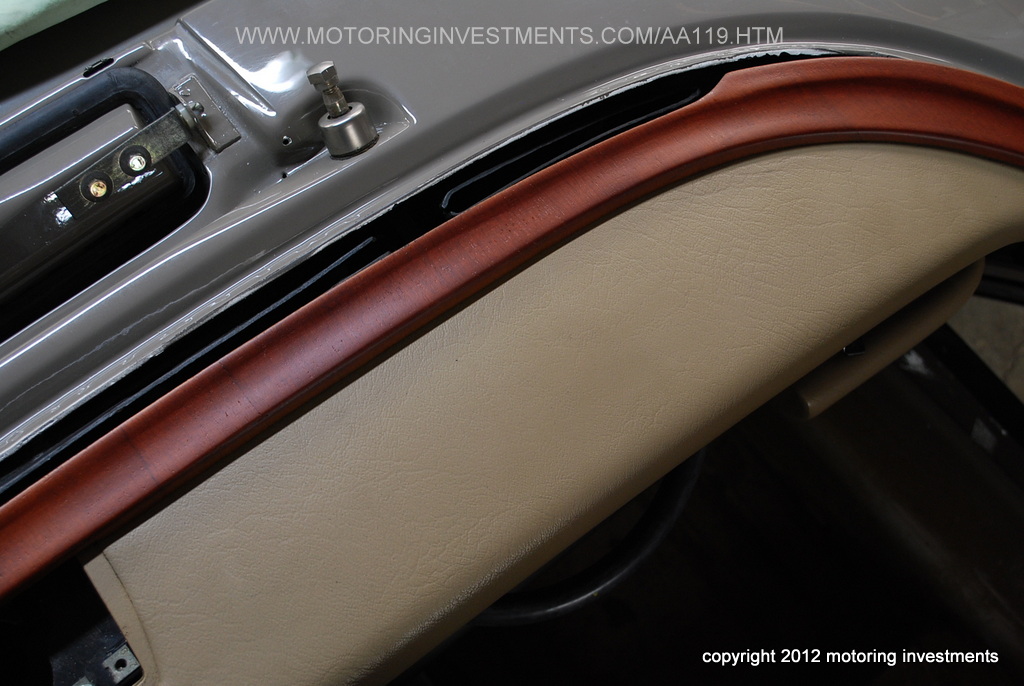
| The
photographs above are of the door threshold trim and pads. Notice the rare color coded threshold sill pads? Completely original and correct for this car. |
|||||
 |
 |
 |
|||
The above row displays pictures of the interior and dash disassembly. All switches, knobs, levers and electrical connections are inspected, documented and reconditioned for serviceability. |
|||||
 |
 |
 |
|||
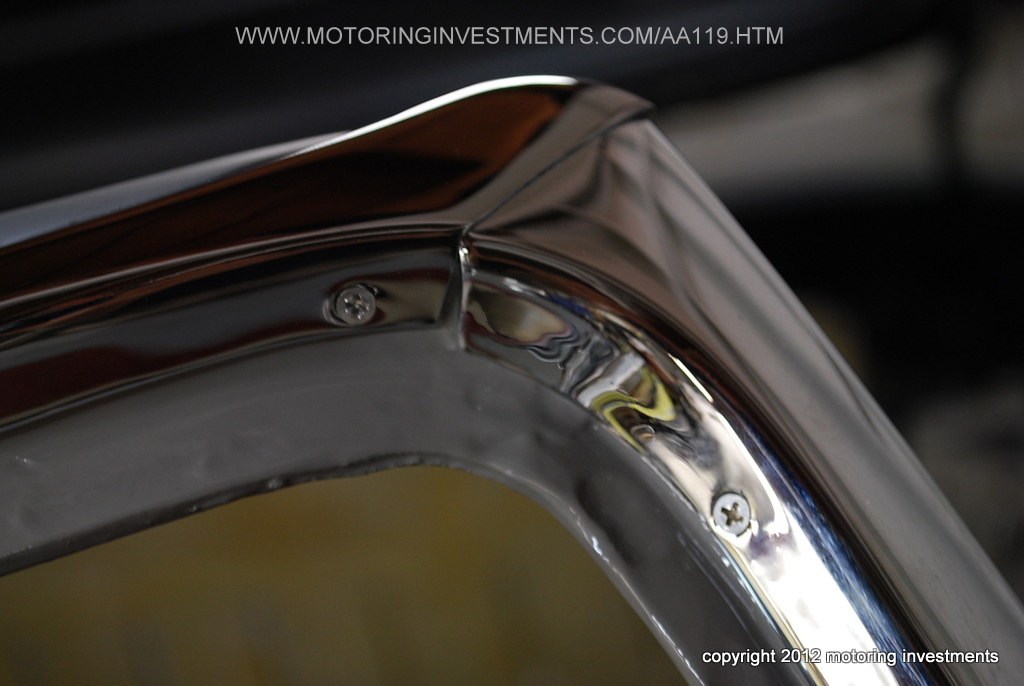
| Removing all
the chrome trim, uncovers more traces of the original gray-beige paint underneath. |
|||||
|
|
 |
 |
|||
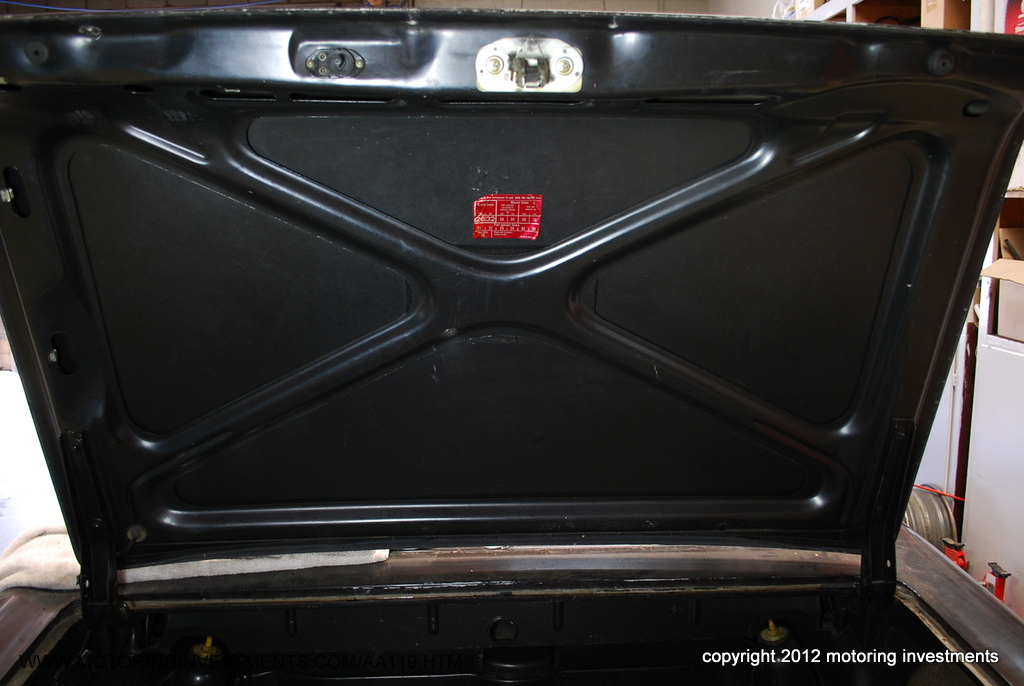
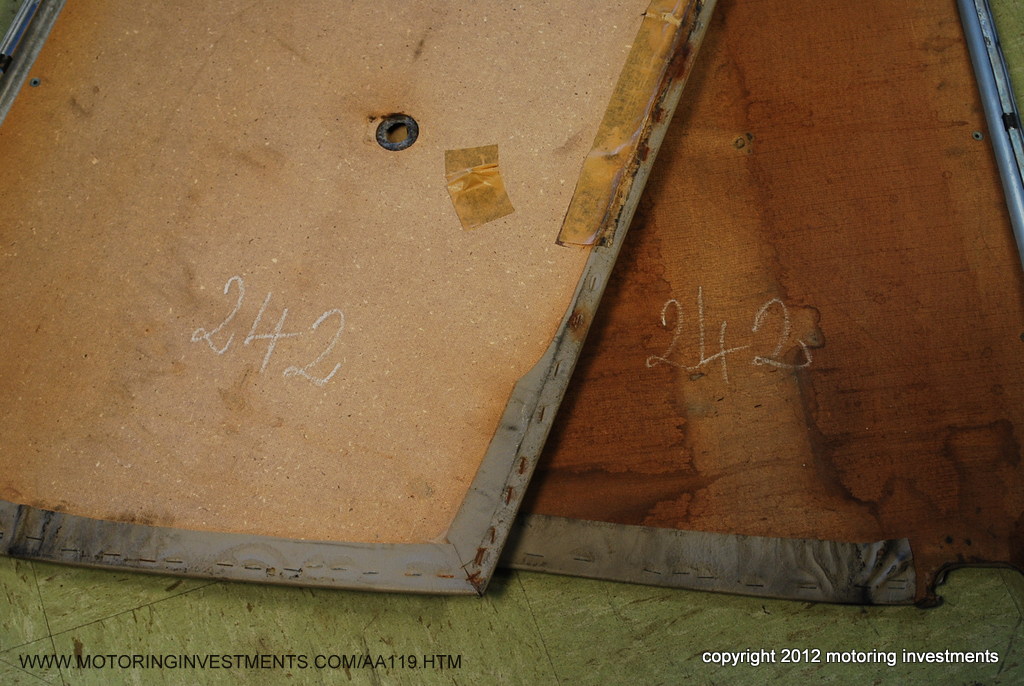
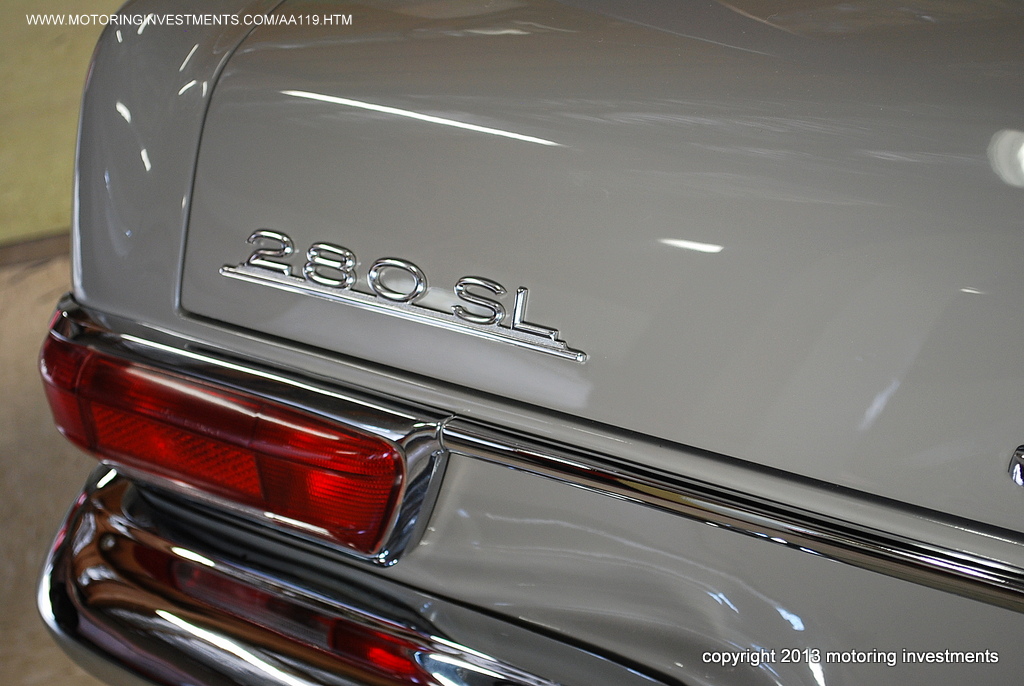
| The number above is the
body number. This sequence corresponds with all the numbered panels on the car, proving a body panels (numbers matching) car. |
The # 242 is the
production number. Notice all the interior panels are identified with the same number. Door panels, glove box, dash pieces and seats all match. |
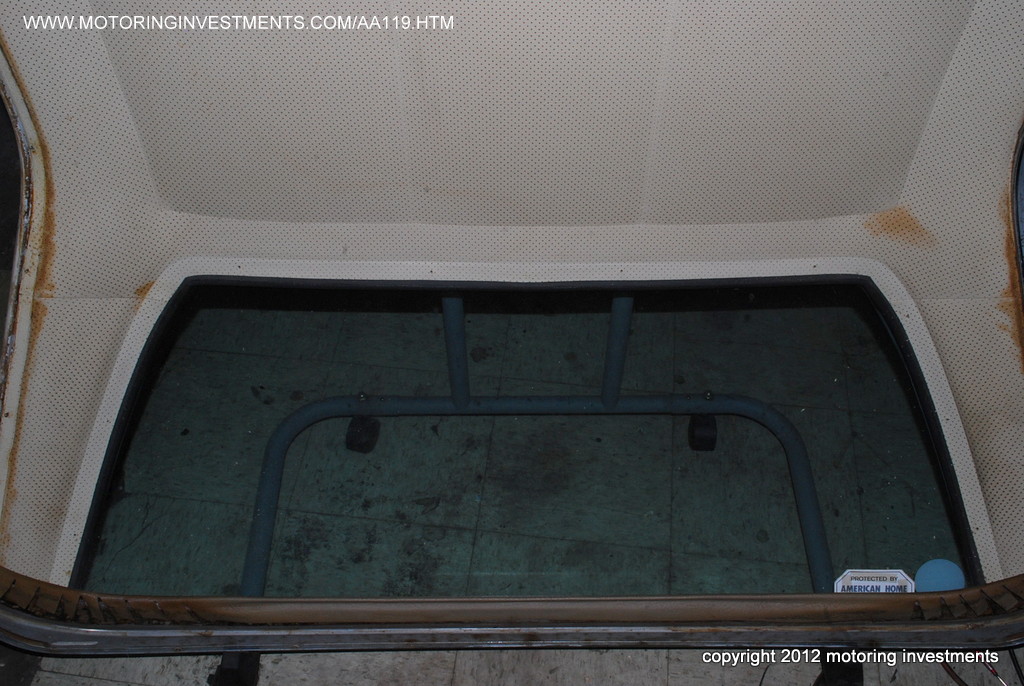
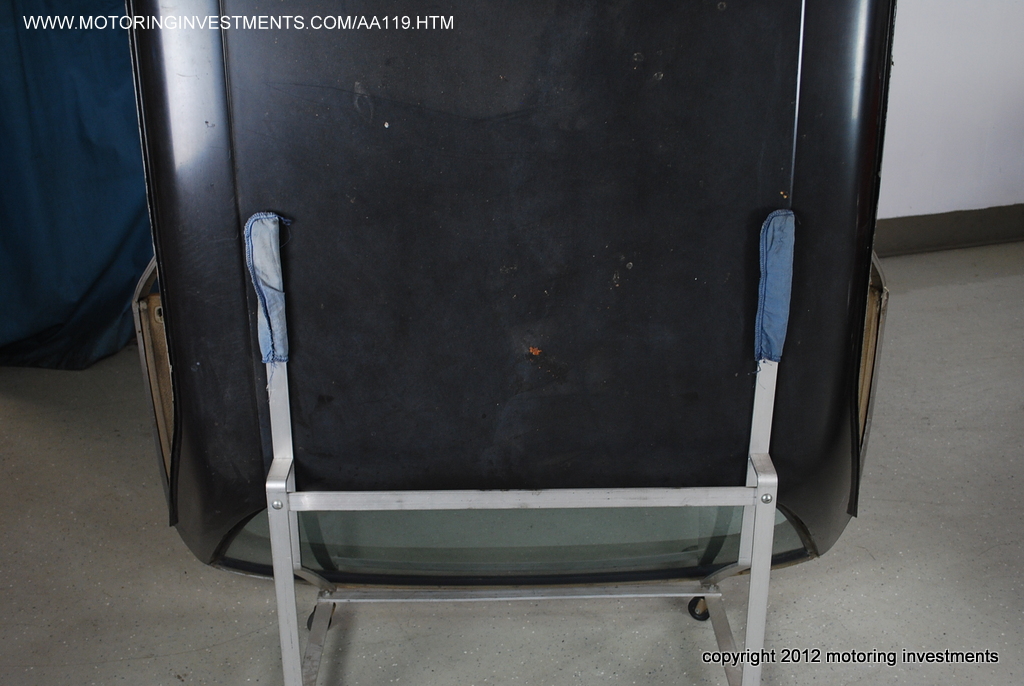
The underside of the folding top compartment shows the satin black original paint. |
|||
 |
|
 |
|||
| The backsides of the door panels. | The photo below is of the
backside of the seat back panel. |
||||
 |
Original
paint color code # 726 (Beige Grey) Original color code for hard top # 726 (Beige Grey) The data plate on the inner fender also displays the production number ( #..242) and the body number (#..121) |
 |
|||
 |
 |
 |
|||
| The production number
listed on the inside of the seat frame. |
Close up picture of the seat frame. |
||||
 |
 |
 |
|||
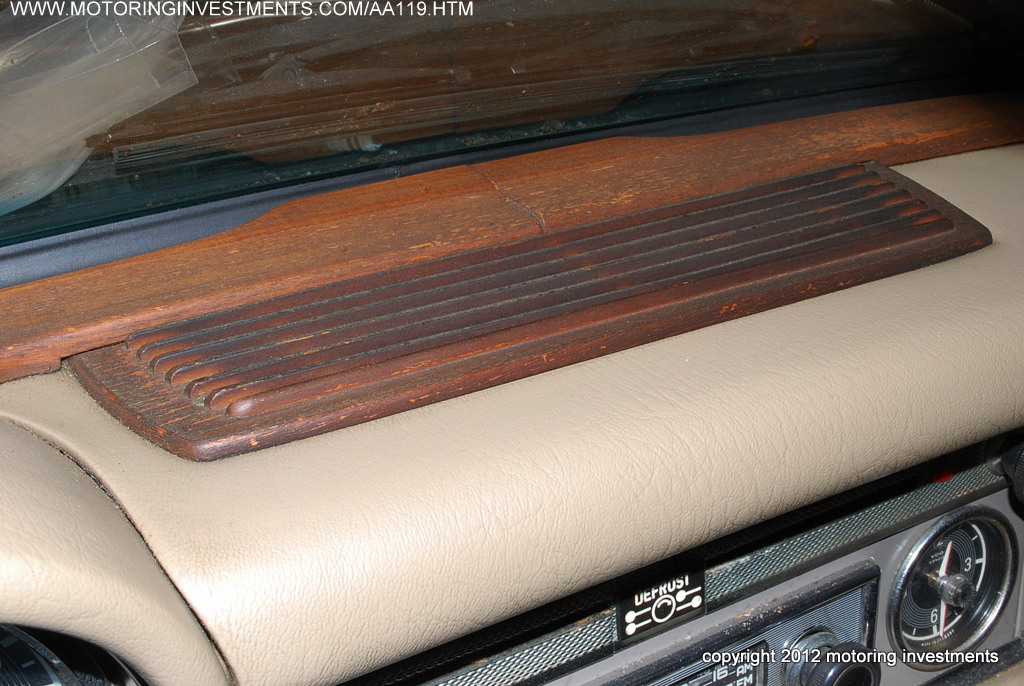
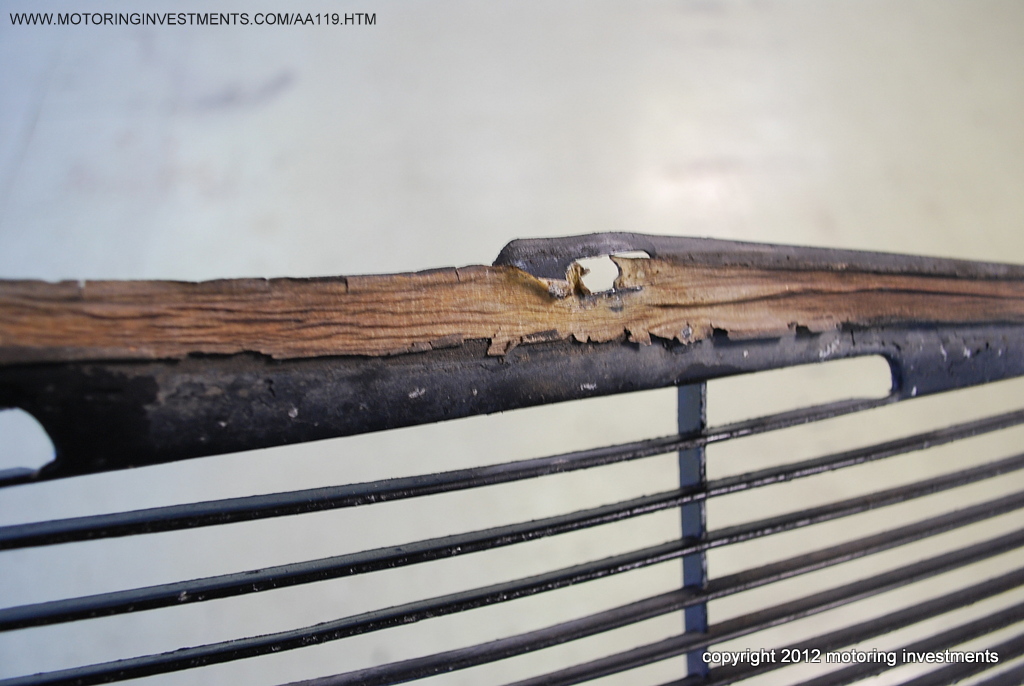
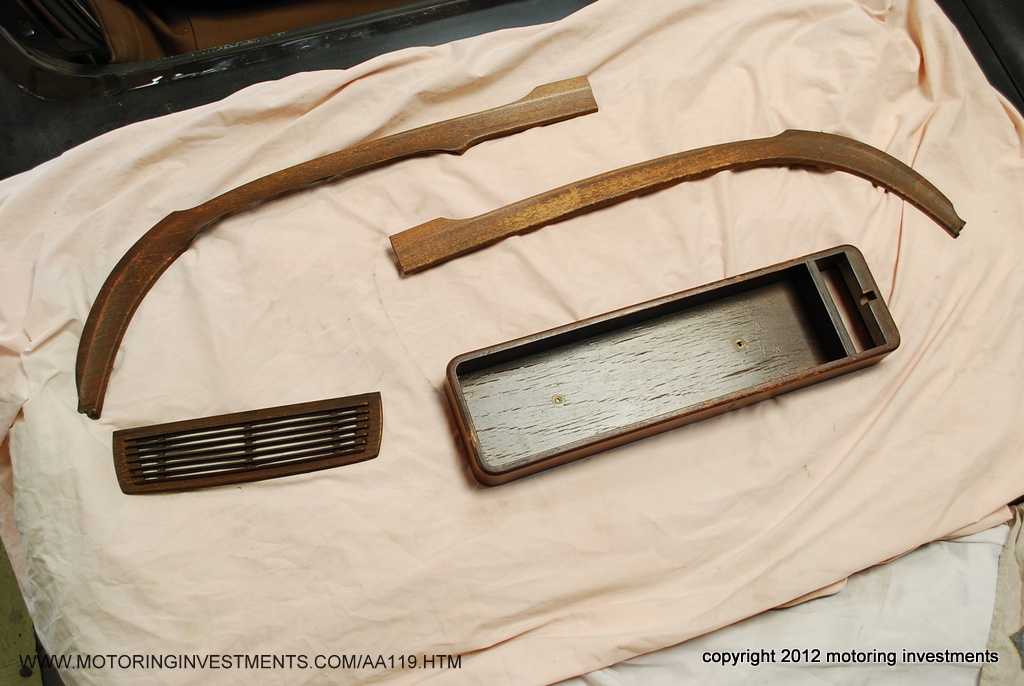
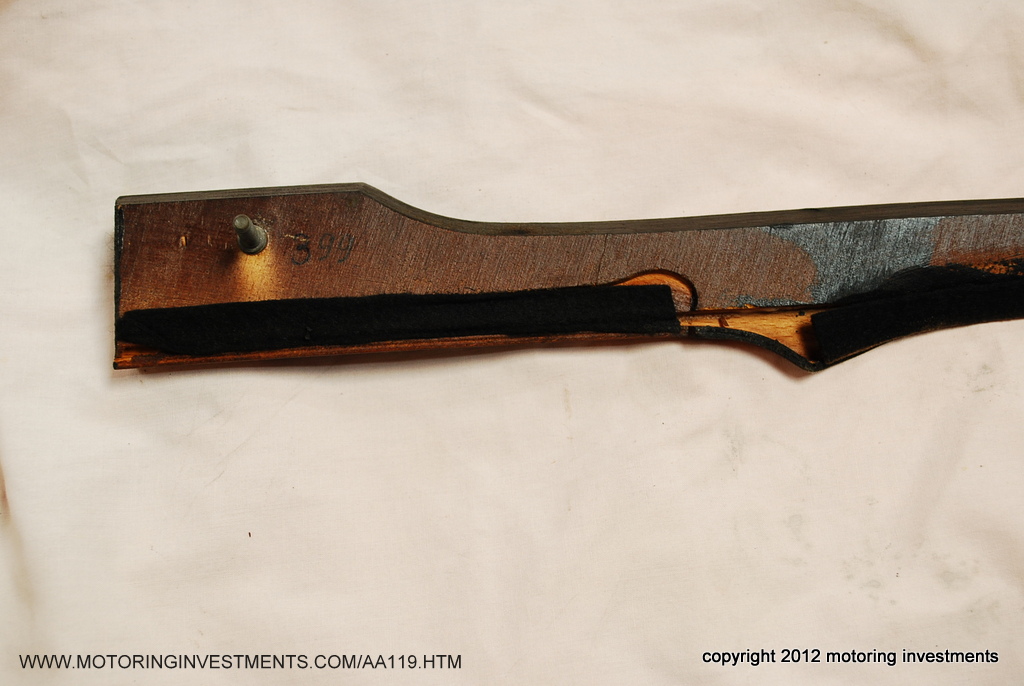
Here are the "before" pictures of the wood. It is carefully removed and veneered, and refinished to match the original color. |
|||||
 |
 |
 |
|||
 |
 |
 |
|||
 |
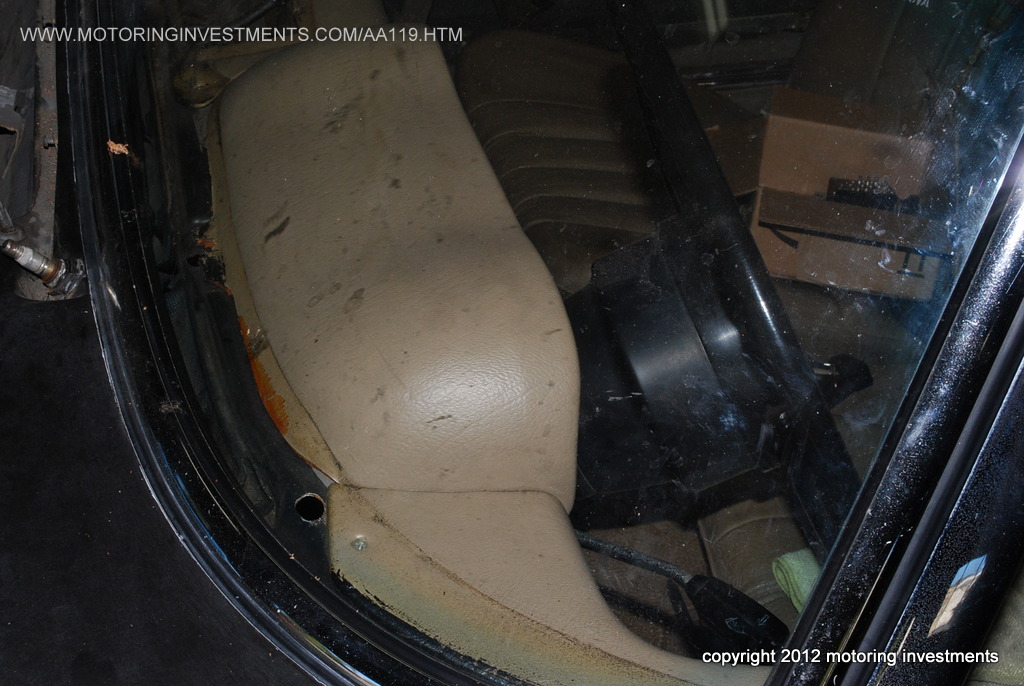
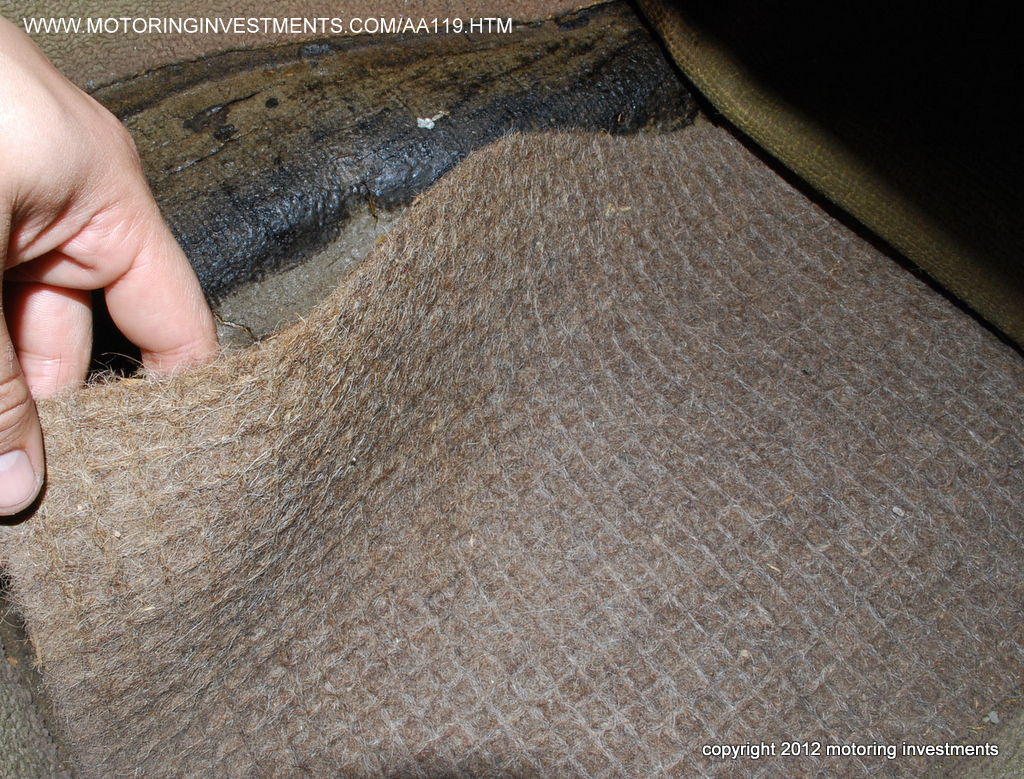
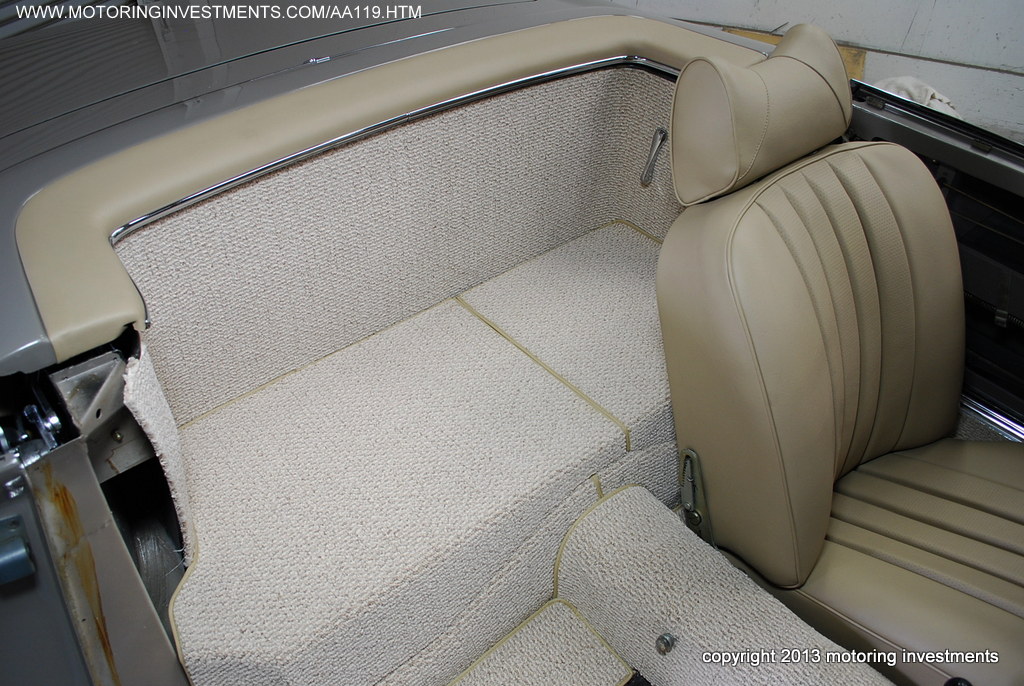
The pictures
above show the interior during disassembly. Notice the waffle pattern floor insulation in the photo above. This padding is factory correct and was installed as an insulation or sound deadening material. The pictures above also display the interior floor boards and their exceptional and original condition. |
 |
|||
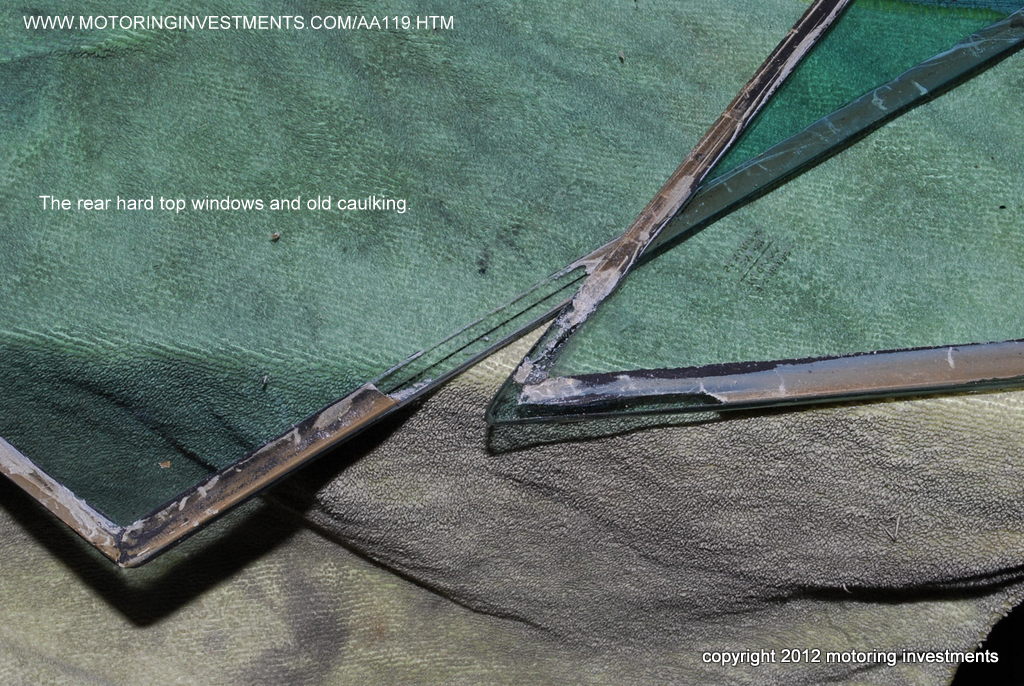 |
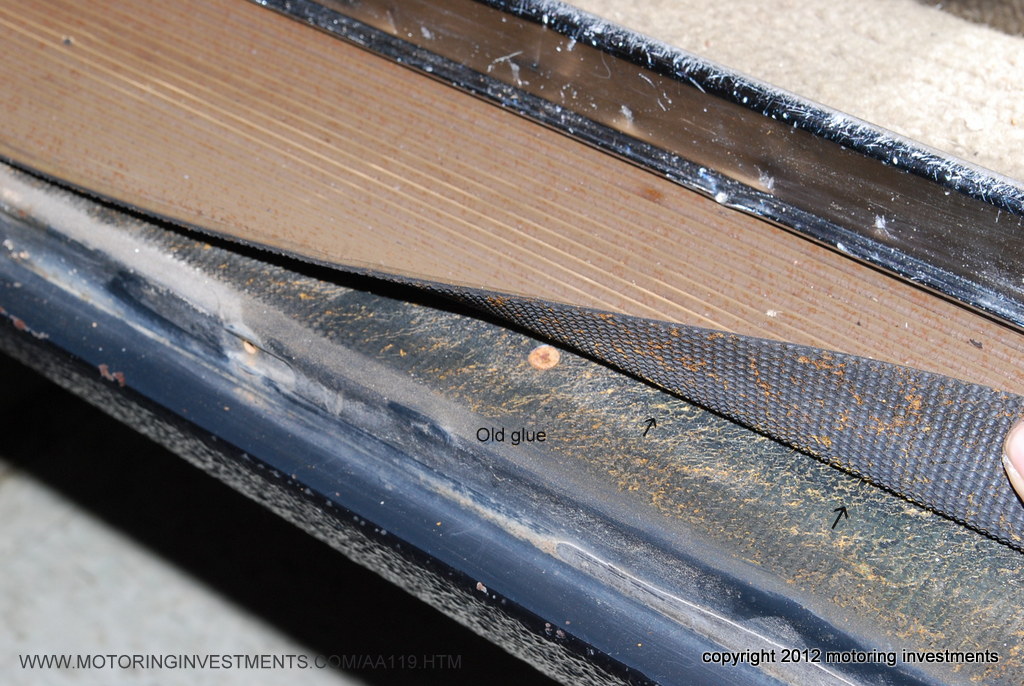
The caulking
applied by the factory technicians, still in place for over 43 years. |
 |
|||
 |
 |
 |
|||
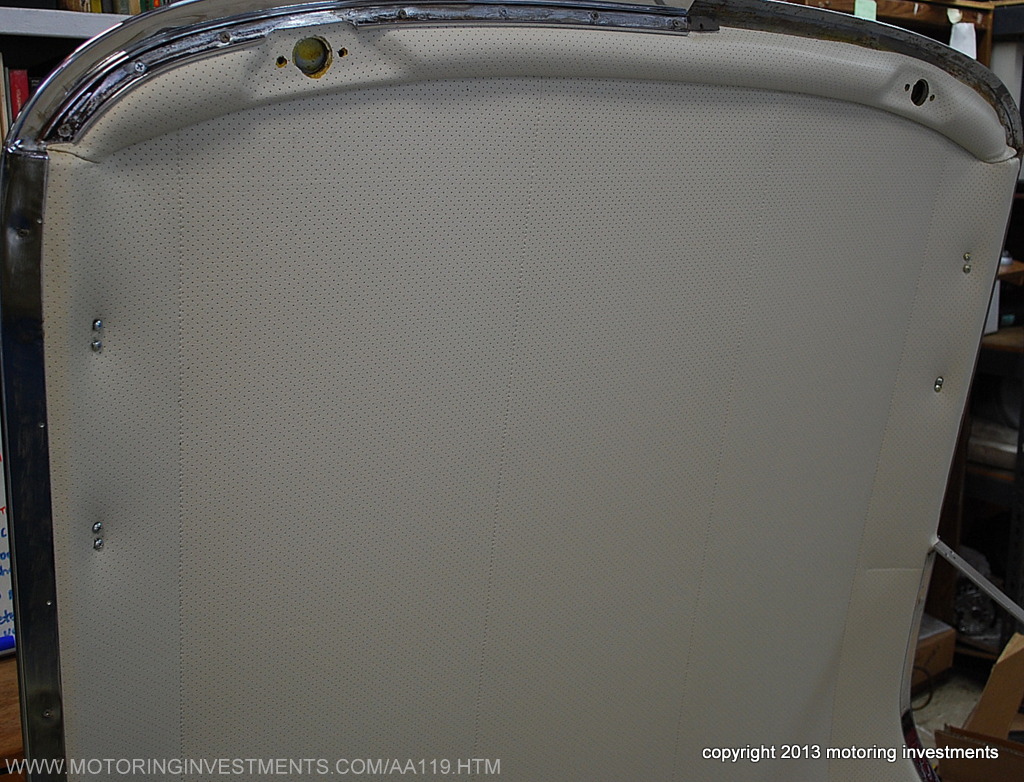
 |
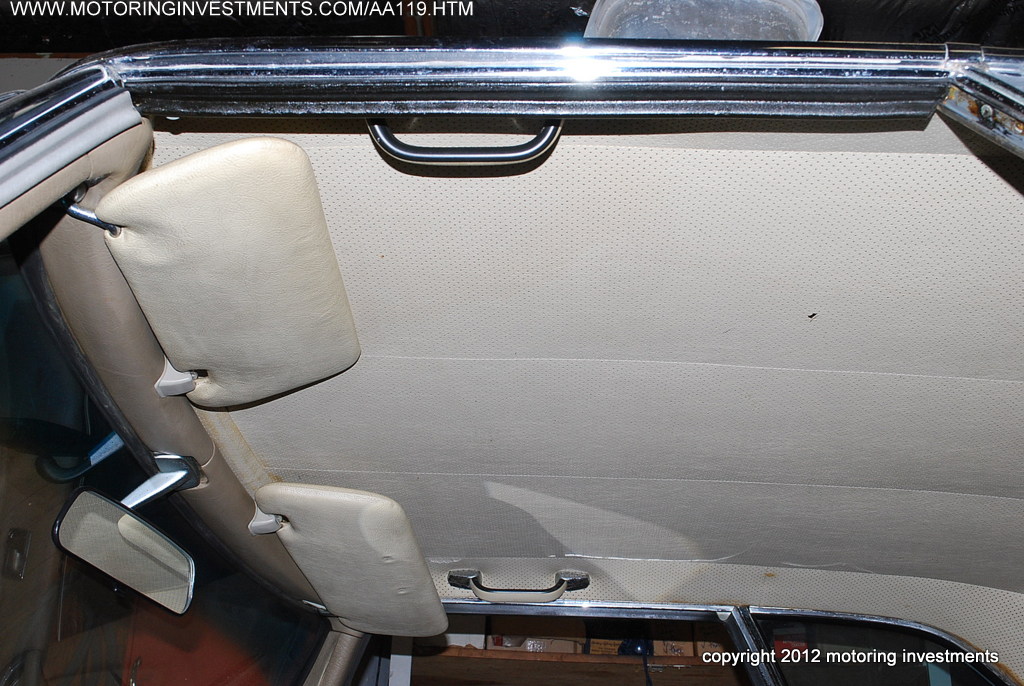
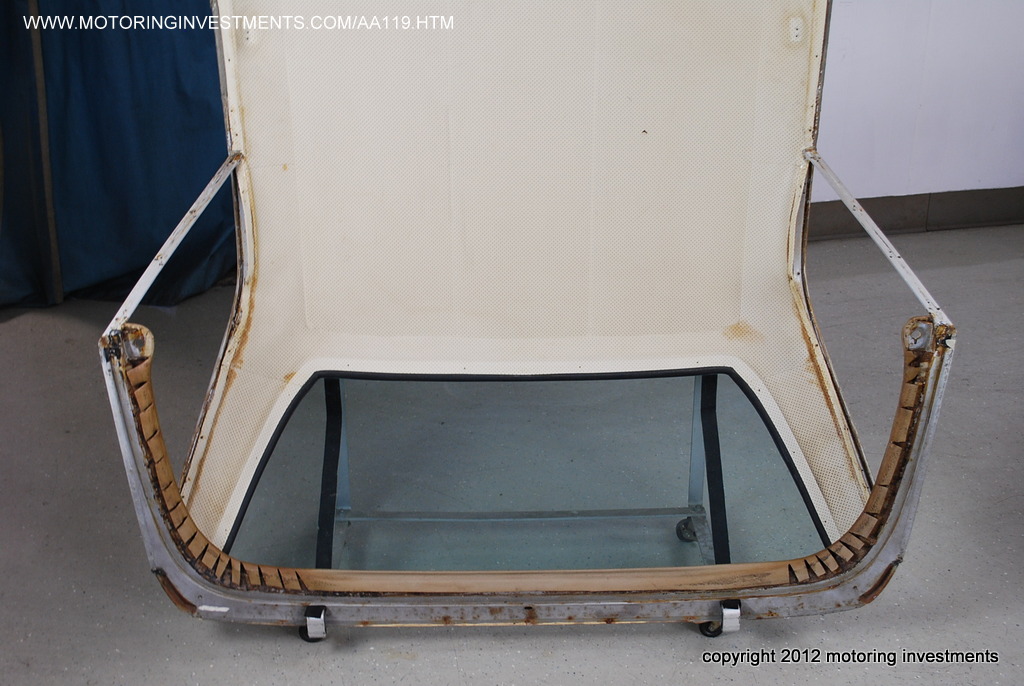
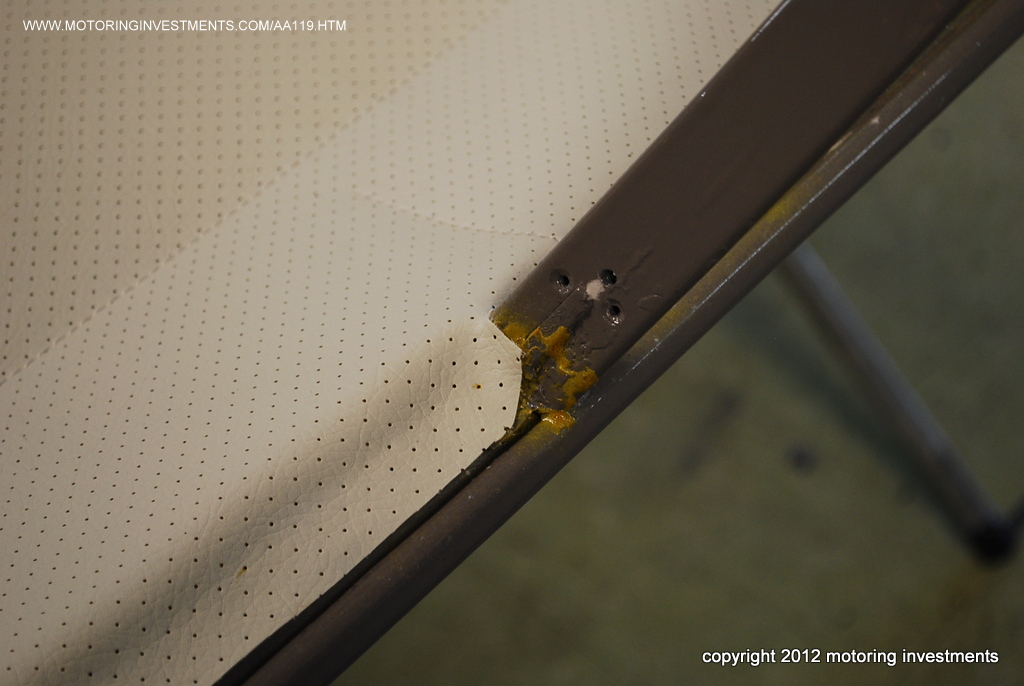
The headliner in the before state. |
 |
|||
 |
 |
 |
|||
 |
 |
 |
|||
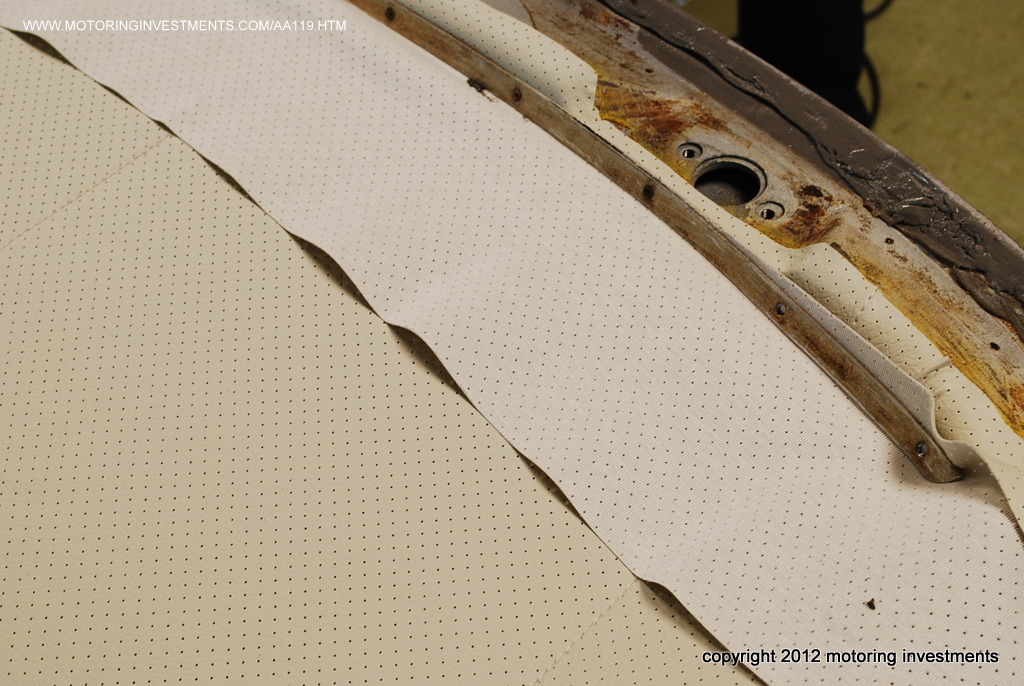
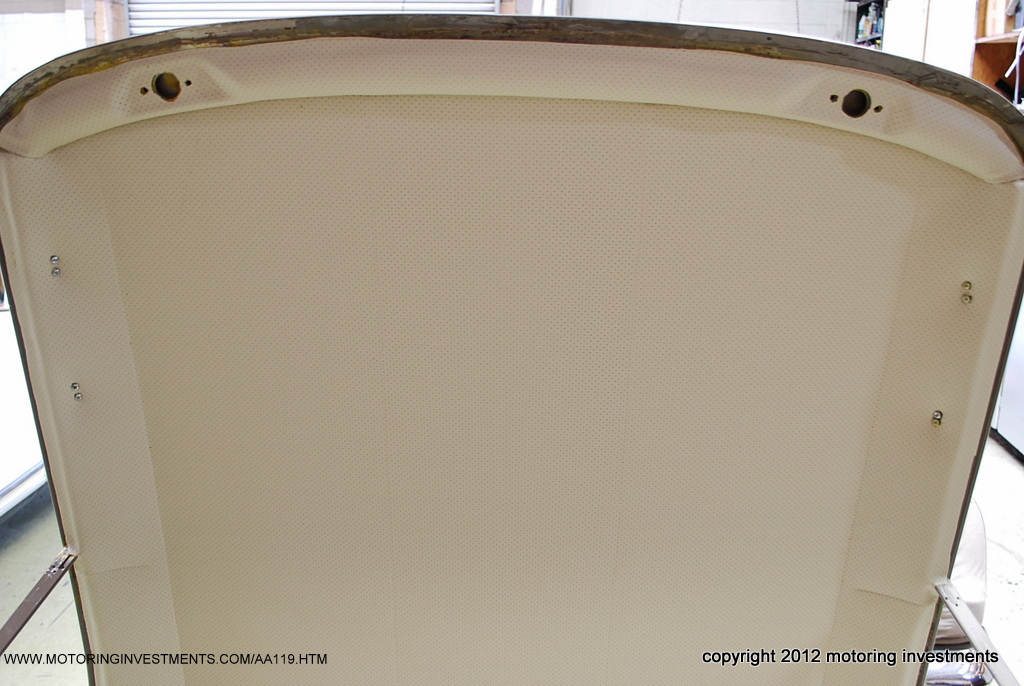
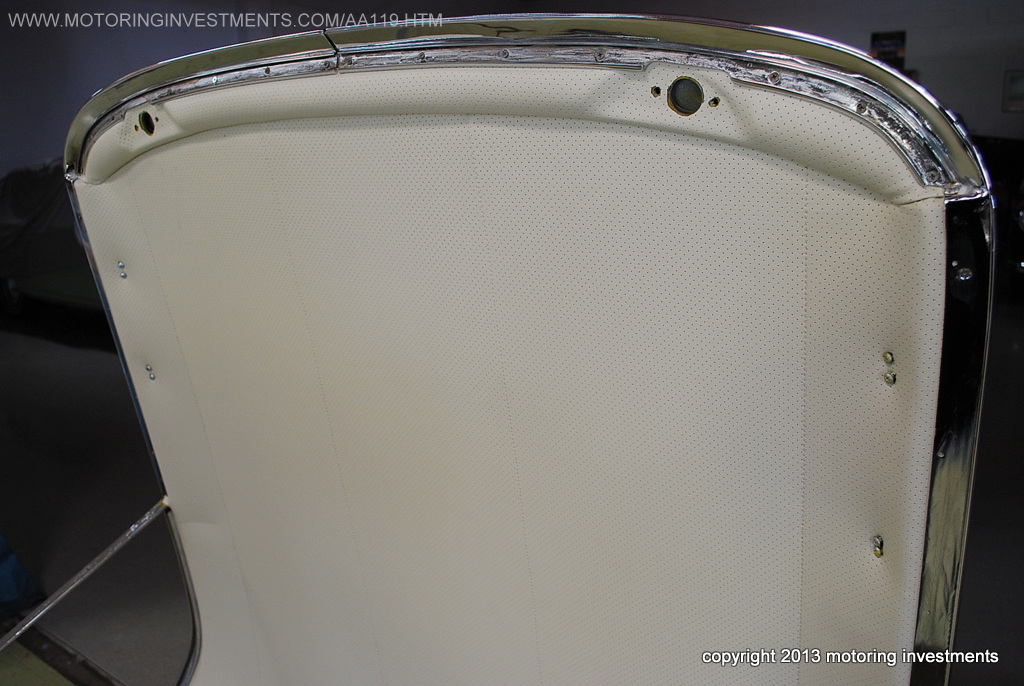
The pictures above show the old headliner foam that disintegrates over time. And below are images of the new foam going in place after the hardtop is stripped and cleaned. |
|||||
 |
 |
 |
|||
 |
 |
 |
|||
 |
The new
headliner. The picture below is a close up of the hard top rear shelf area with the # 726 marked with a wax pencil from the factory. This number corresponds with the color code. |
 |
|||
 |
 |
 |
|||
 |
 |
 |
|||
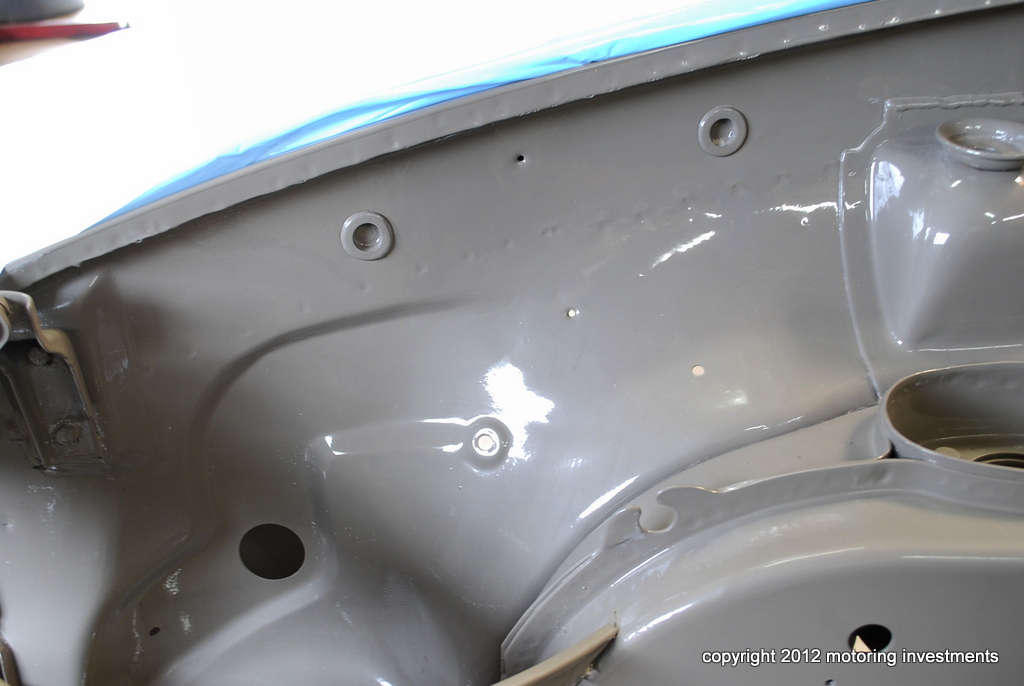
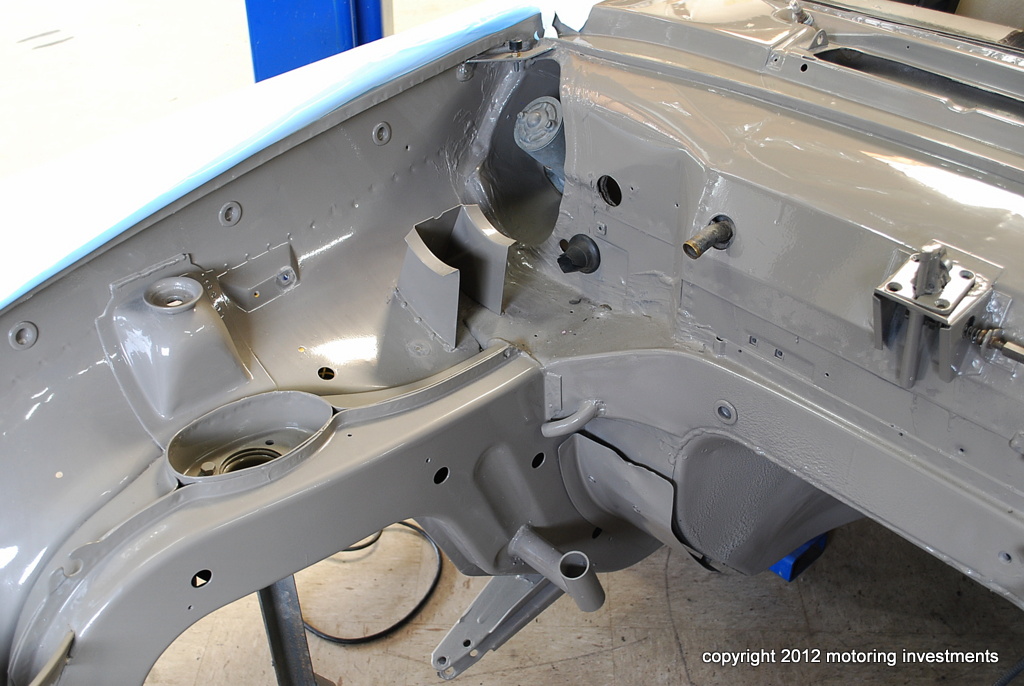
The pictures above and below show us the engine bay after the paint process. Also notice the picture above of the inner fender plugs painted in place. |
|||||
 |
 |
 |
|||
 |
 |
 |
|||
| The headlamp
bucket pictured above is shown with the ground points protected from the new paint. |
The wheel house pictured below is painted with the new partition panels. |
||||
 |
 |
 |
|||
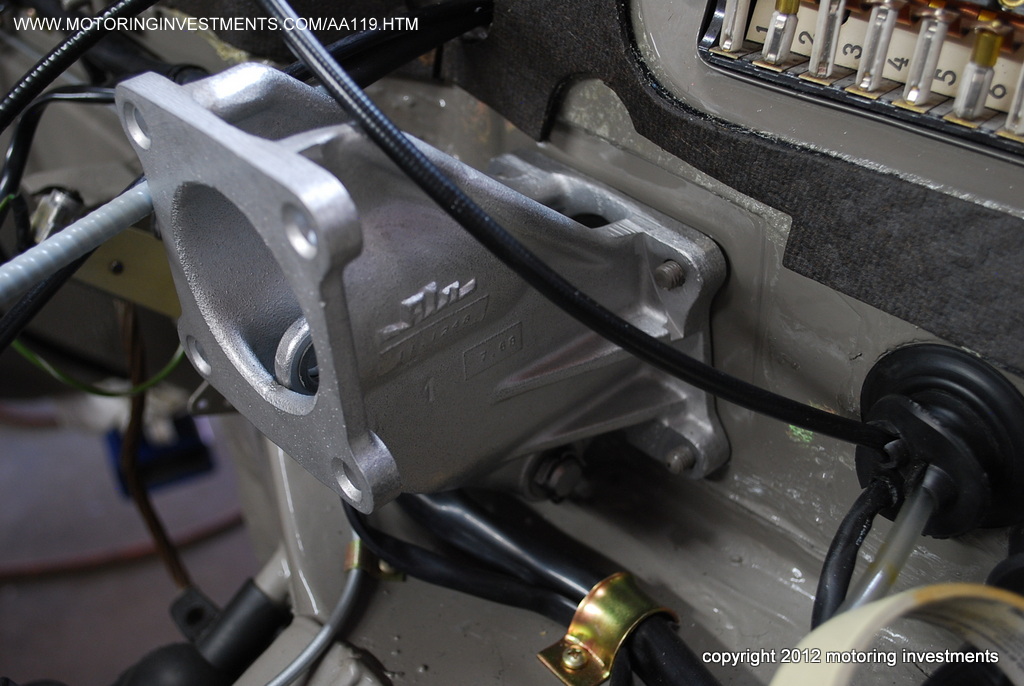
 |
The
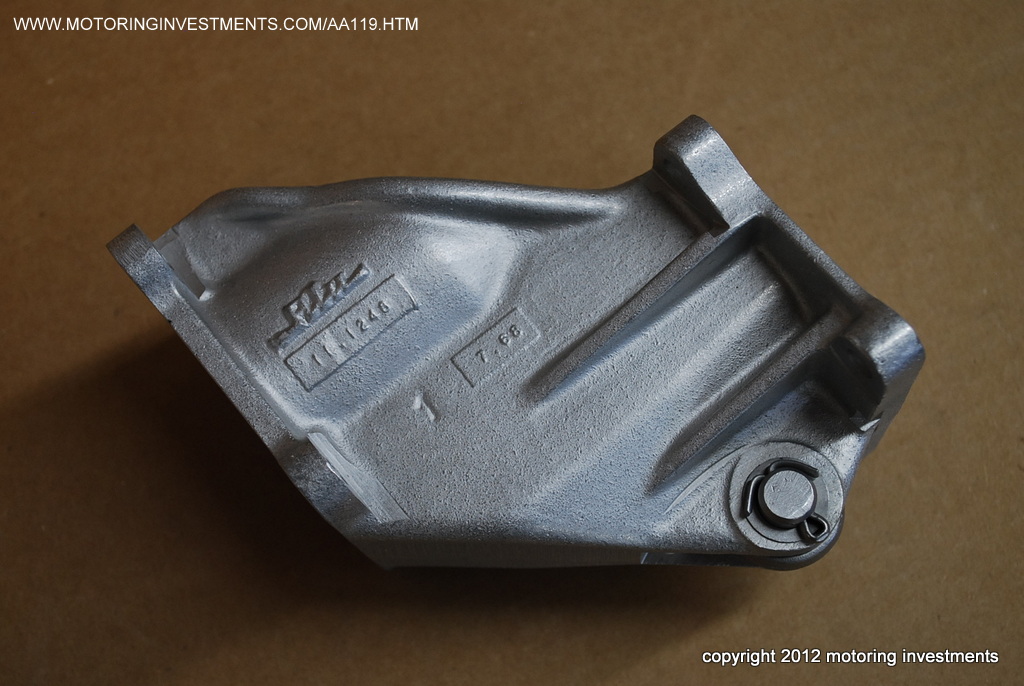
transmission mounting plate is pictured to the left. This plate is also a numbers matching panel and painted to match the body color. The fresh air flap is pictured to the right. This area is completely disassembled, painted, and cleaned. Then reassembled with a new cabin fresh air filter and all new seals. The heater valve and O-rings are also serviced at that time. |
 |
|||
 |
 |
 |
|||
 |
 |
 |
|||
 |
 |
 |
|||
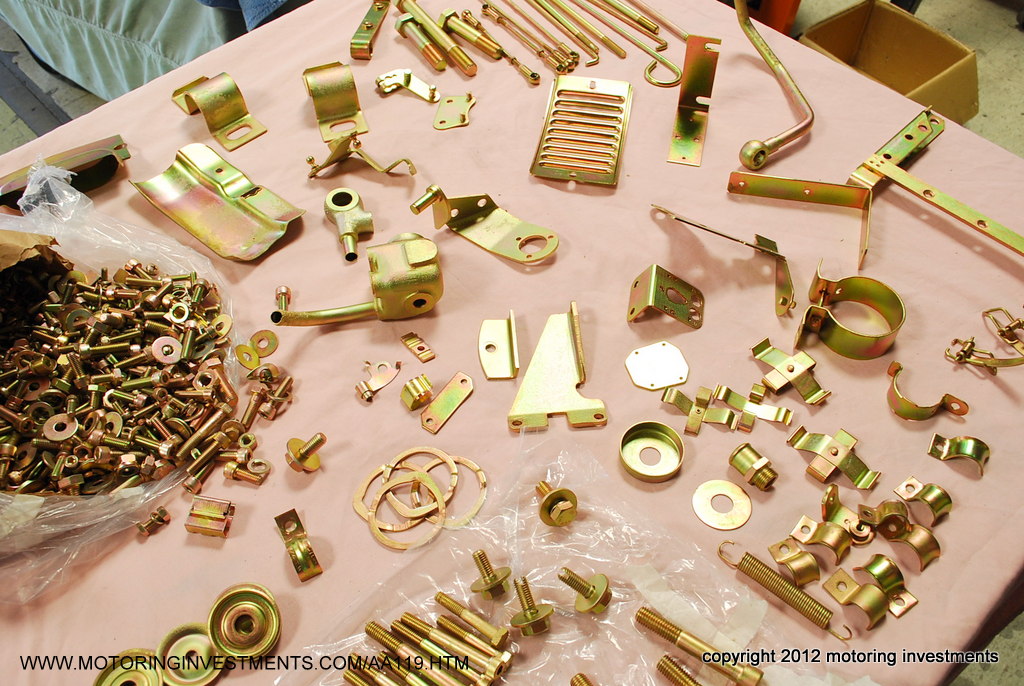
The gold and silver cadmium pieces are catalogued and re-plated. Upon completion the pieces are sorted and re-building can begin. |
|||||
 |
 |
 |
|||
.JPG) |
New firewall
pad looks just like the original pad from over 40 years ago. |
 |
|||
 |
 |
||||
 |
|
||||
 |
 |
 |
|||
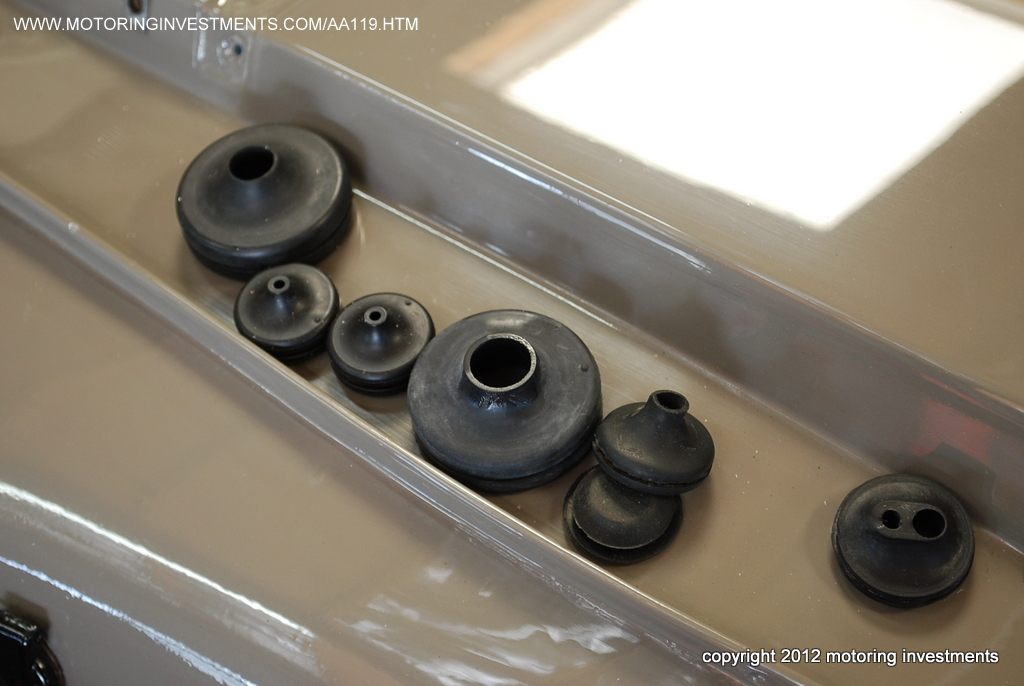
| The new
firewall grommets to be installed. |
|||||
 |
 |
 |
|||
| Below are
pictures of the engine bay components, after the refinishing process. |
|||||
 |
 |
 |
|||
 |
 |
 |
|||
The parts are ready for installation. These parts have been cleaned tumbled with a ceramic media to achieve the correct finish. |
|||||
 |
 |
 |
|||
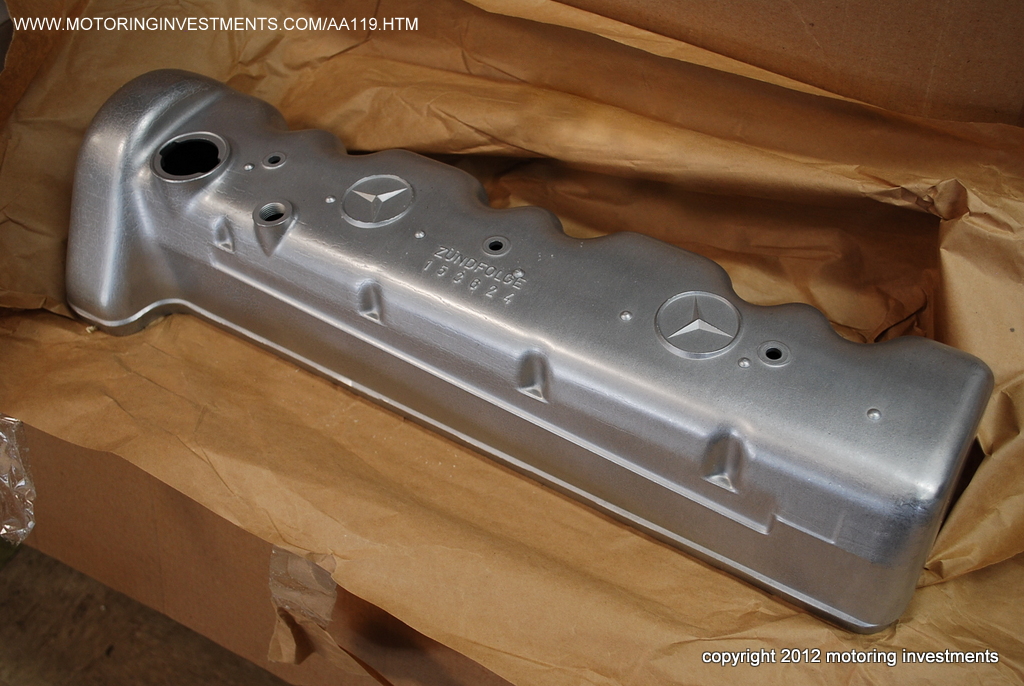
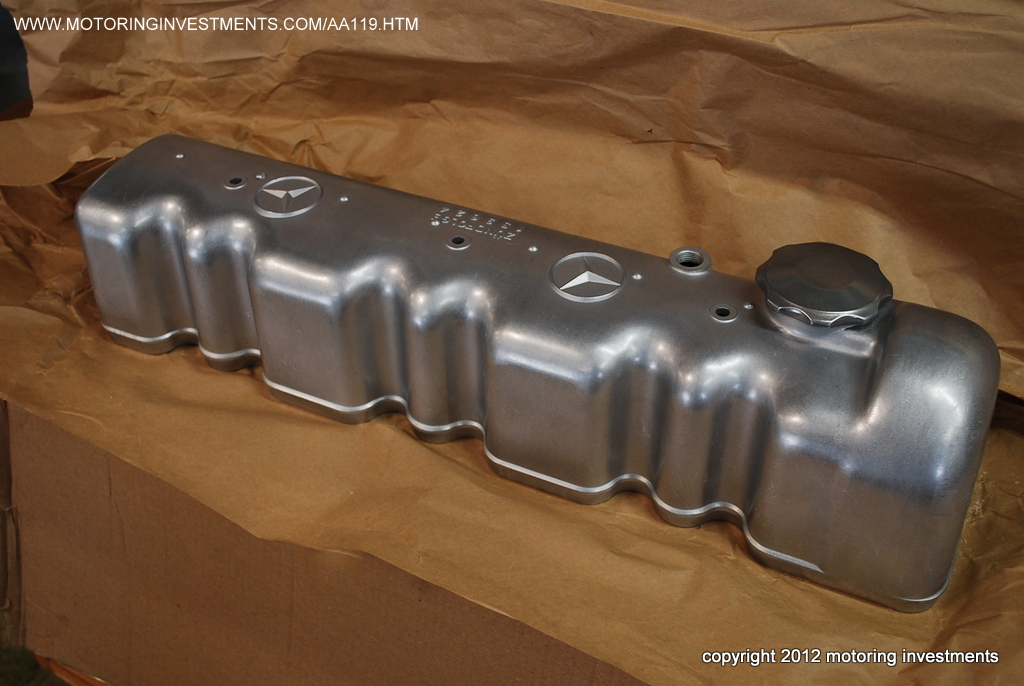
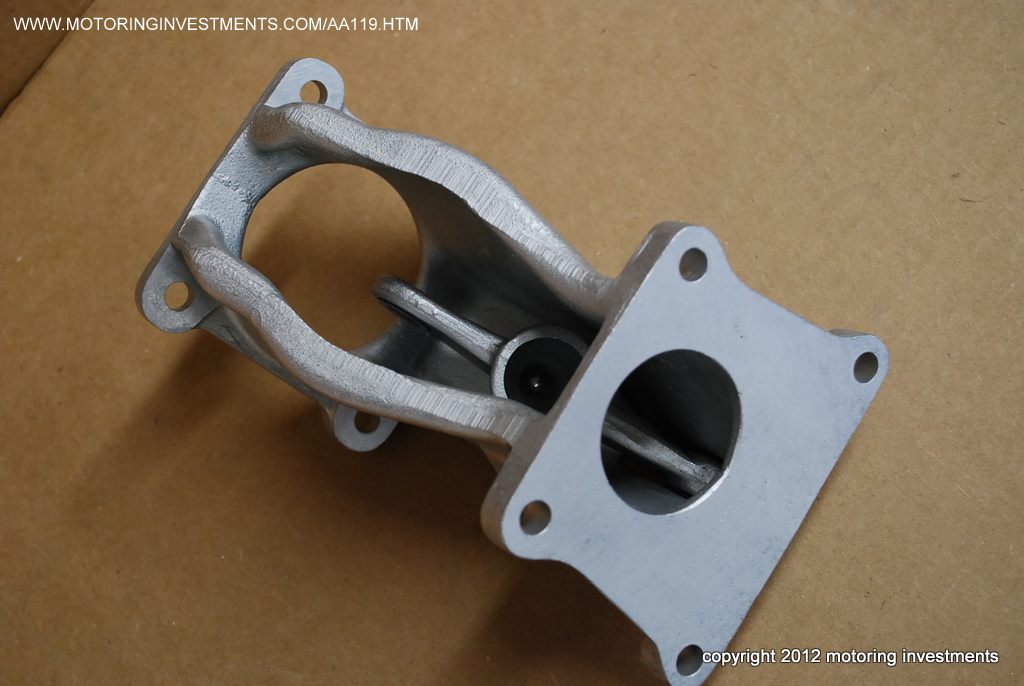
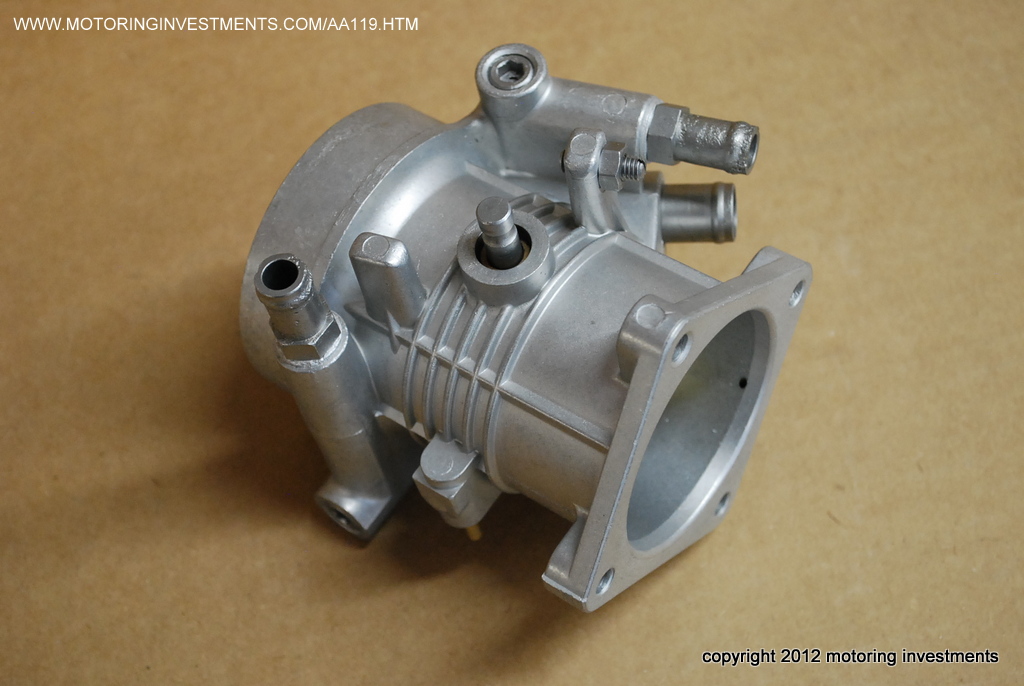
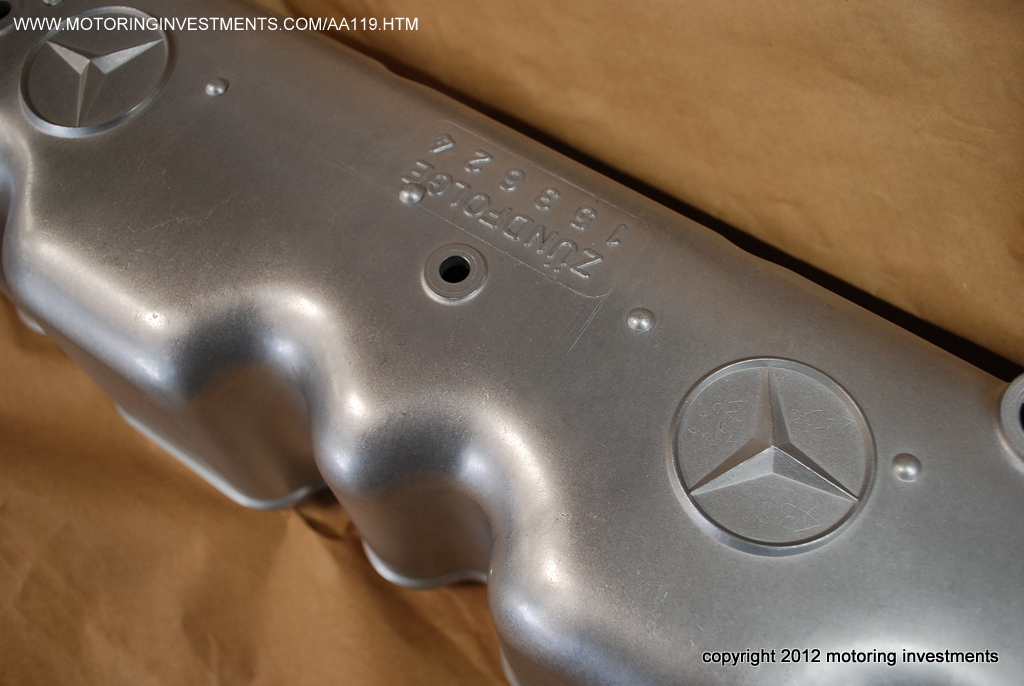
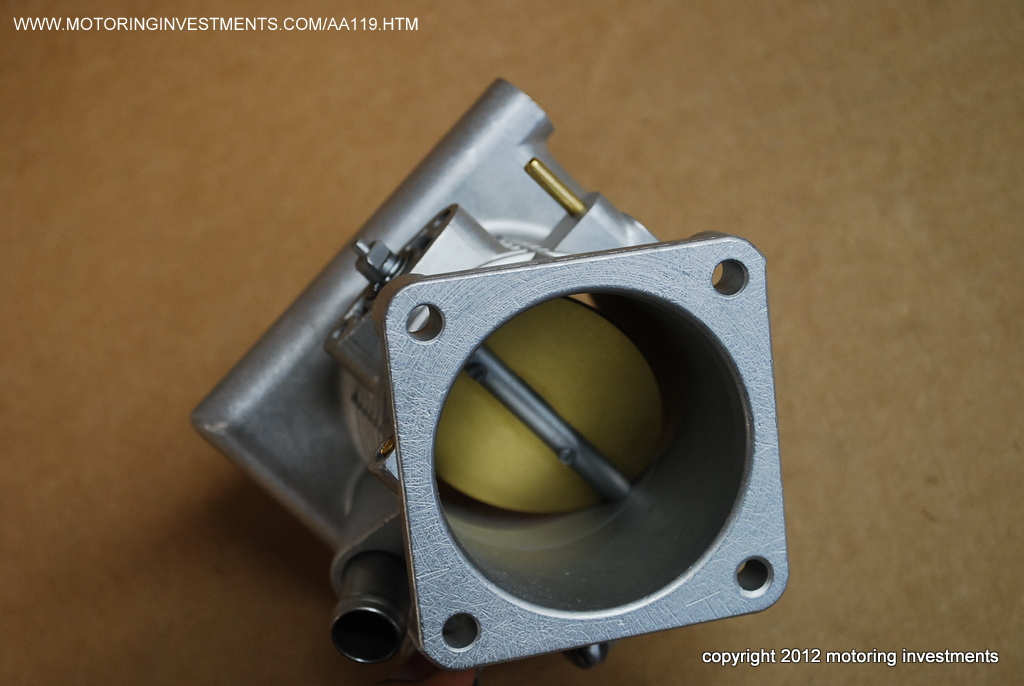
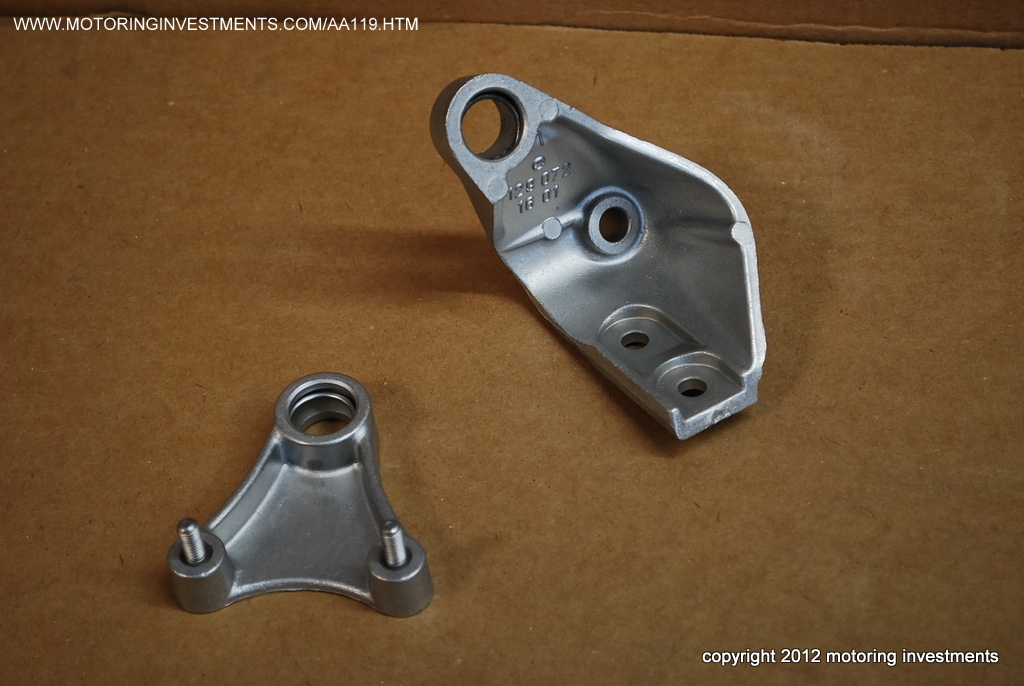
| Valve cover,
throttle body, brake booster pedestal, accelerator linkage and bases. Everything is redone. |
|||||
 |
 |
 |
|||
The pictures below are of the front suspension being assembled after we sand blasted and powder coated to match the factory satin black. |
|||||
 |
 |
 |
|||
 |
The
surrounding pictures are of the front suspension during the rebuilding process. |
 |
|||
 |
 |
||||
 |
 |
||||
The view of the cylinder head and newly coated exhaust manifolds. |
The picture
above is with the valve cover and intake manifold in place. |
||||
 |
 |
||||
 |
 |
||||
| The picture
below shows the engine mated to the freshly rebuilt transmission. |
|||||
 |
 |
 |
|||
 |
 |
 |
|||
 |
 |
||||
 |
 |
 |
|||
 |
 |
 |
|||
 |
 |
 |
|||
 |
 |
 |
|||
 |
 |
||||
 |
 |
||||
 |
 |
||||
 |
 |
||||
 |
 |
||||
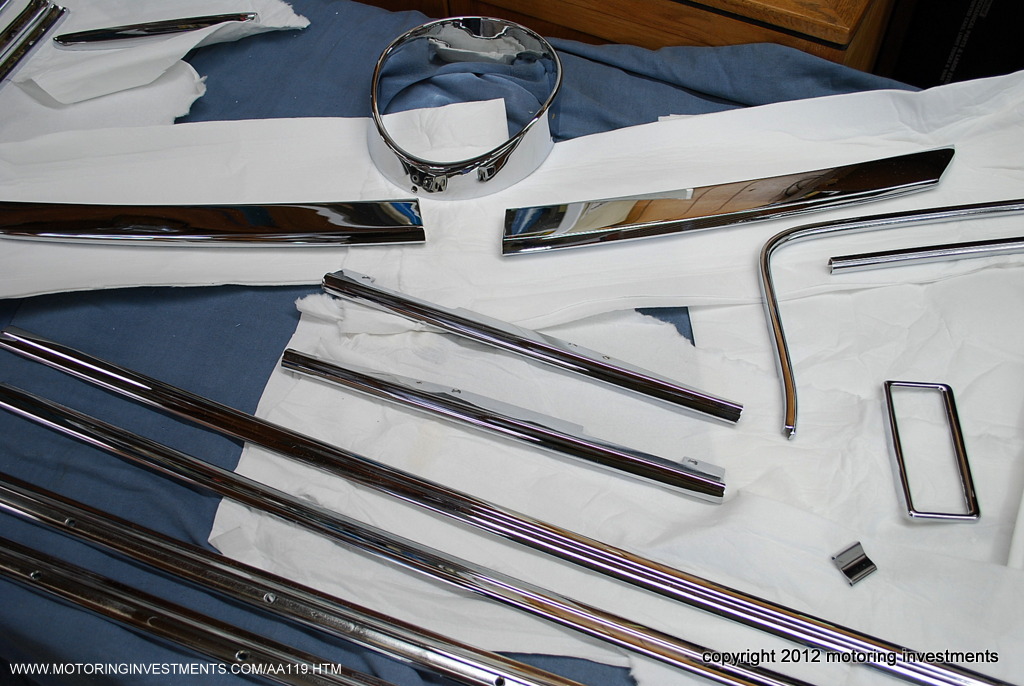
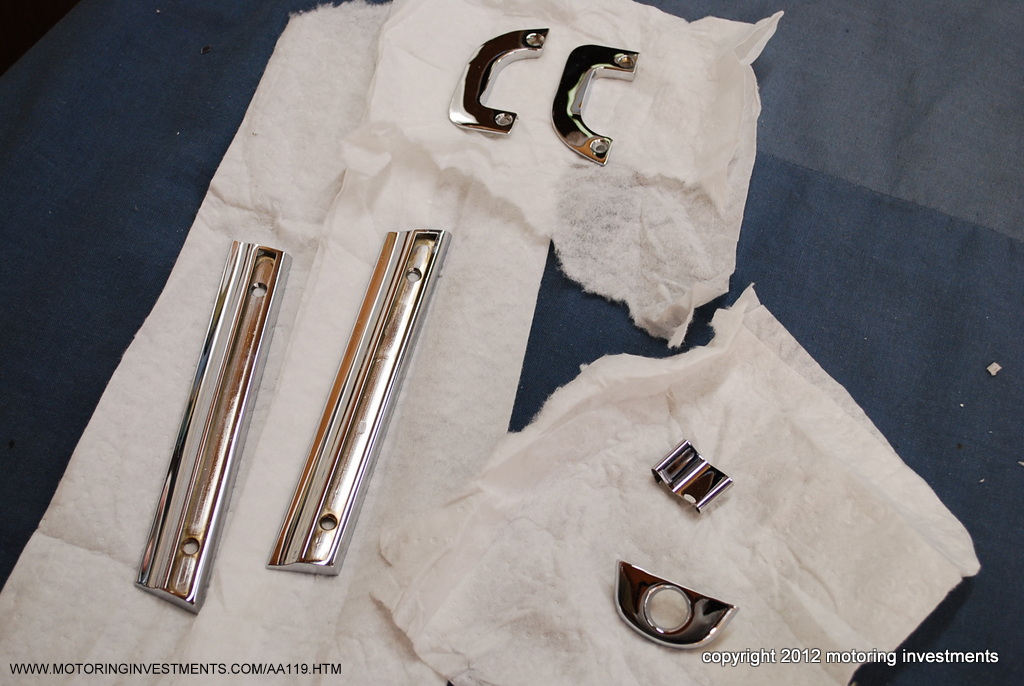
 |
The picture
to the left and right are some examples of the chrome before it is stripped and re-plated. The pictures below are of the exterior and interior chrome after the re-plating process is completed. |
 |
|||
 |
 |
 |
|||
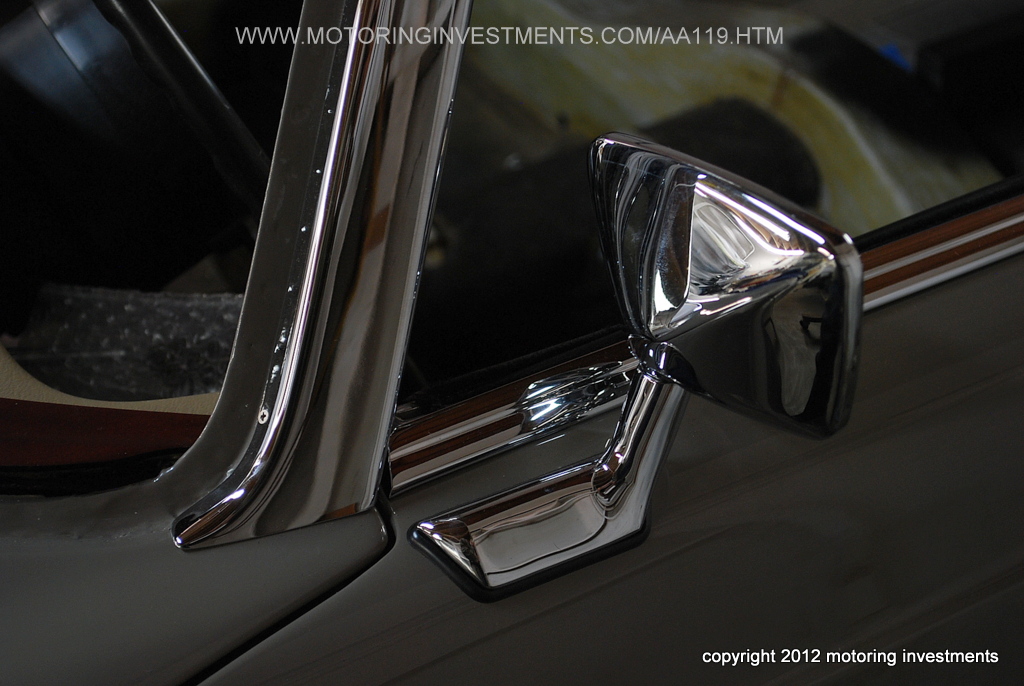
| Pictured
above is the new side rear view mirror from Mercedes. |
The ashtray bezel
is carefully removed and re-plated to look like new. During reassembly the tabs must he heated and bent back very slowly to avoid the risk of breaking the delicate fasteners. |
||||
 |
 |
||||
 |
 |
||||
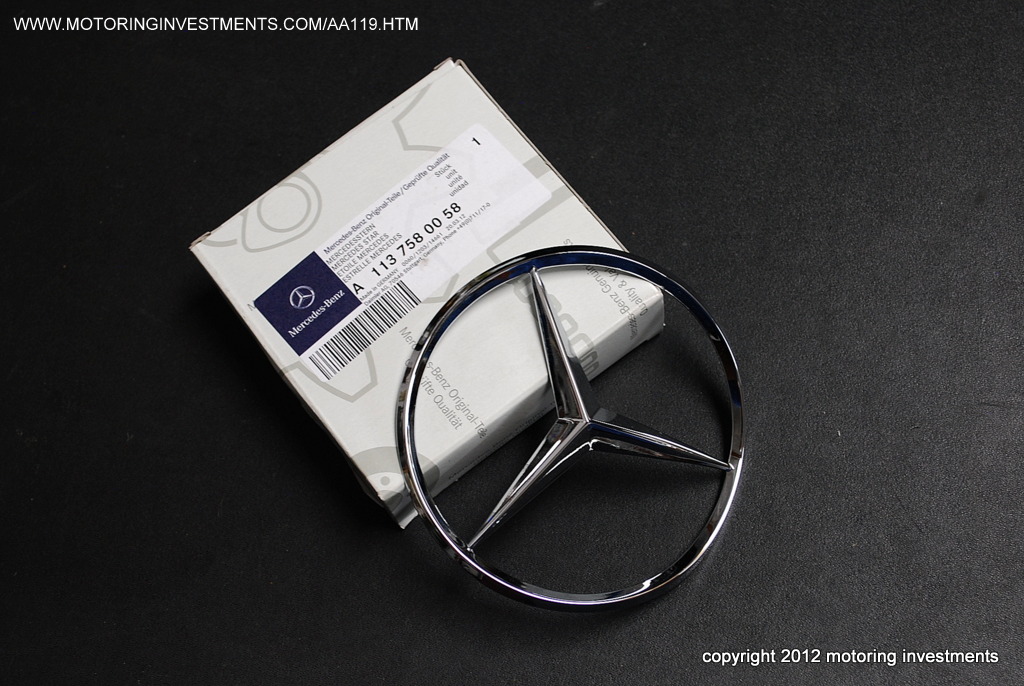
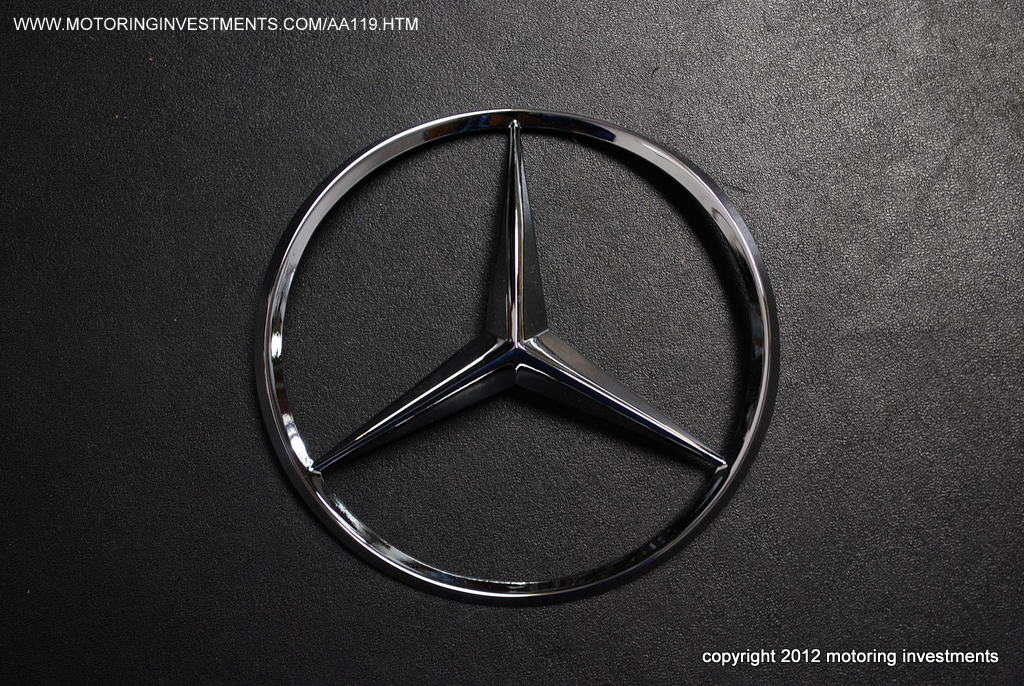
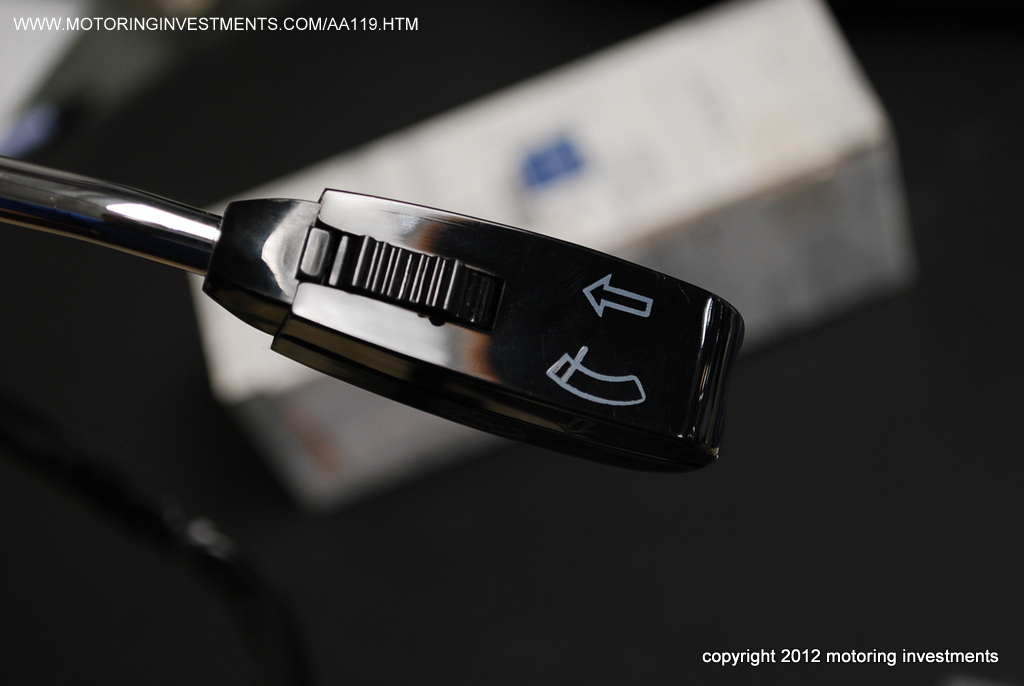
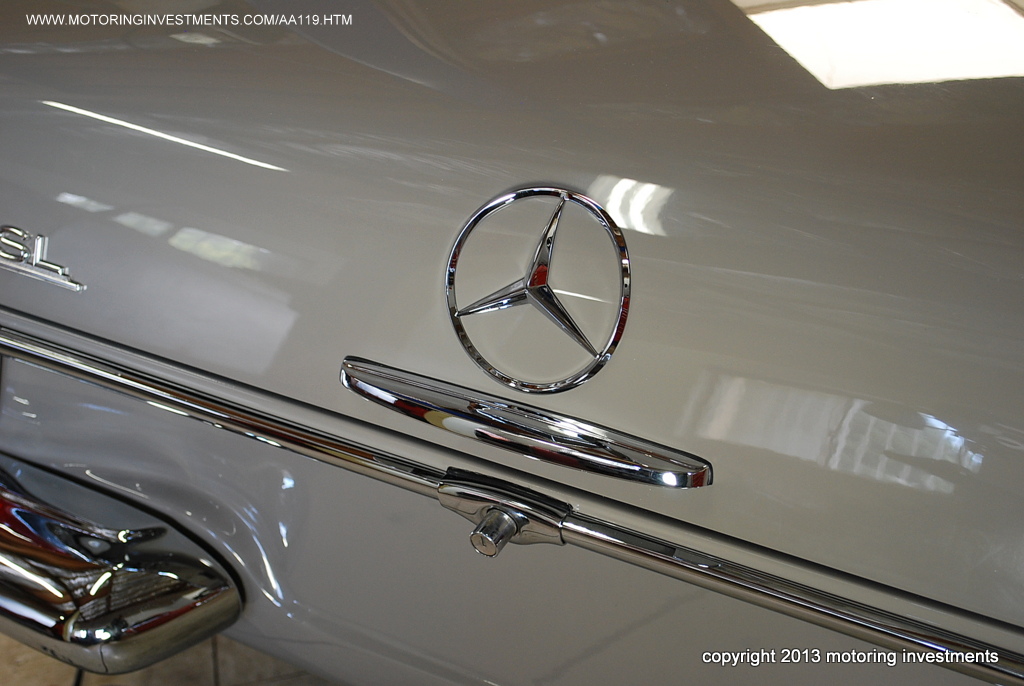
The new trunk star and the new combination switch. The switch controls the windshield wipers, turn signals and washer jets as well. These switches often need replacement from decades of use. |
|||||
 |
 |
||||
 |
 |
 |
|||
 |
 |
 |
|||
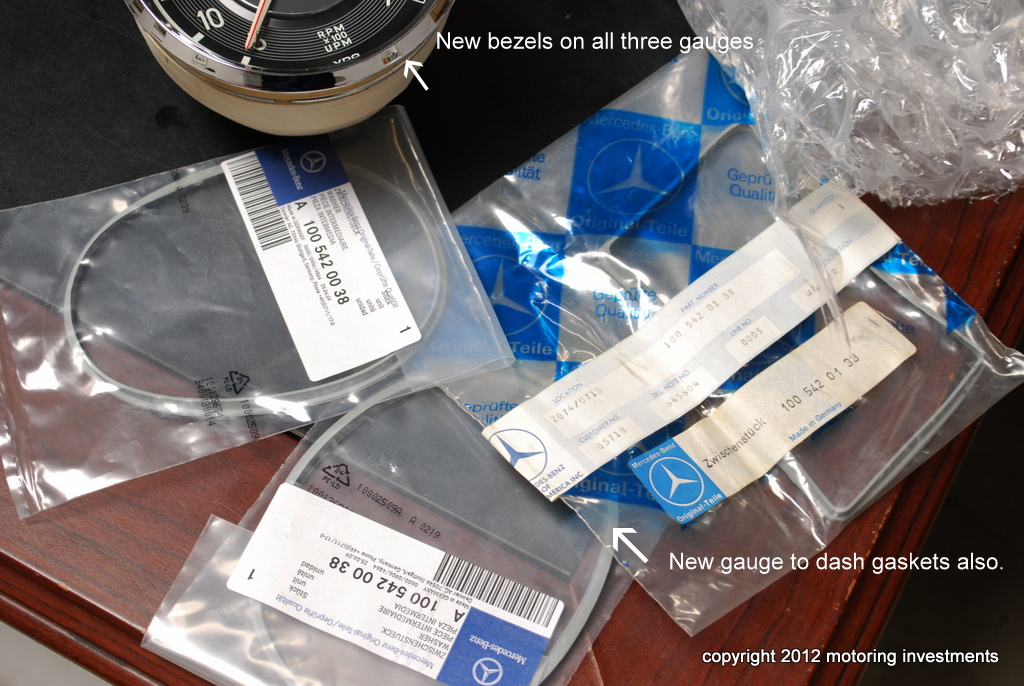
| The gauges, top and
bottom. Before installation and after.... flawless fit. |
All the instrument gauges are serviced and fitted with new chrome bezels along with new gauge seals for an impeccable fit to the dash. |
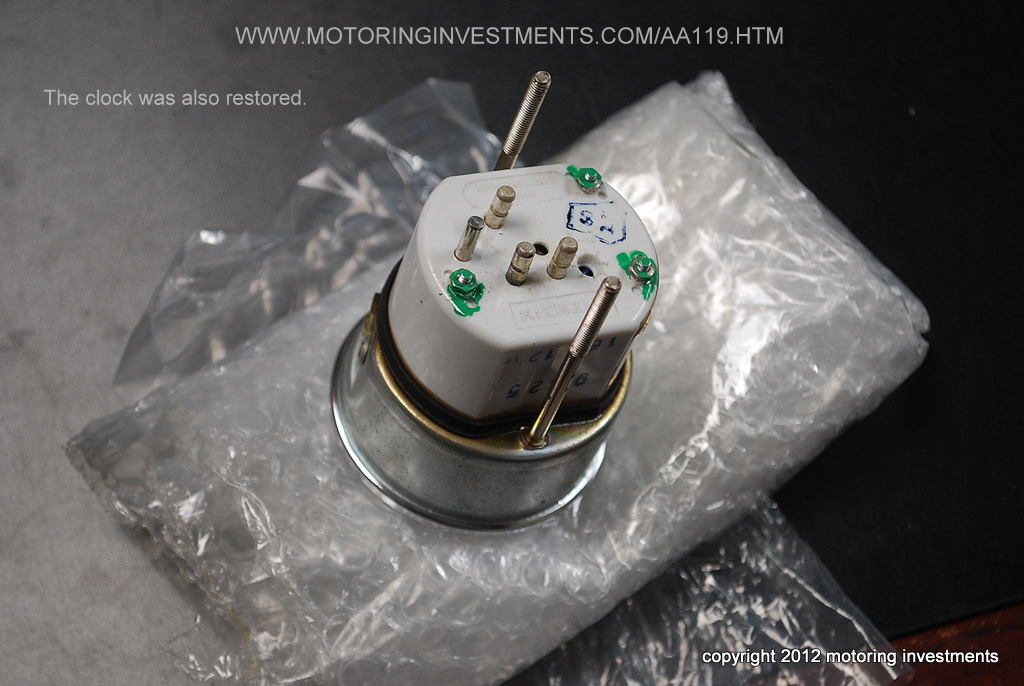
The picture below is a close up of the reconditioned clock. |
|||
 |
 |
 |
|||
 |
 |
 |
|||
 |
 |
 |
|||
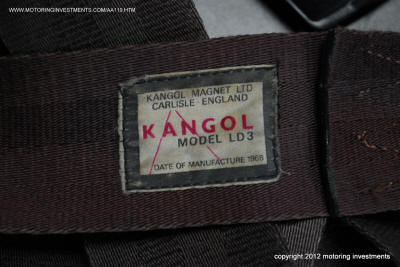
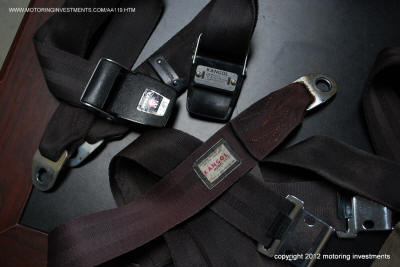
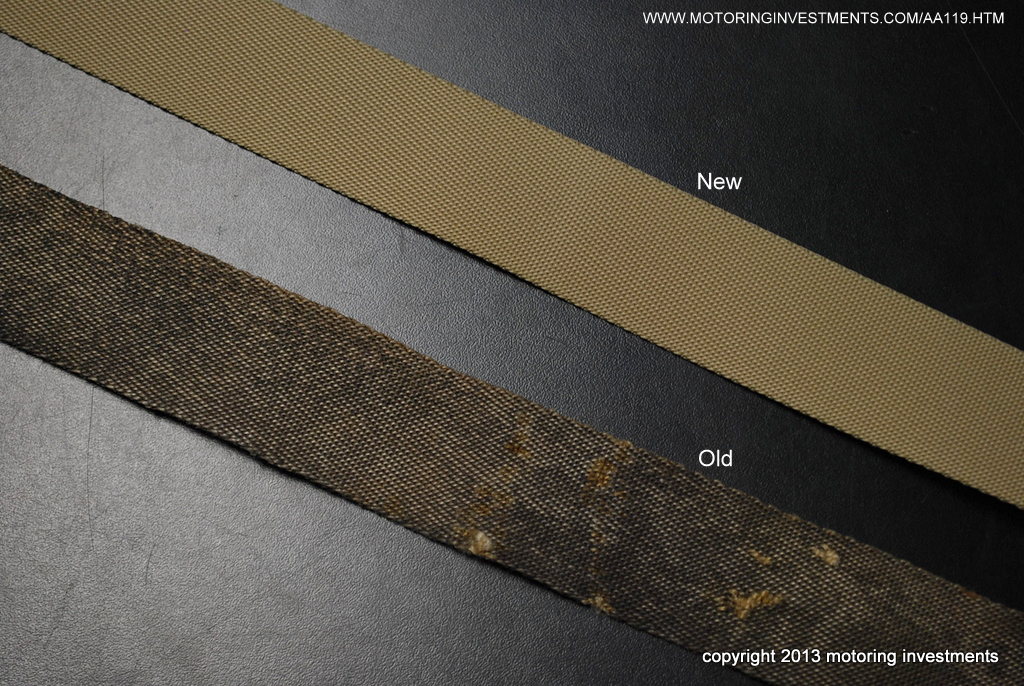
 |
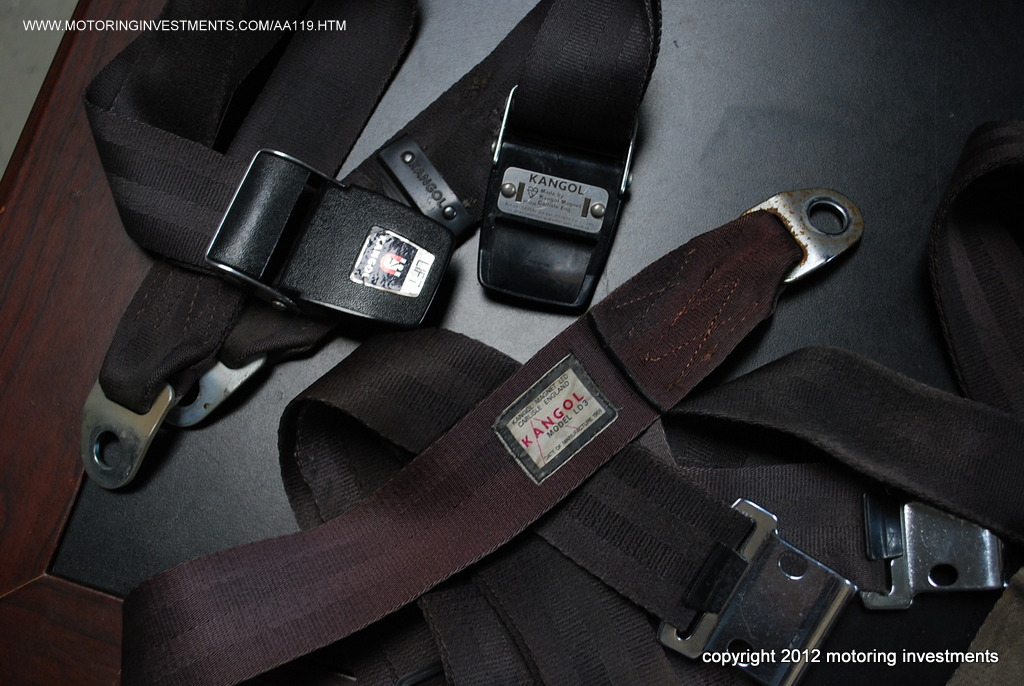
The original
Kangol seat belts are also restored to look like new. They will be re-webbed and the chrome is re-plated to look and feel fresh. We duplicate every detail, from re-applying the new decals on the buckles to re-stitching the original labels. |
 |
|||
 |
 |
||||
 |
 |
 |
|||
 |
 |
 |
|||
 |
 |
 |
|||
 |
 |
 |
|||
 |
The pictures to the left and right display the sheet metal screws installed into the rocker panel covers. The hardware is replaced with new fasteners. |
 |
|||
The pictures below are of the reconditioned clock and dash going together. |
|||||
 |
 |
 |
|||
 |
 |
 |
|||
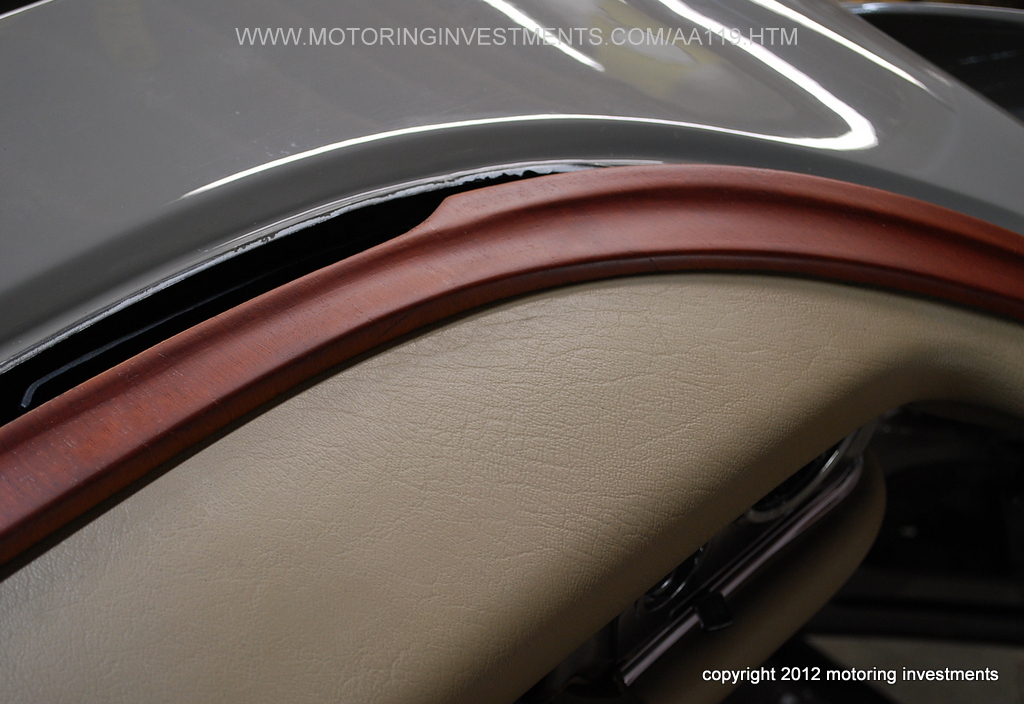
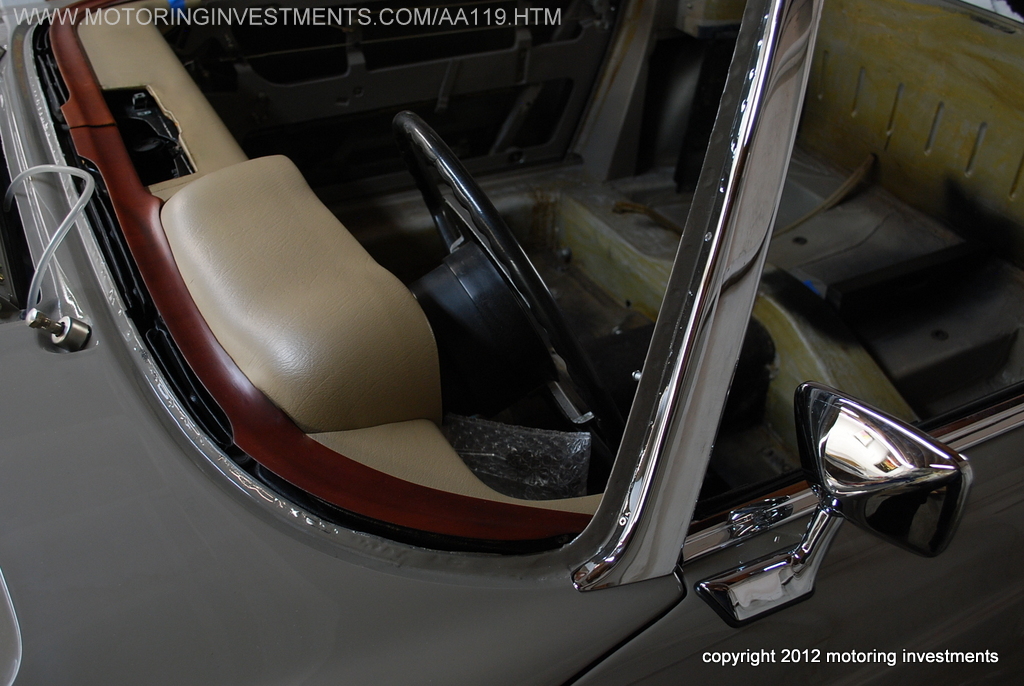
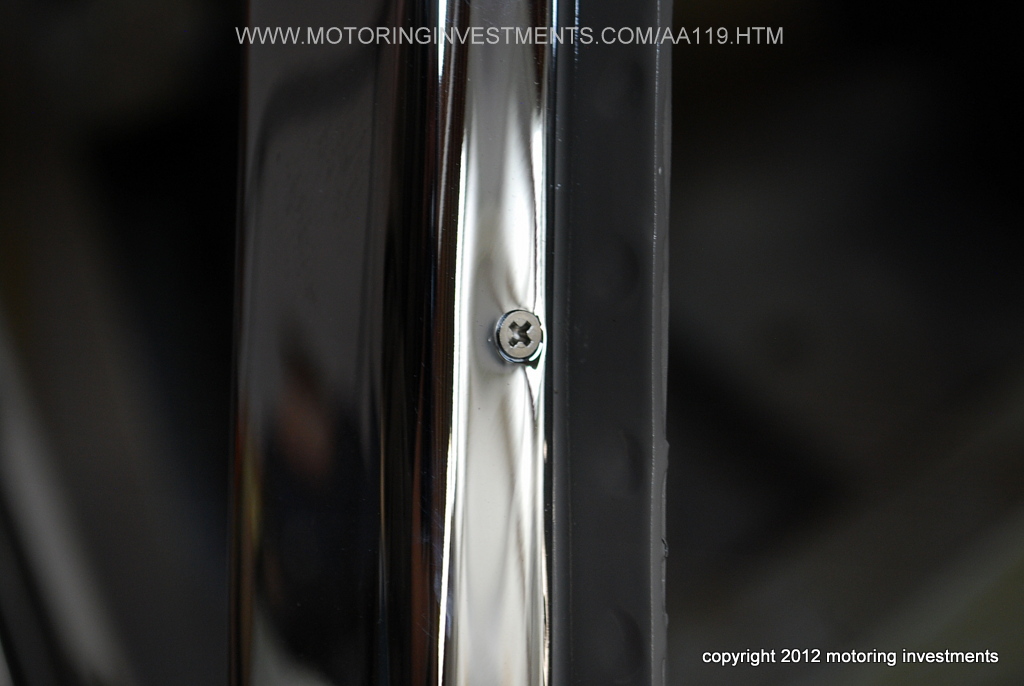
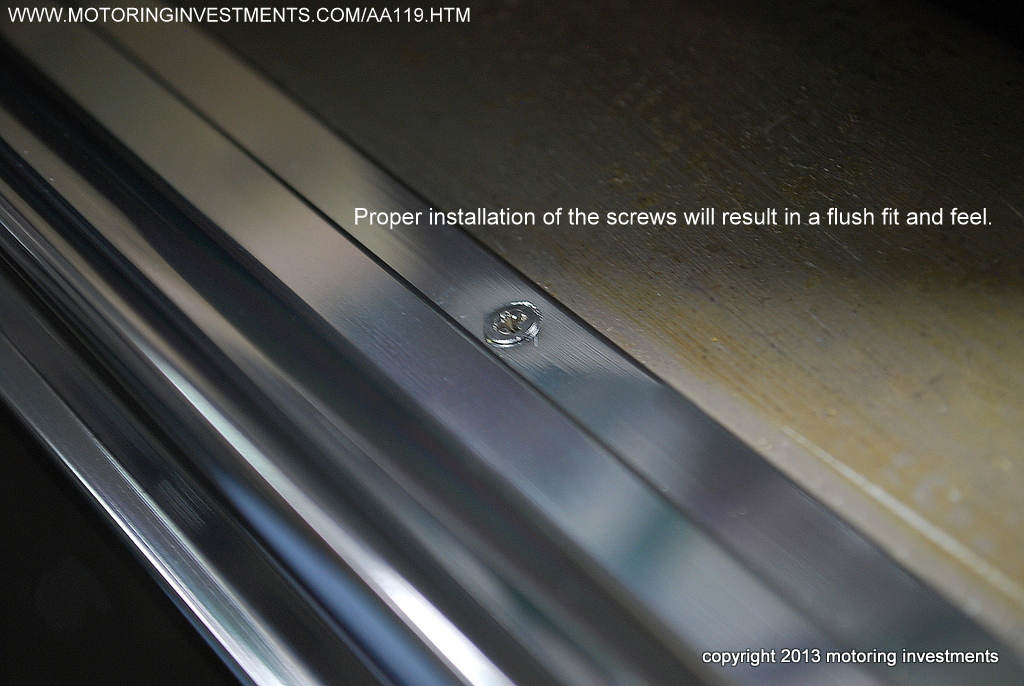
The pictures above and below show us the progression on the topside of the dash. The wood has also been restored and re-finished to the factory correct look. Below, we have pictures of the chrome being installed. Notice the A-pillar chrome trims and the screws. They must sit flush into the body and not protrude out from there respective spot. |
|||||
 |
 |
 |
|||
| The pictures above and
below display the exact fit the restoration is following. All chrome, screws, wood, dash panels, etc. fit perfectly. |
Another close up
view of the screws. To fit like factory, a lot of care goes into installing the fasteners. |
||||
 |
 |
 |
|||
The pictures below are of the interior just before carpet and interior panels installation. We duplicate the satin black paint on the seat pedestals. The factory did this to hide the body color in the cockpit. |
|||||
 |
 |
 |
|||
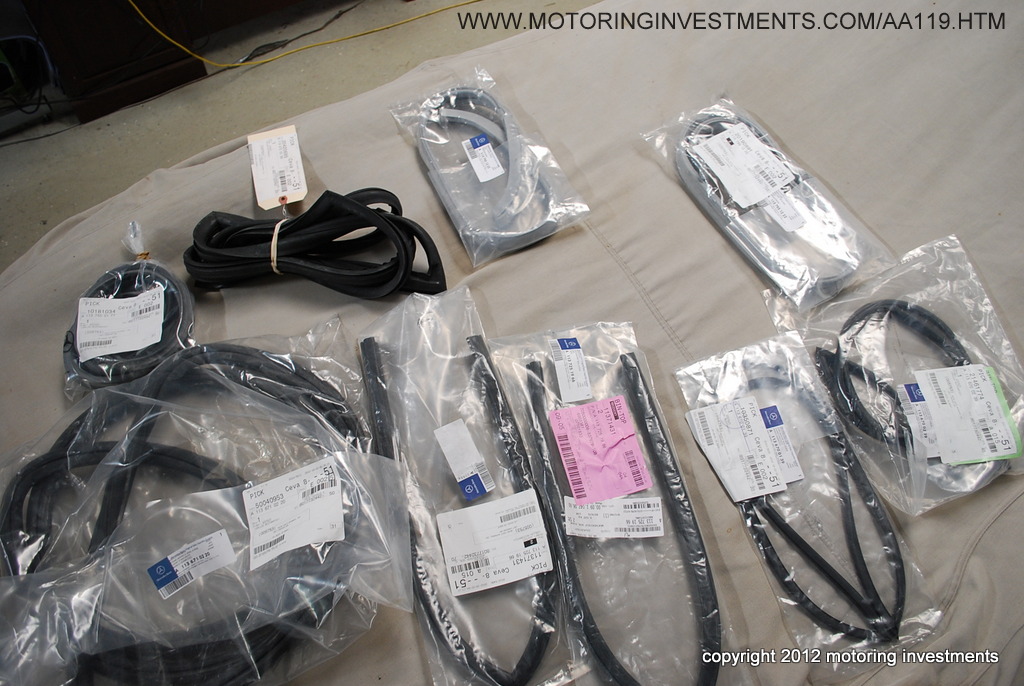
 |
All new
weather seals, temperature levers, and body seals. All OEM Mercedes Benz seals and parts to insure of a proper fit. |
 |
|||
 |
 |
 |
|||
 |
 |
 |
|||
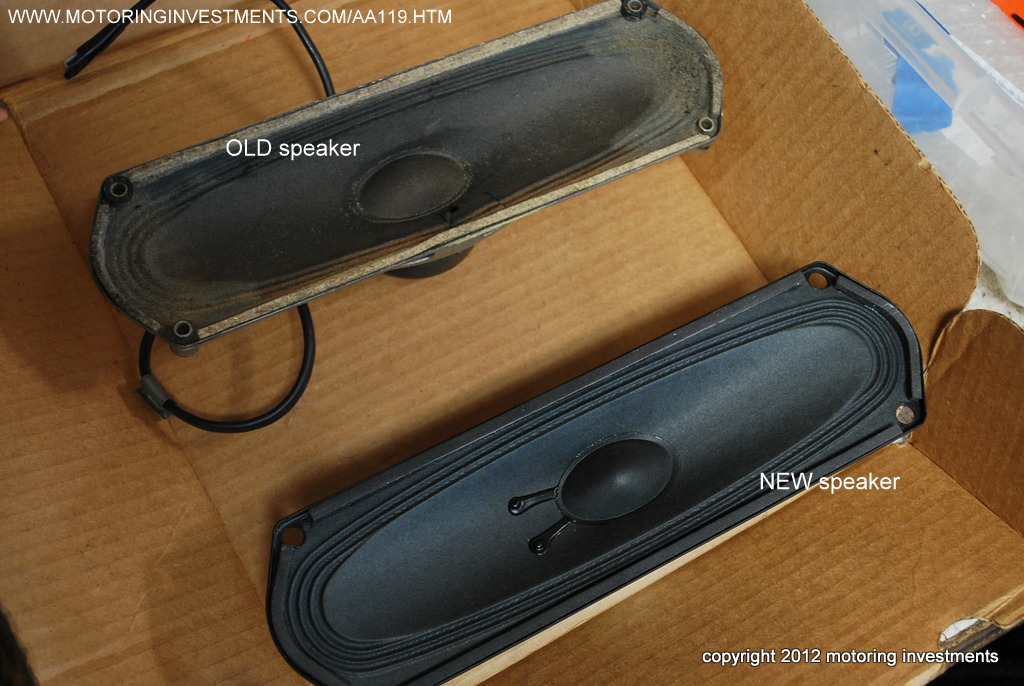
The oval speaker from the topside of the dash is replaced with a new one. |
|||||
| Re-trimming the rear ledge of the hardtop | |||||
 |
 |
||||
 |
 |
||||
.JPG) |
.JPG) |
||||
.JPG) |
.JPG) |
.JPG) |
|||
|
The undercarriage pictures below show the exhaust parts as well as hanging the system in place. |
|||||
 |
 |
 |
|||
|
|
The photos to
the left display the exhaust manifolds before being sent out for coating. The photo on the right shows the manifolds coated in a high grade aerospace ceramic finish. This process lowers the temperature in the engine bay and extends the life of neighboring components. |
 |
|||
 |
The pictures above and below are of the exhaust system parts. The exhaust system is first hung in place then removed to be welded together for an exact fit. The underside heat shield (pictured on the left) that protects the floor from the exhaust temperature is in place. |
 |
|||
.JPG) |
 |
.JPG) |
|||
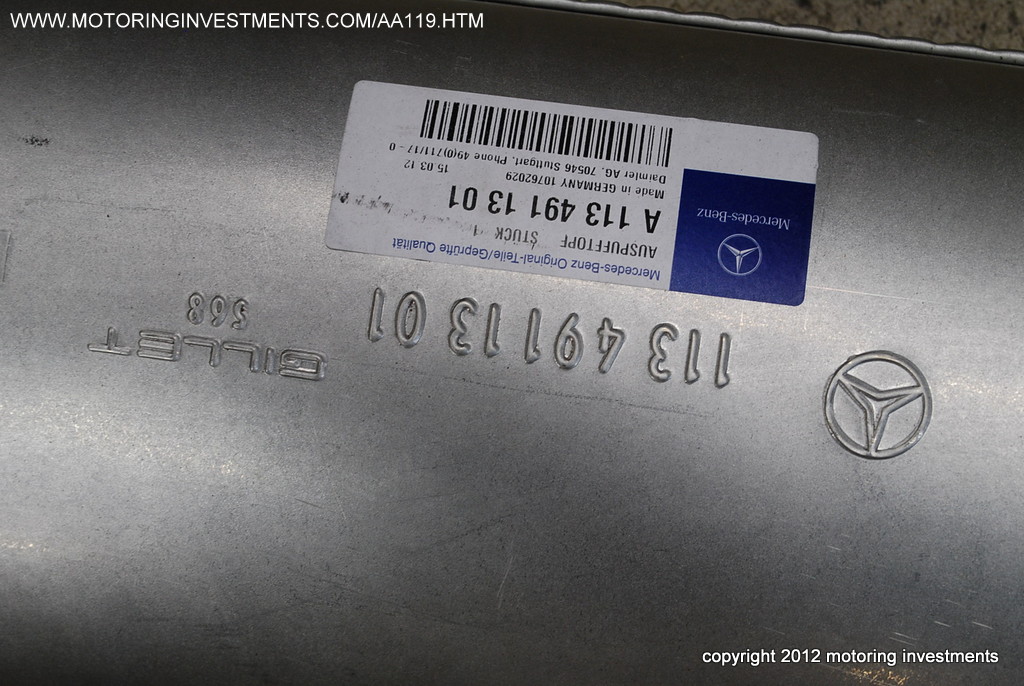
| All OEM factory correct replacement parts. | |||||
.JPG) |
.JPG) |
 |
|||
Notice the lines of the exhaust pipes and their relationship to the rest of the undercarriage. A perfect fit. |
|||||
 |
 |
||||
.JPG) |
.JPG) |
.JPG) |
|||
.JPG) |
.JPG) |
.JPG) |
|||
 |
 |
 |
|||
 |
 |
||||
 |
 |
||||
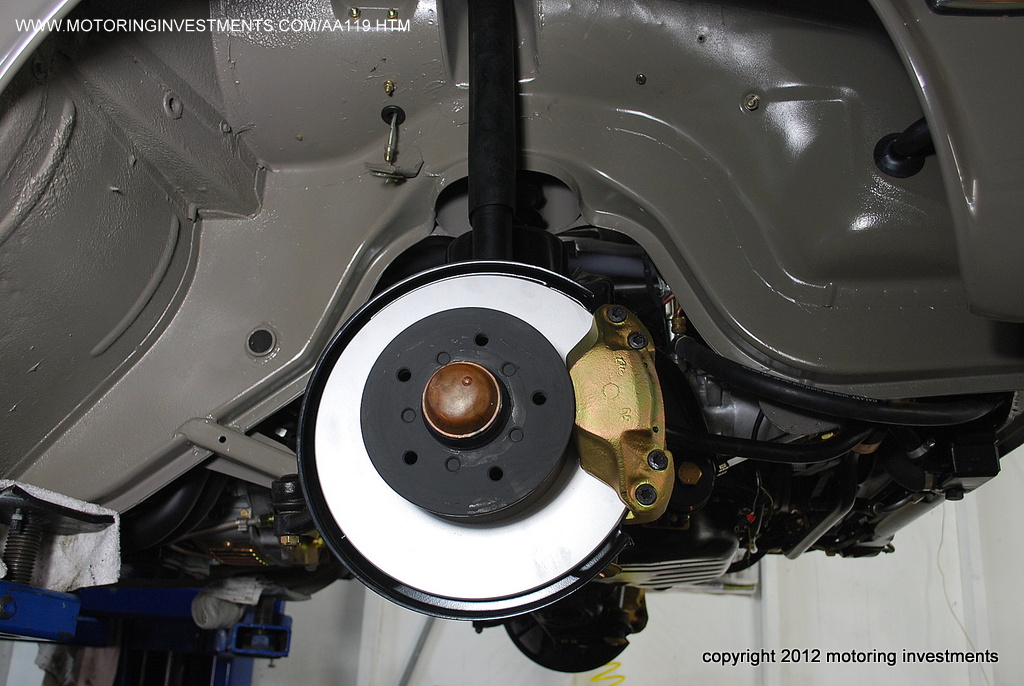
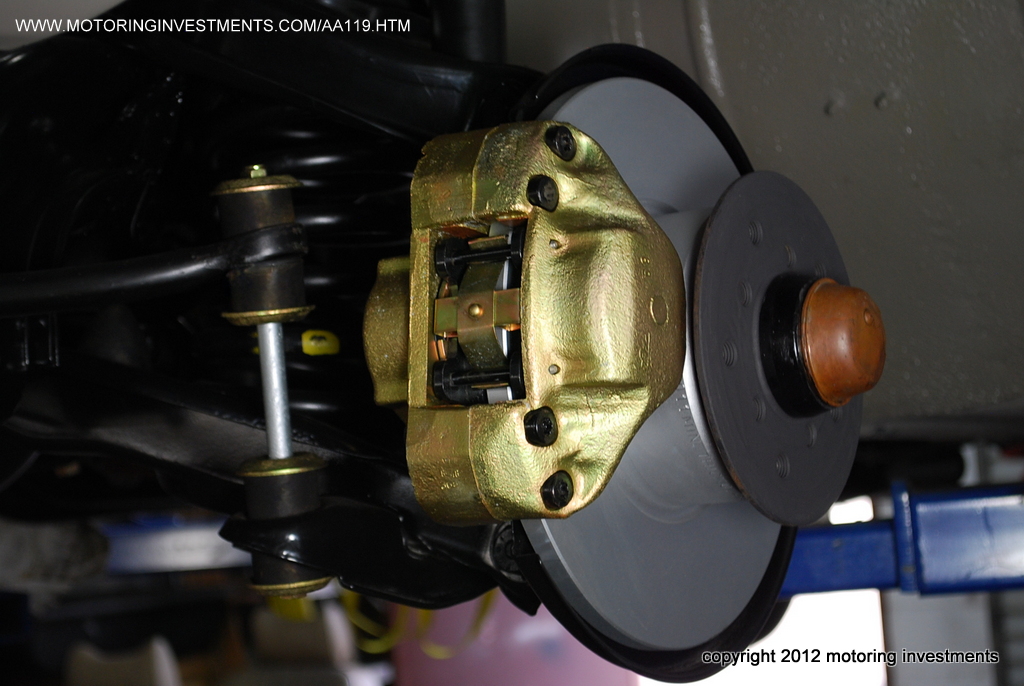
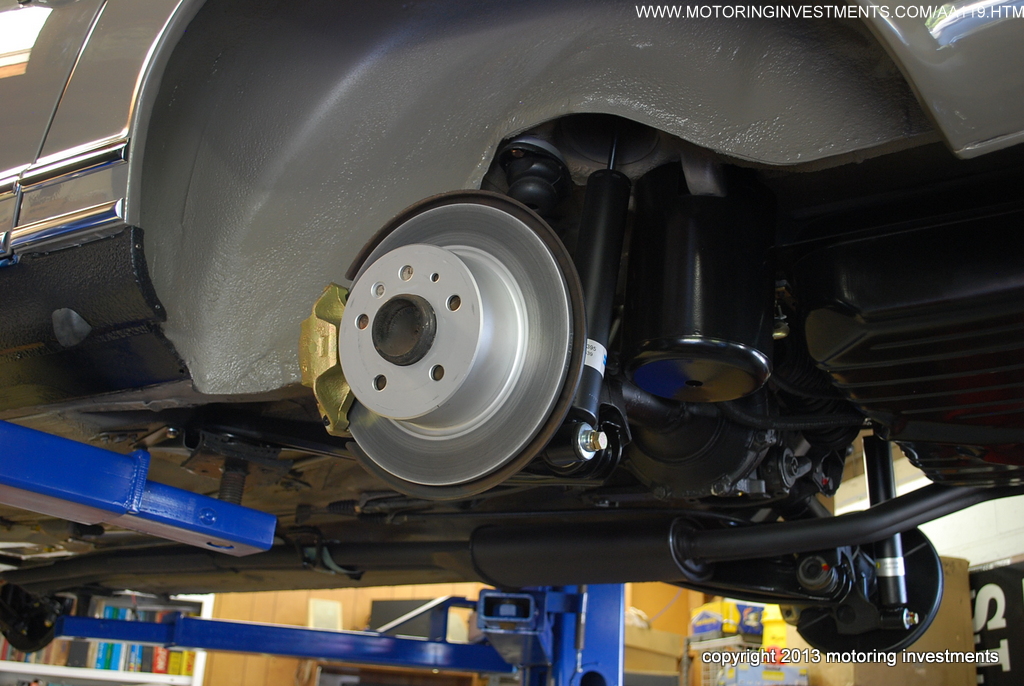
The pictures above are of the front brake discs and calipers. The photos below show us the rear brake discs, calipers and wheel wells. |
|||||
 |
 |
||||
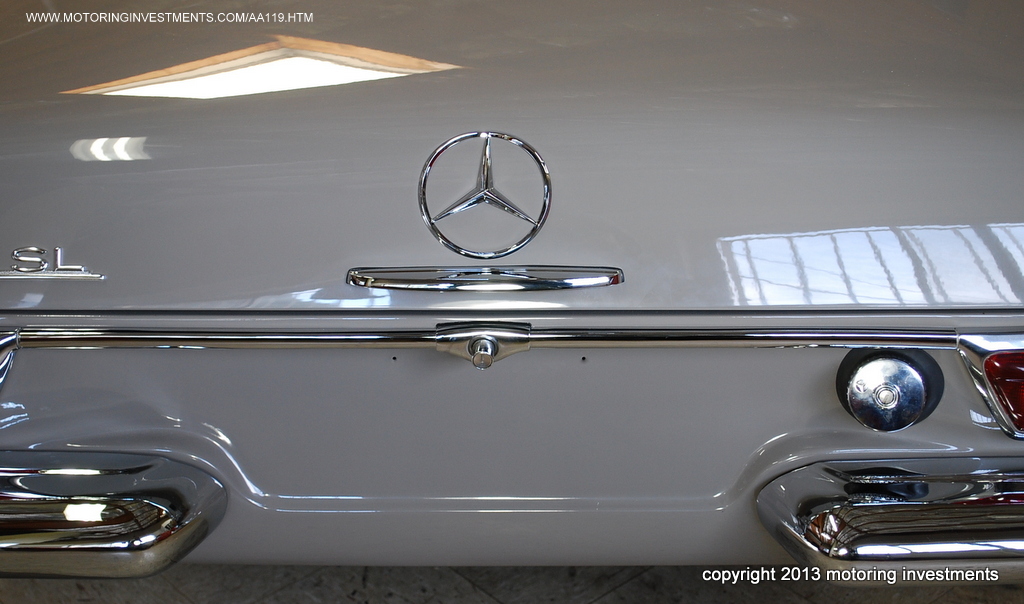
The picture below shows us the rear deck lid in the completed state. |
|||||
 |
 |
 |
|||
 |
 |
||||
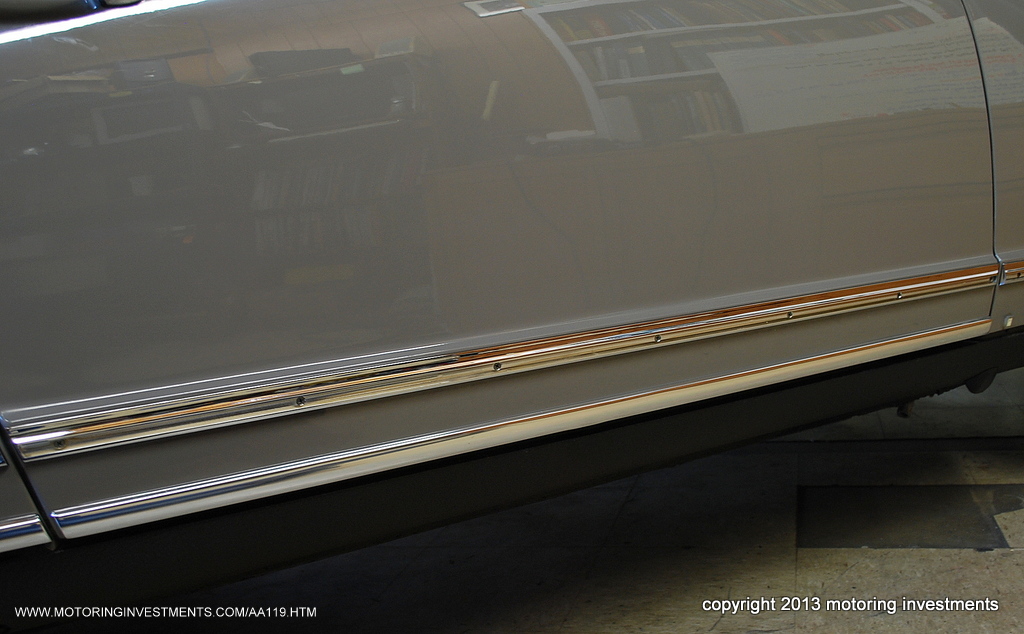
The pictures above display the chrome body moldings. These are re-plated and installed with all new screws and hardware. Notice the picture below, the screws sit flush into the chrome trim. The rubber profile, next to be installed, will now sit flush into the trim channel. |
|||||
 |
 |
||||
|
|
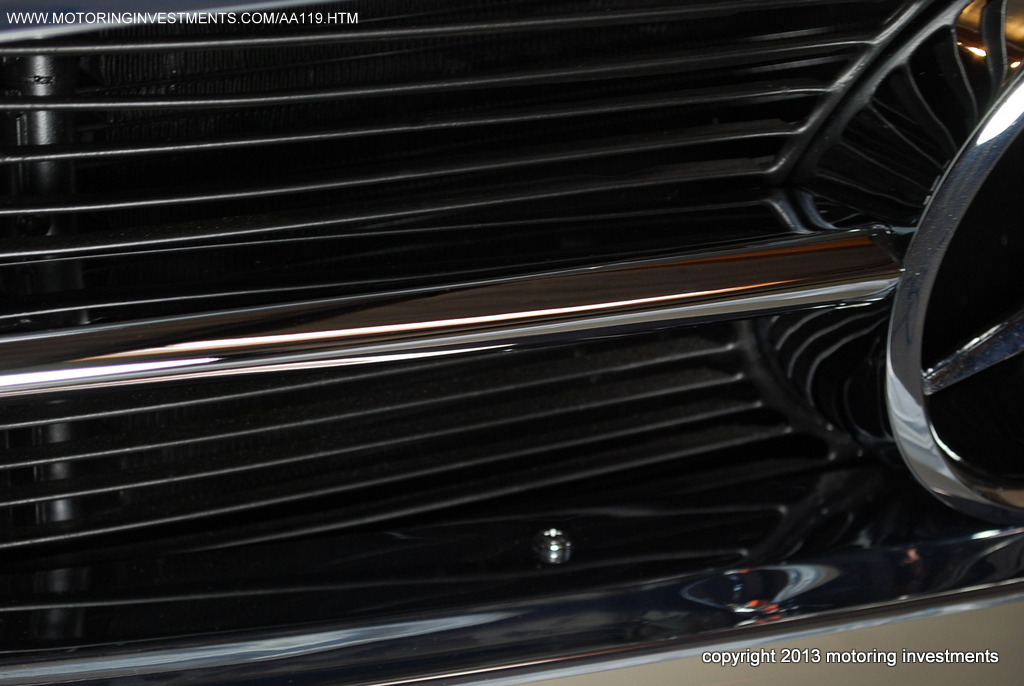
The photos to
the left and right are of the bug grills, before we refinished them. |
|
|||
 |
 |
 |
|||
The photos above are of the bug grills refinished and installed into the car. |
|||||
 |
 |
 |
|||
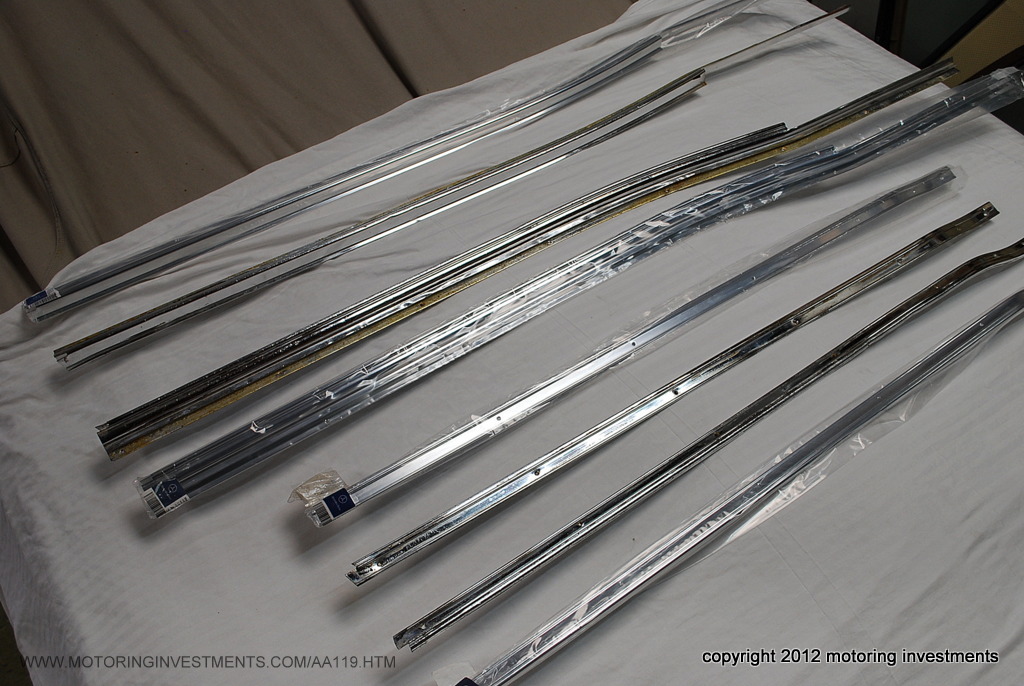
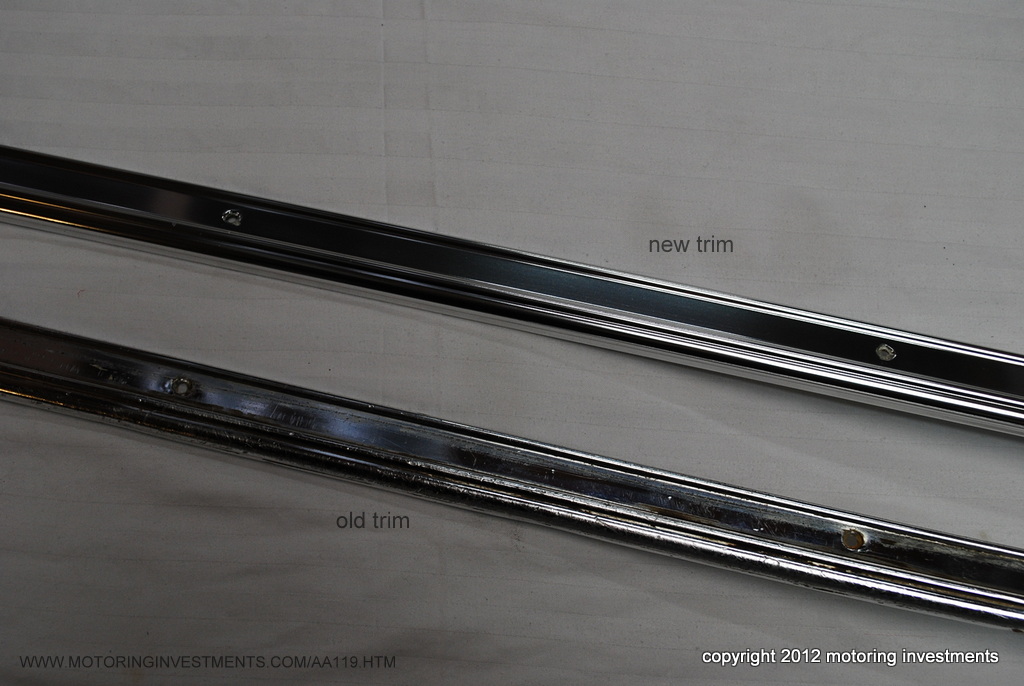
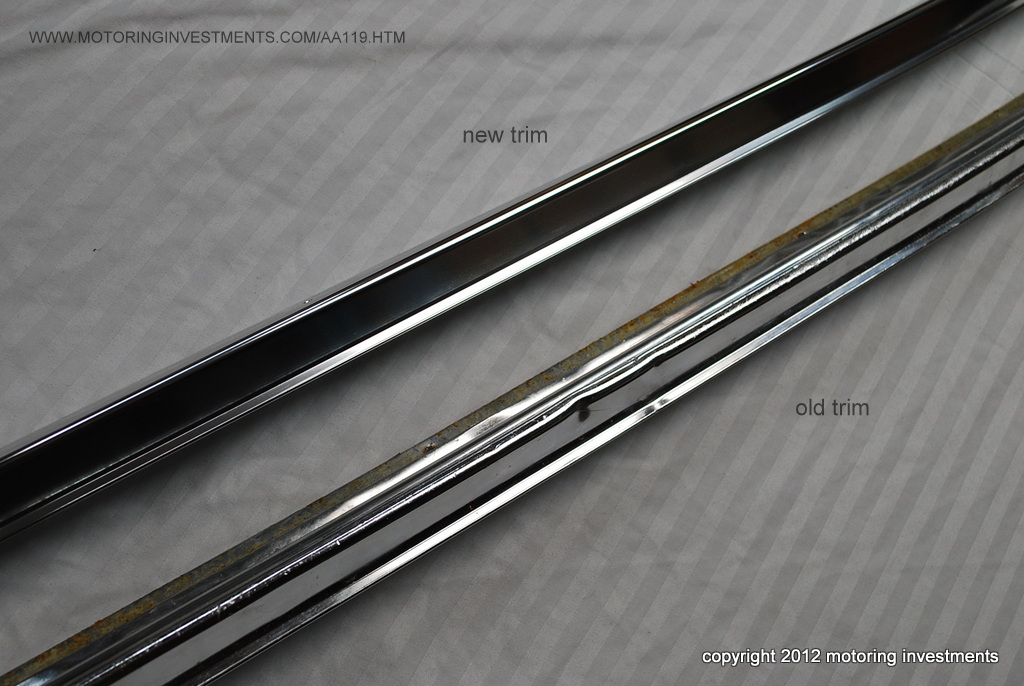
| The
surrounding photos are of the door threshold trim sets, both new and old. |
|||||
 |
 |
 |
|||
 |
 |
 |
|||
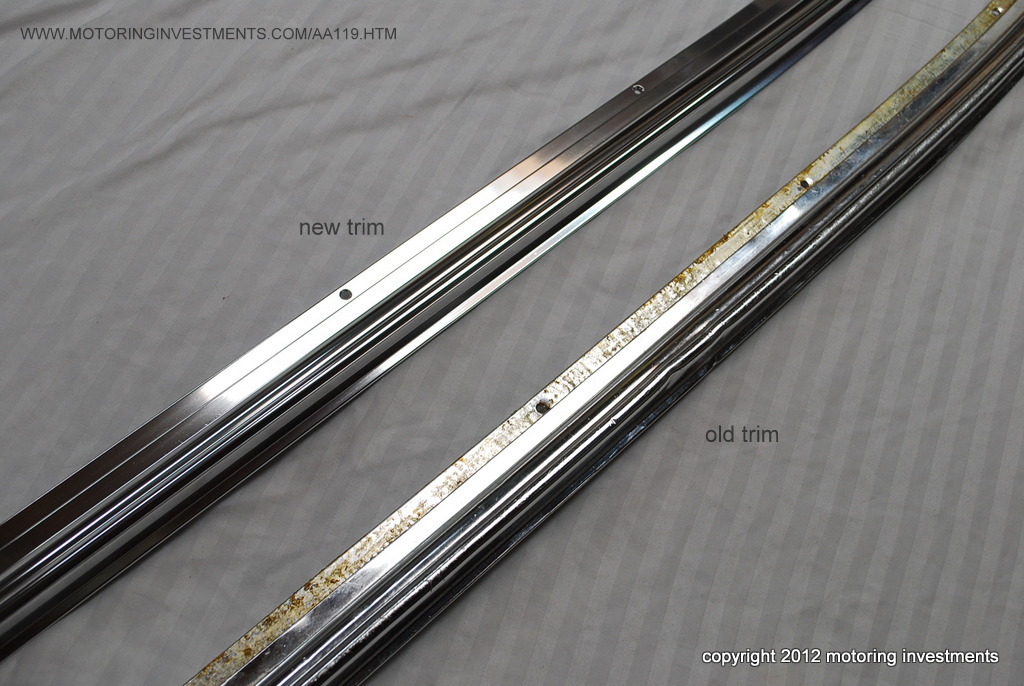
| Spacer washers behind the trim | When preparing the trims for installation we carefully remove the washers behind the original outer trims. Their purpose is to provide spacing from the body to the rocker panel covers. |
The above picture is a close up of a new trim with washer in place along with an old trim. |
|||
 |
 |
 |
|||
 |
The caulking
applied to the chrome for the hard top needs to be spread evenly and once installed, remove any excess. The caulking assures a snug fit and proper protection against the elements. |
 |
|||
 |
 |
 |
|||
 |
 |
 |
|||
 |
 |
 |
|||
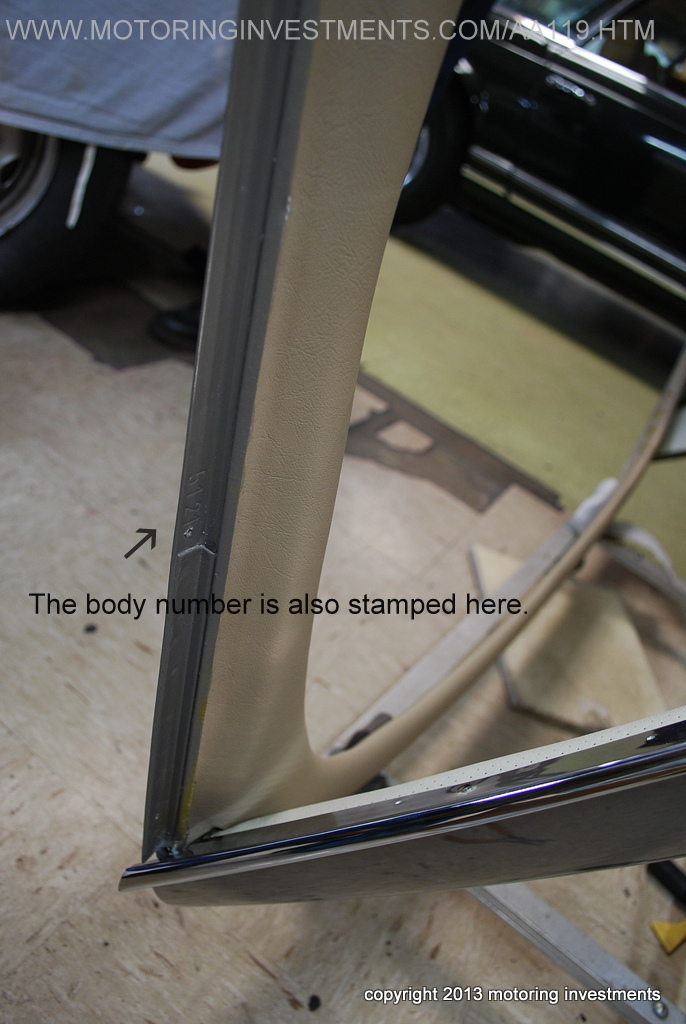
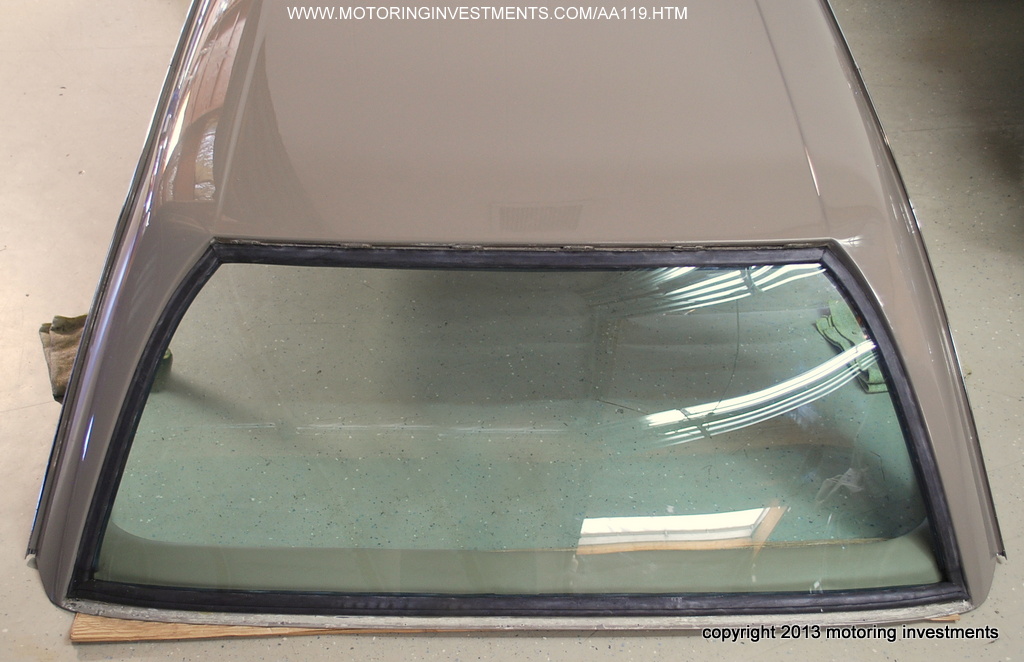
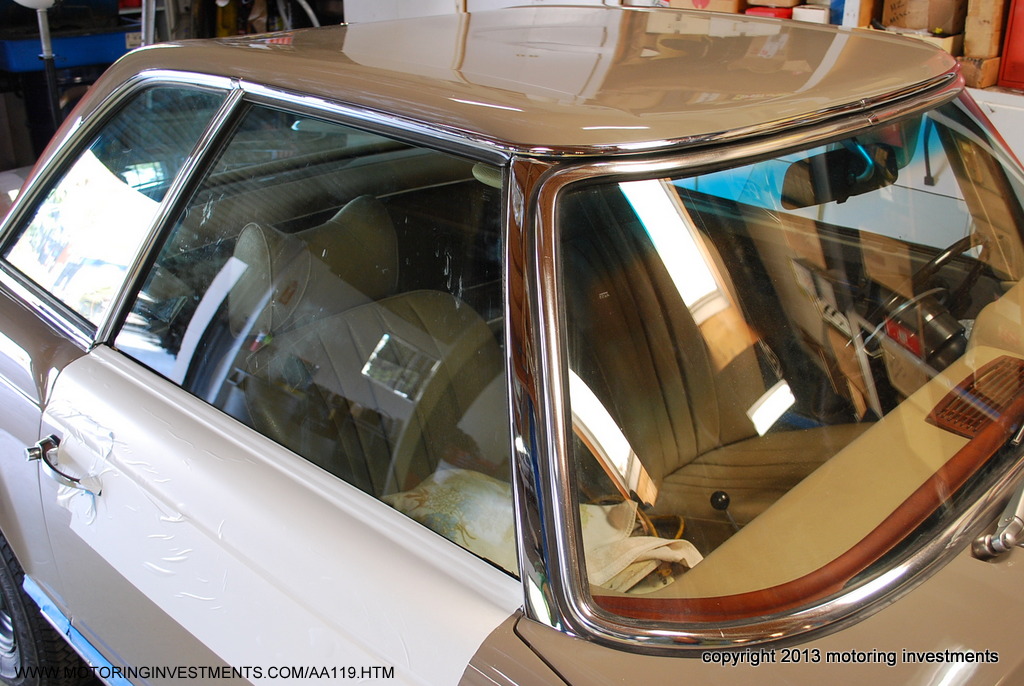
The body number is also stamped on the bottom edge of the hard top quarter window. |
|||||
 |
 |
 |
|||
| The picture above show the molding just installed, notice the space? | |||||
 |
 |
||||
The pictures above show the moldings with their respective joiner clips in place. These clips finish the trim assembly process to give the chrome a seamless look. |
|||||
 |
 |
||||
 |
 |
||||
| The photo above shows the precise fit. | |||||
 |
 |
||||
|
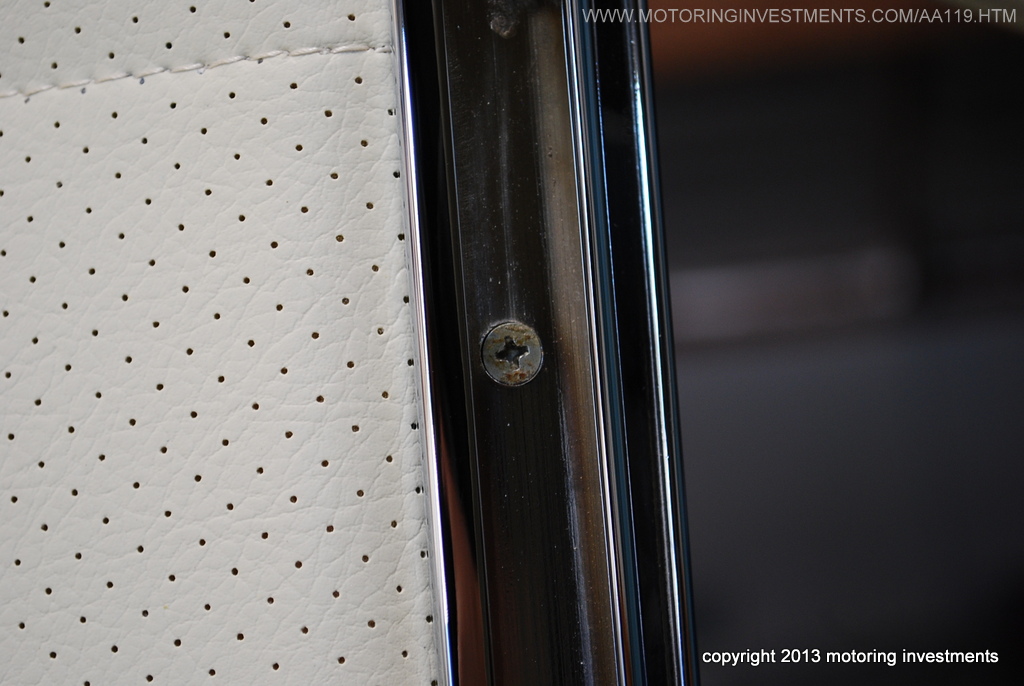
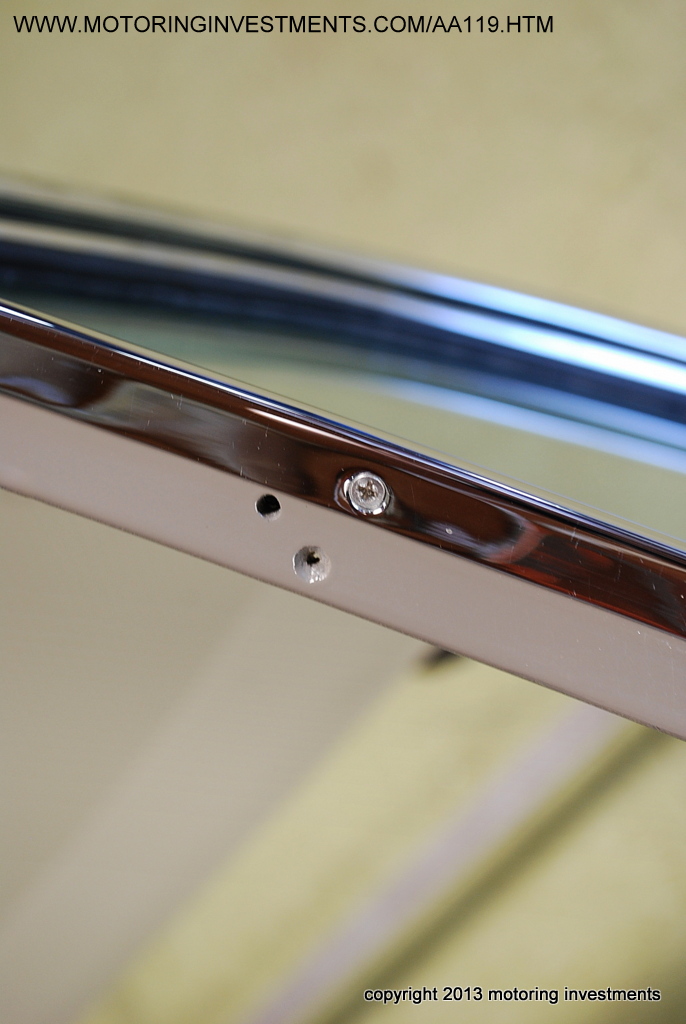
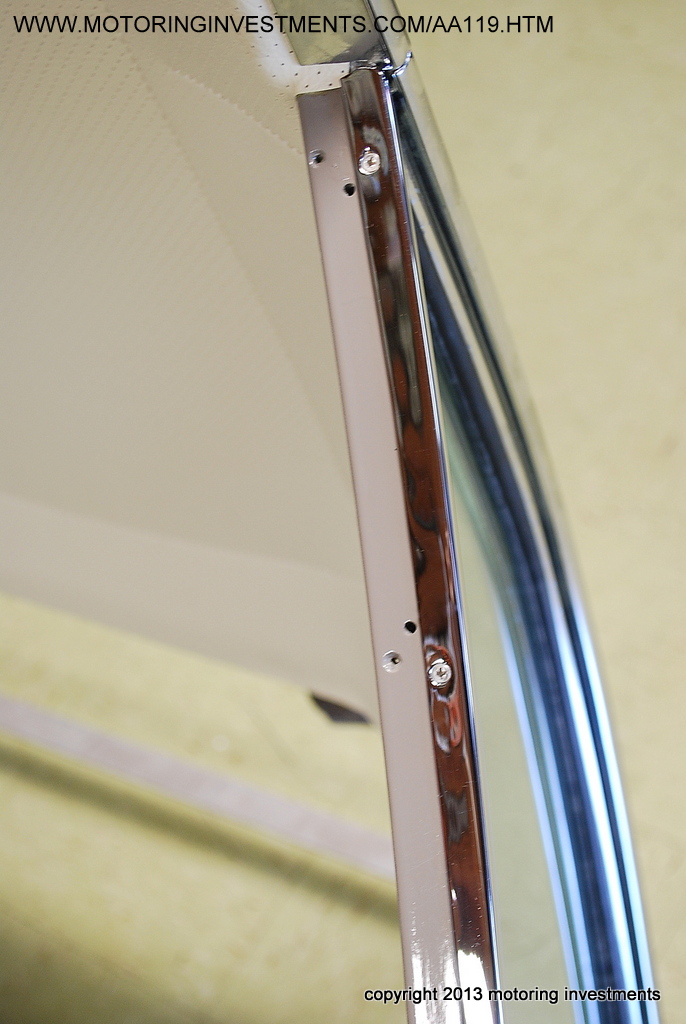
The picture above is displaying the chrome trim installed and fitted with the rubber profile along the inside of the glass. This rubber profile helps centralize the trim installation and seal up from any outside elements. |
The photo displayed below highlights the exterior trim being installed onto the hard top. Notice the chrome lip that has to sit flush into position? |
Below is a close up photo of the correct type of screws to use while completing the hard top chrome trim installation. Notice the flushness in relation to the chrome and body? They must fit perfectly flush to the body and not stand proud from the channel itself. |
|||
 |
 |
 |
|||
|
The pictures displayed above are of the hardtop quarter glass. These are especially difficult to install. Start the install of the glass and new seal at the bottom edge and work up the glass to the topside. Notice the protective layer we apply to help guard the headliner while glass installation is taking place? The seatbelt pictured below, are restored and ready for installation. All buckles, decals, chrome, and labels have been renewed or replaced. |
|||||
 |
 |
||||
 |
 |
||||
 |
 |
||||
| With no rear glass | With the glass installed | ||||
 |
 |
||||
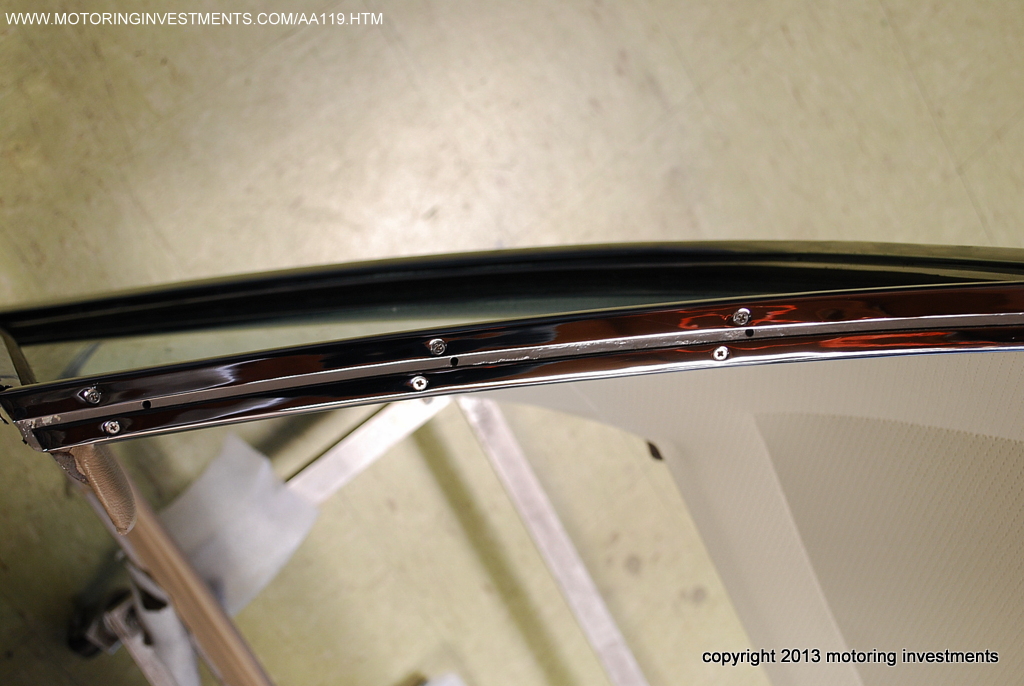
| These pictures above show the rear chrome trim being installed. | |||||
 |
 |
||||
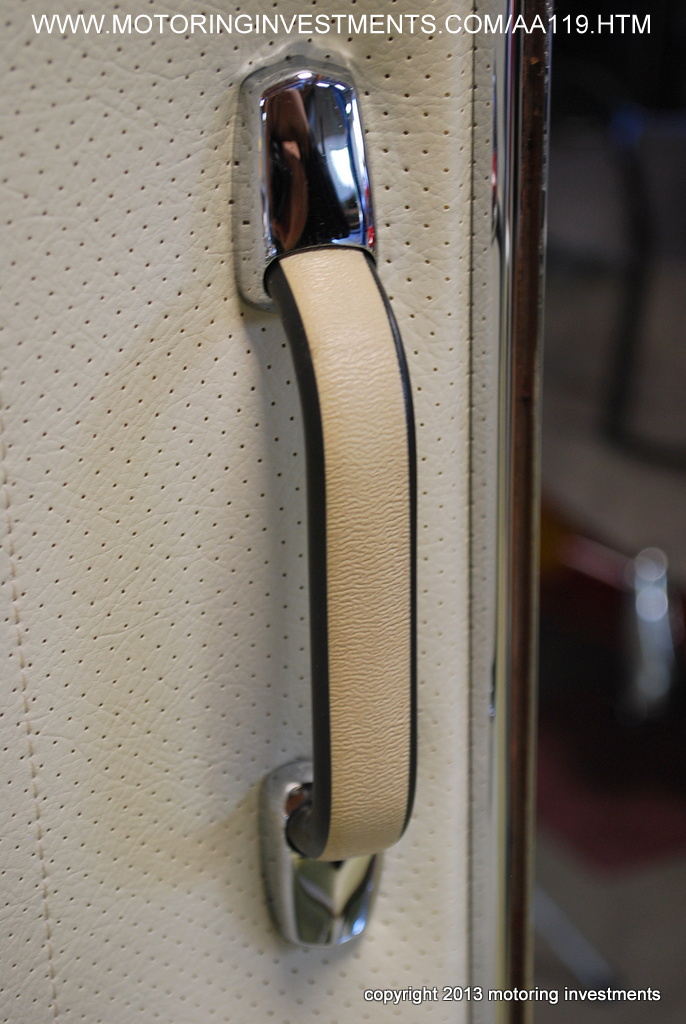
| The hard top handle bases are also re-plated and feel like new. | |||||
 |
 |
||||
|
The photo above shows the hard top side
latches. These help secure the hard top onto the body. All new hardware and washers are used to restore the latches. |
|||||
 |
 |
||||
| BEFORE | AFTER | ||||
 |
 |
||||
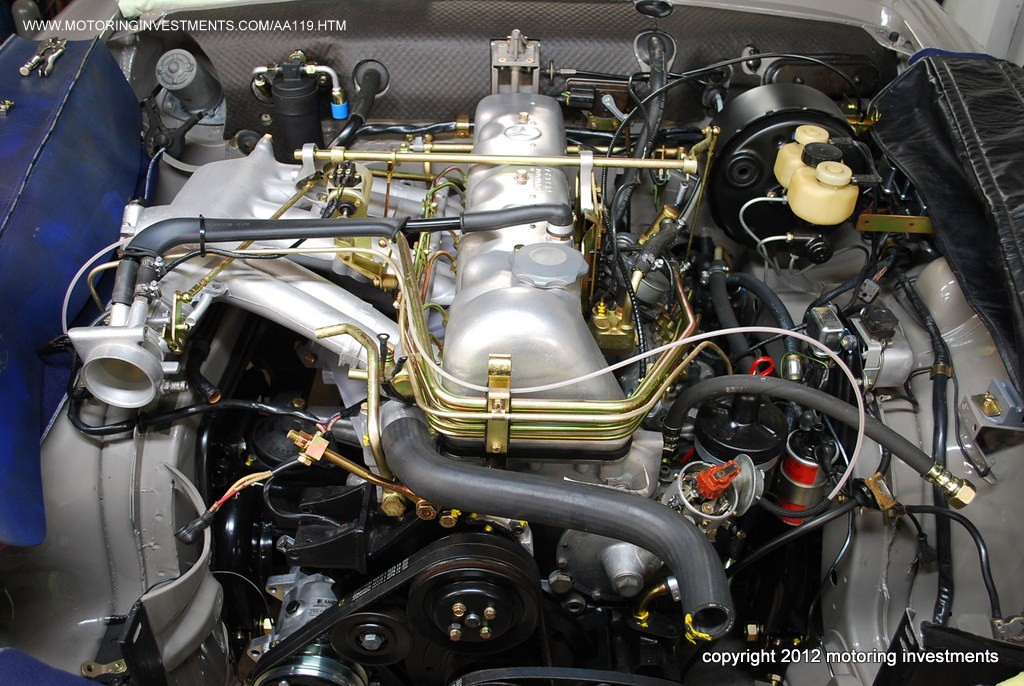
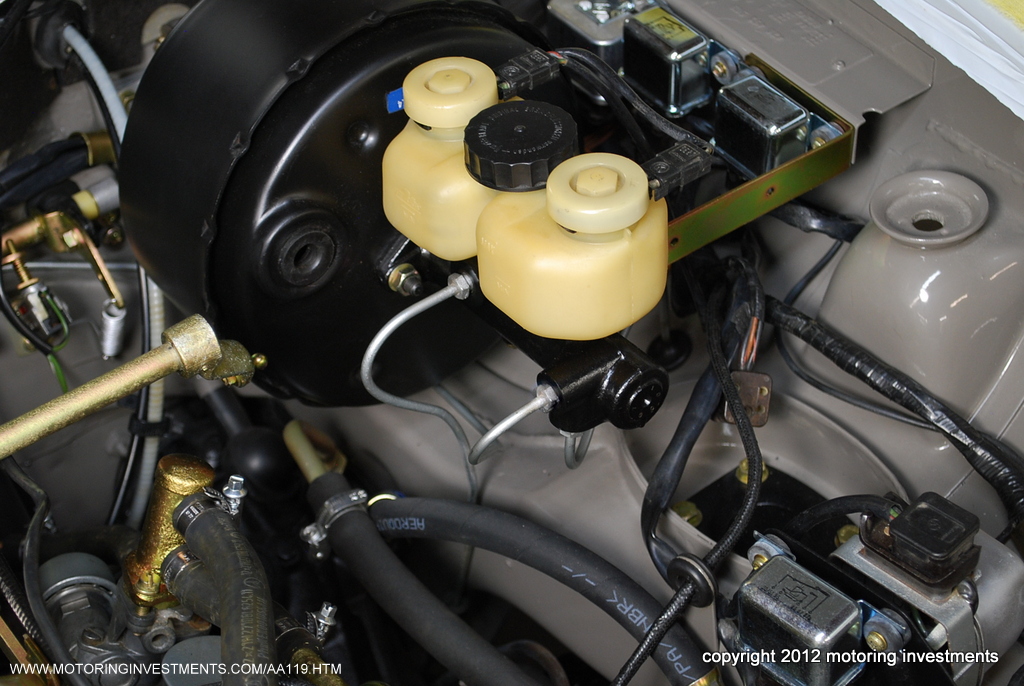
|
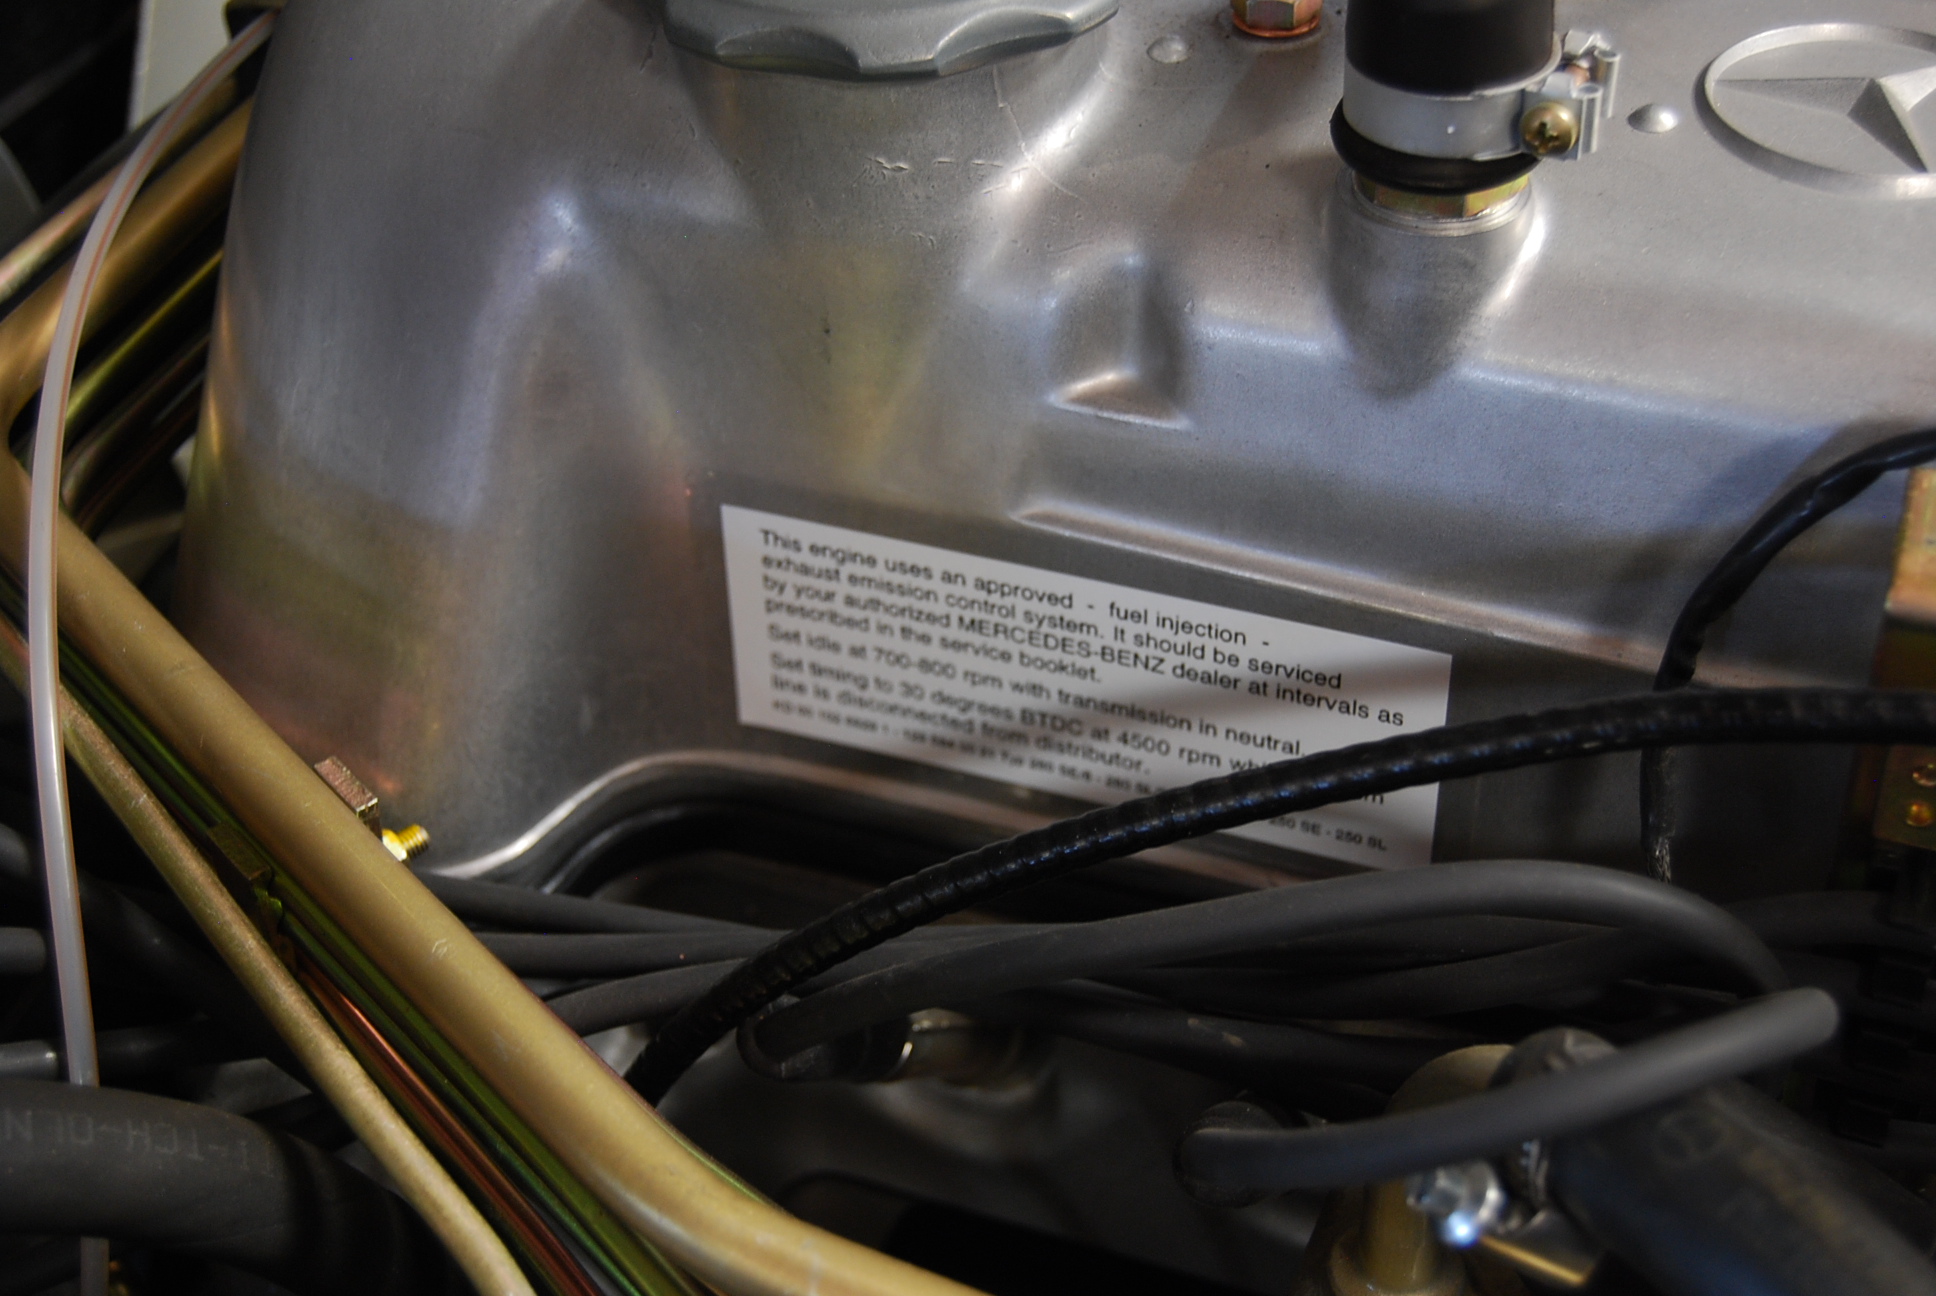
The photos below show us the engine bay and its progression. After testing and tuning, we apply the engine bay decals to finish the complete restoration. |
|||||
 |
 |
||||
|
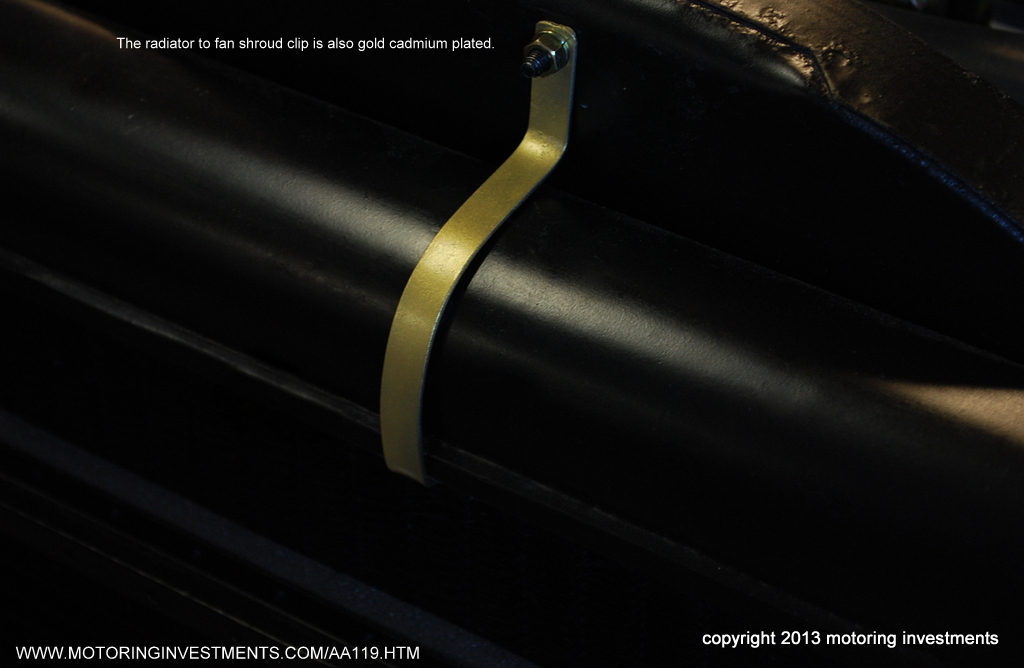
The photo below is of the radiator to fan shroud clip. |
|||||
 |
 |
||||
The pictures below are of the door mechanisms, fully reconditioned. All window guides, glass blocks, regulator rods and rubber buffers are inspected and serviced to function like new. When are doors are completed, they will sound and close just like when they left the factory, over 40 years ago. |
|||||
 |
 |
||||
 |
 |
 |
|||
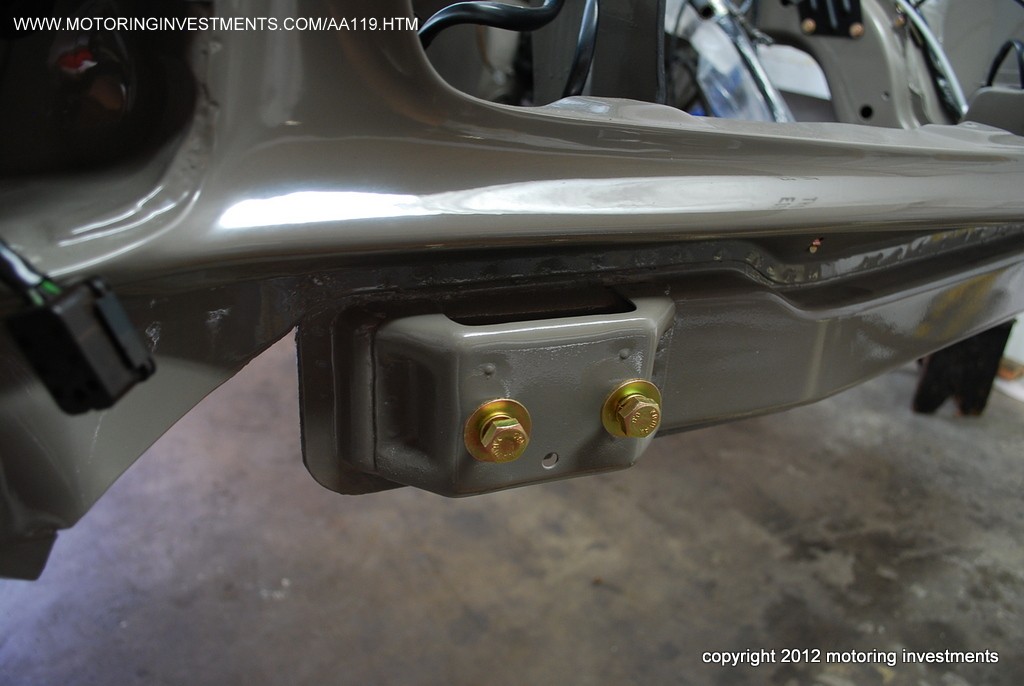
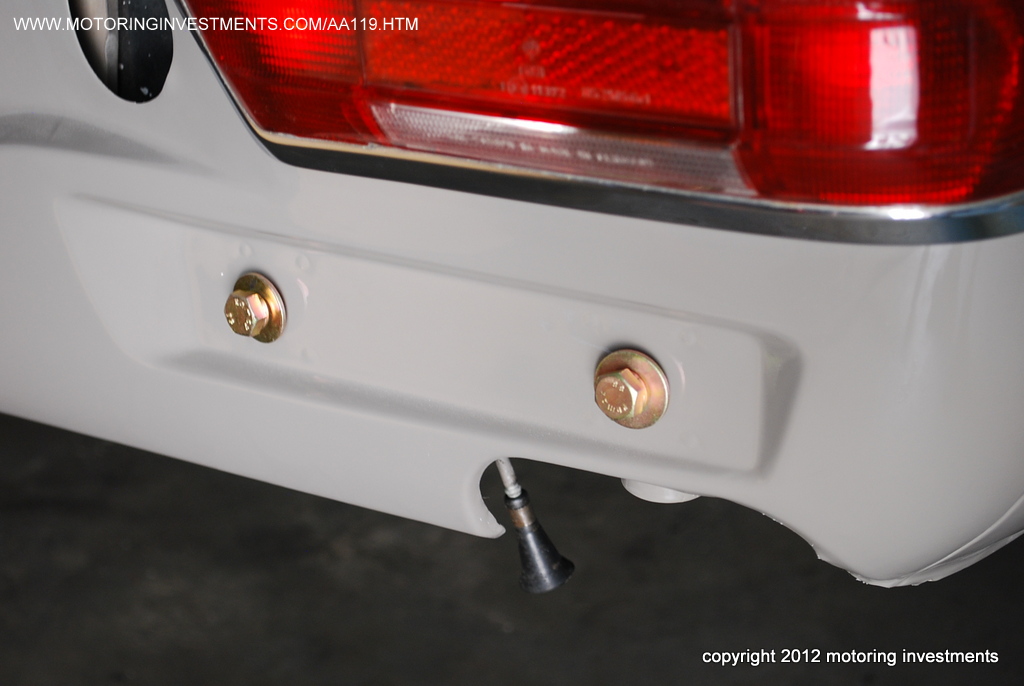
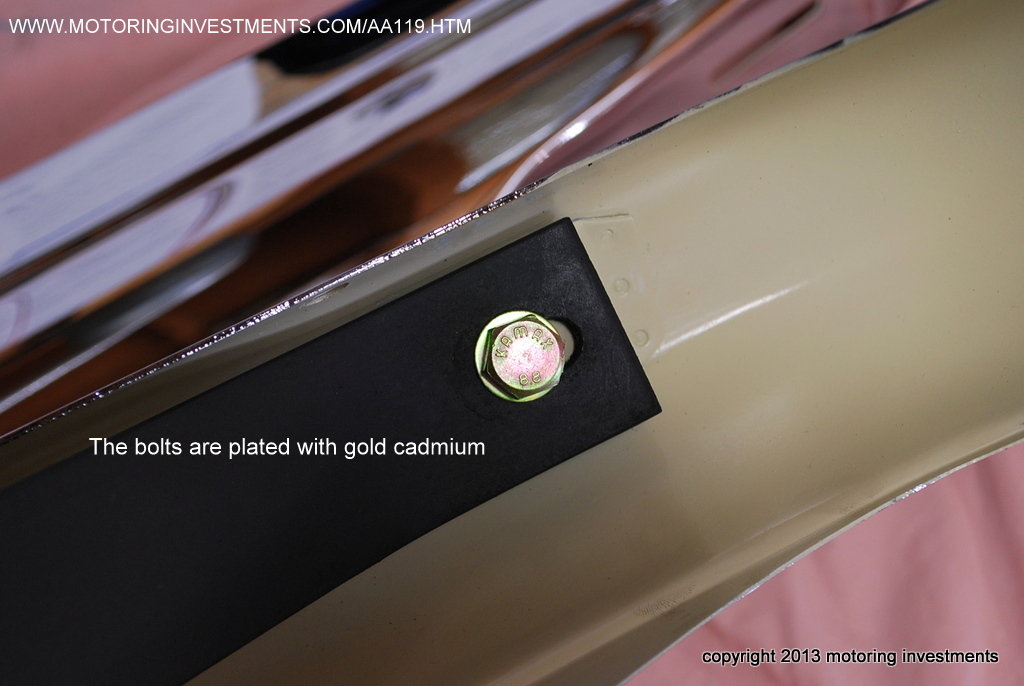
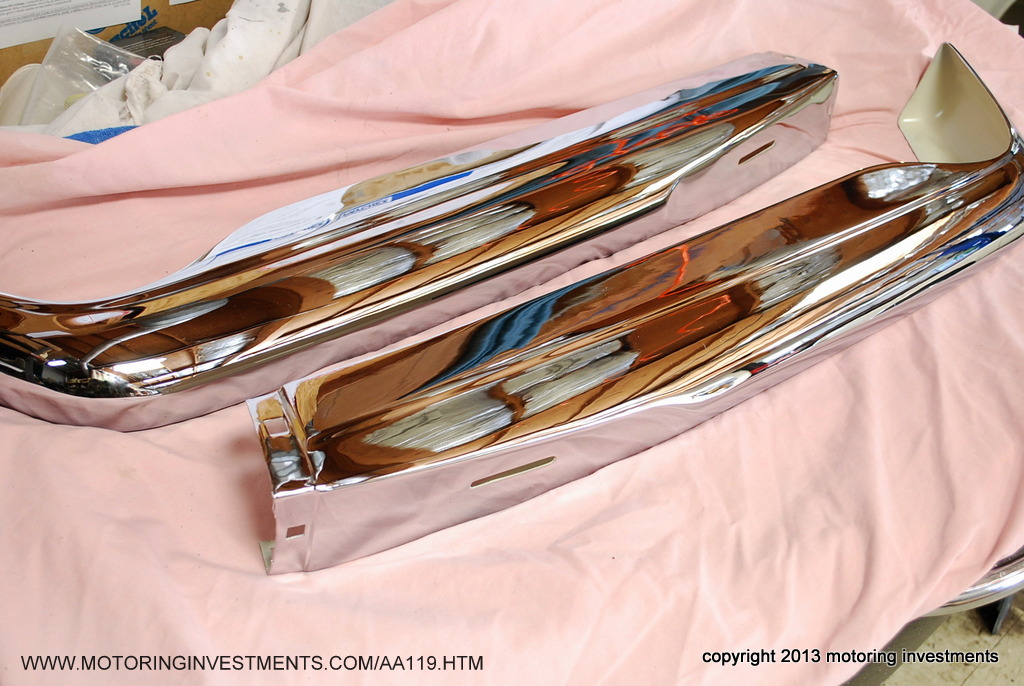
The bumper backsides, shown above and below. Notice the gold cadmium plated bolts, bumpers brackets, (refinished to match the correct black) as well as the light color used to refinish the backsides? |
The photo above and below show the bumpers' seamless look. Notice they are not drilled with holes for the cumbersome over riders. |
The bumper
backsides are painted to prevent corrosion and display a finished, correct look. |
|||
 |
 |
 |
|||
 |
 |
||||
| The photos
above display the inner threshold trims and their respective matching
points. Notice the screws and how flush they sit in the trim? Proper alignment and installation of all the trim and rocker panel cover screws will result in a flush fit, thus having no imperfections when installing sill pads and carpets. |
|||||
 |
 |
||||
 |
 |
 |
|||
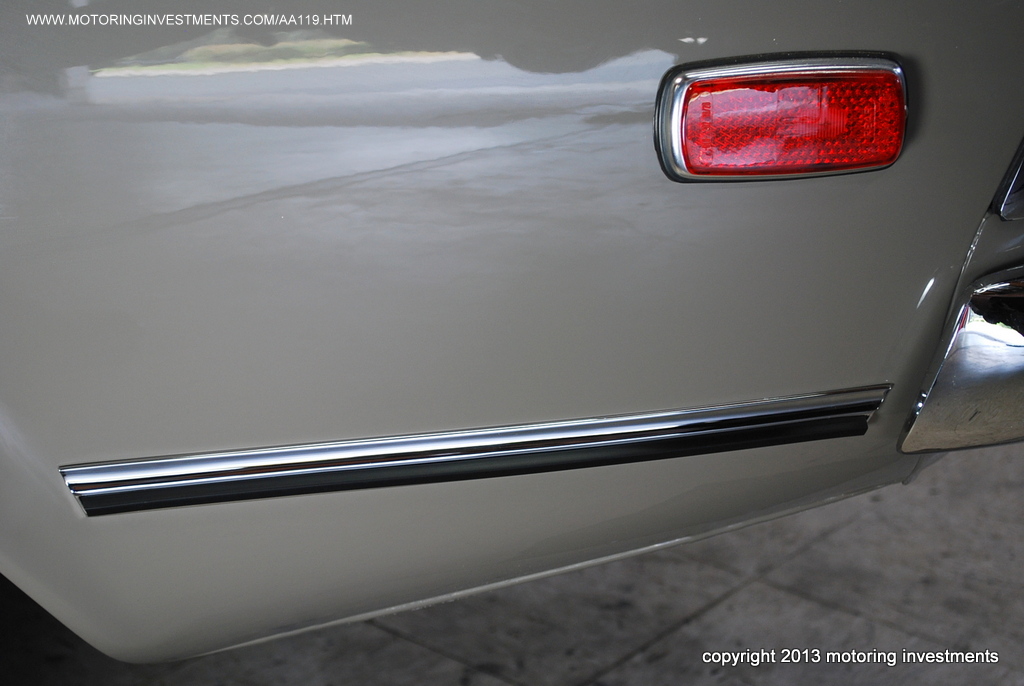
The photo above shows the rubber profile that goes into the chrome door trim. This profile must be inserted and angle cut to fit correctly. |
|||||
 |
Notice the
pictures to the left and right are of the profile being installed. The photos below are of the rubber profile in place and trimmed to fit. |
 |
|||
 |
 |
||||
 |
 |
||||
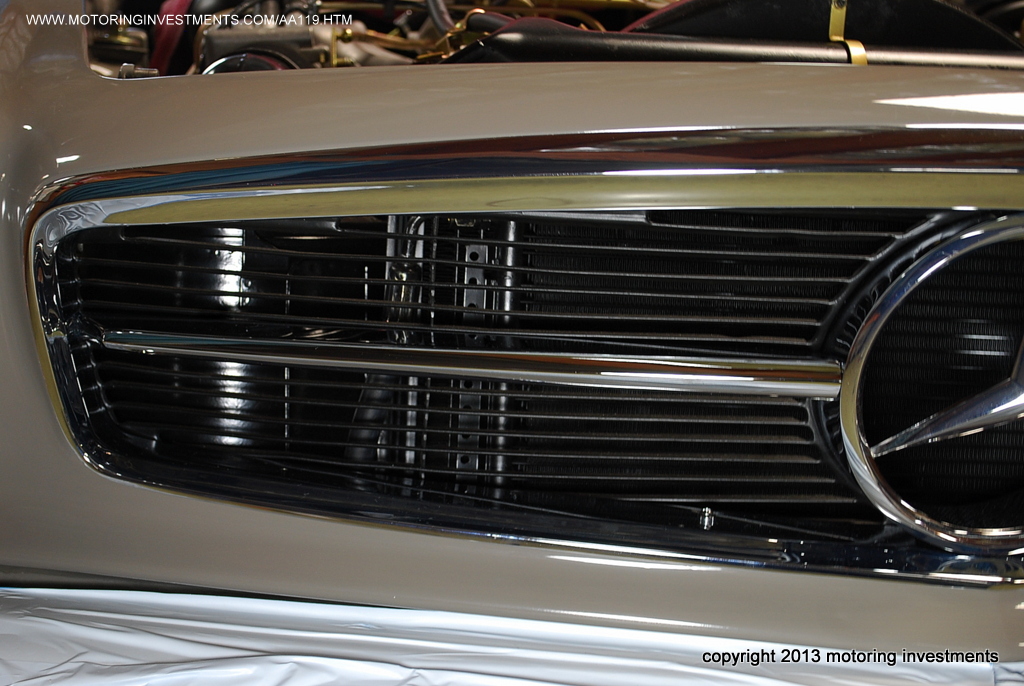
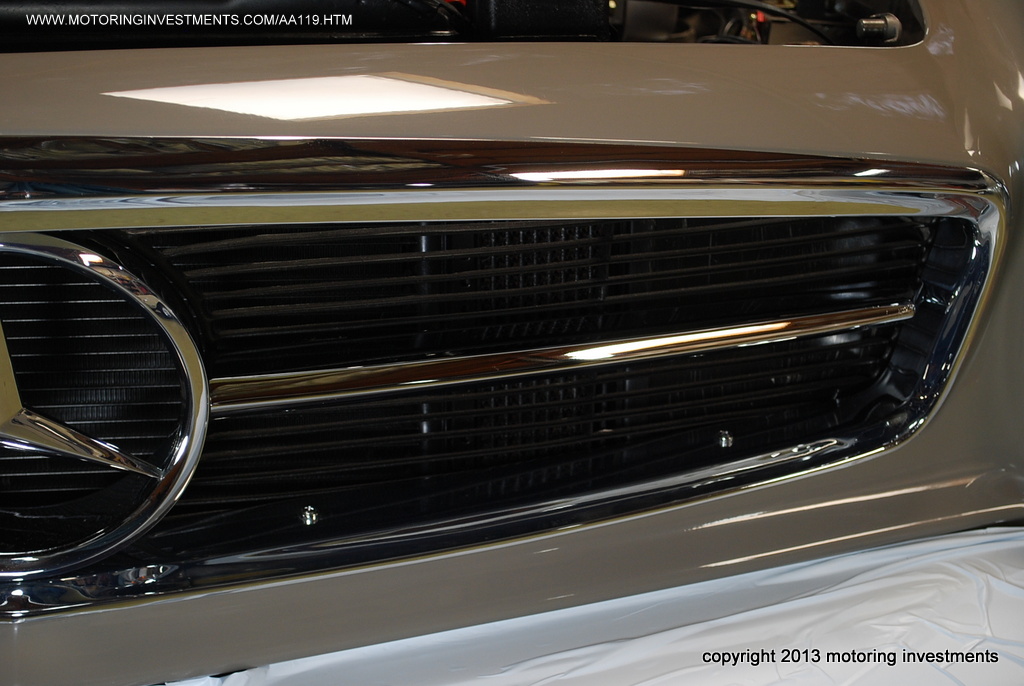
| Flawless chrome grill. | |||||
 |
The photos to
the left and right are of the small felt pieces that go affixed onto the backside of the chrome grill center bars. Often missing on even most high point restorations, we produce every detail, no matter how small or inconspicuous.
|
 |
|||
 |
 |
 |
|||
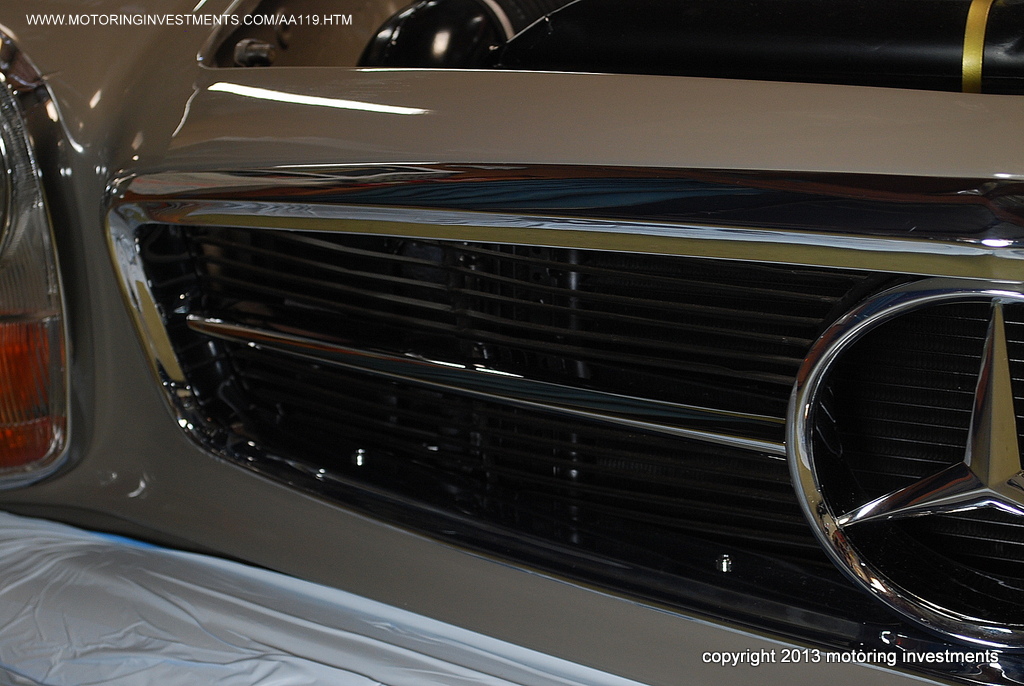
| The front grill center bar. | The photos
above and below highlight the perfect fit from nose to grill. |
The protective tape that
is applied to the bug grill is visible from the backside, as per factory original. |
|||
 |
 |
 |
|||
The photos shown here, highlight the impeccable finish of the newly plated chrome, and its fit with the body. |
|||||
 |
 |
 |
|||
 |
 |
||||
 |
 |
||||
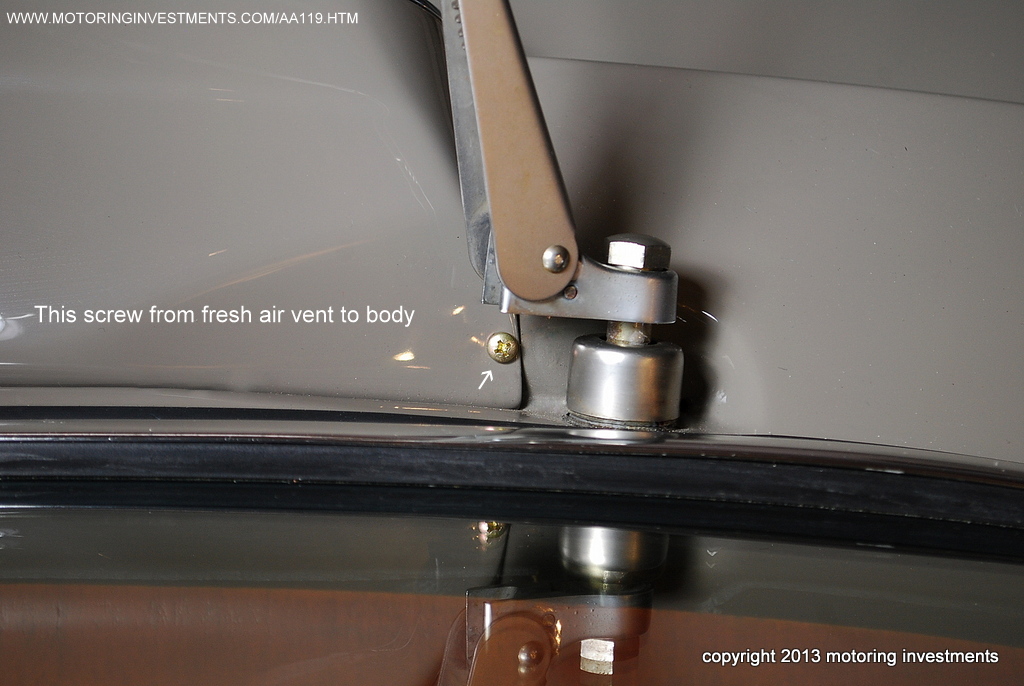
| The photo
above shows the correct windshield wiper units. |
The correct screws that mates the fresh air scoop to the body is also gold cadmium plated. Many times, these screws are incorrectly painted over or not re-plated with gold cadmium as per factory. These screws should be easy to remove, for a technician to be able to service the hoses or mechanisms under the scoop. |
||||
 |
 |
 |
|||
 |
 |
 |
|||
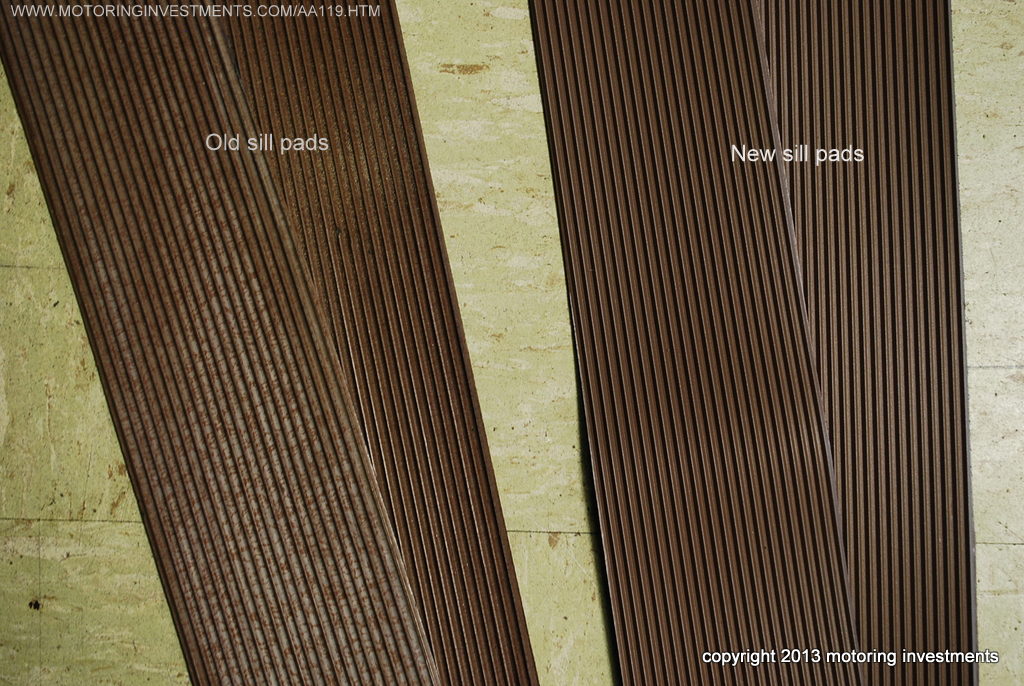
| The photos
above are of the door threshold sill pads.
These are no longer available new in the original
colors. As supplied by Mercedes they now only come in black. We have refinished New OEM door sill pads to match the correct and original color code that this 280SL was born with. Look closely at the new vs. old sill pads pictures above, the color is a perfect match. Pictured below are different angles of the door sill pads installed onto the car. |
|||||
 |
 |
||||
 |
 |
||||
 |
 |
 |
|||
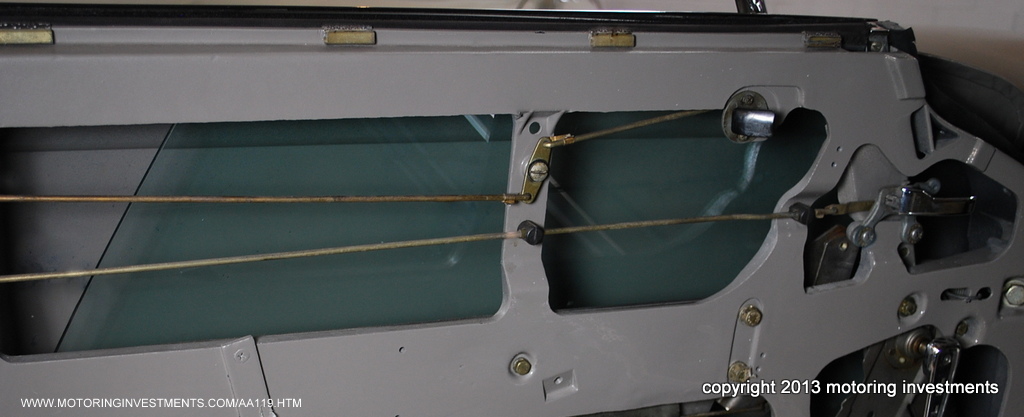
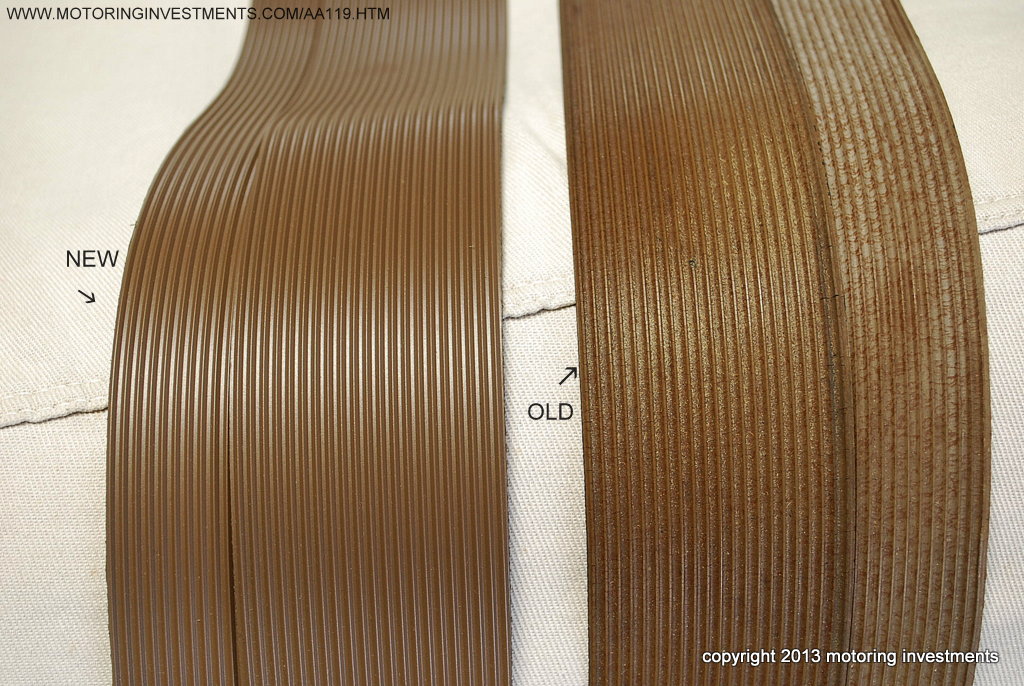
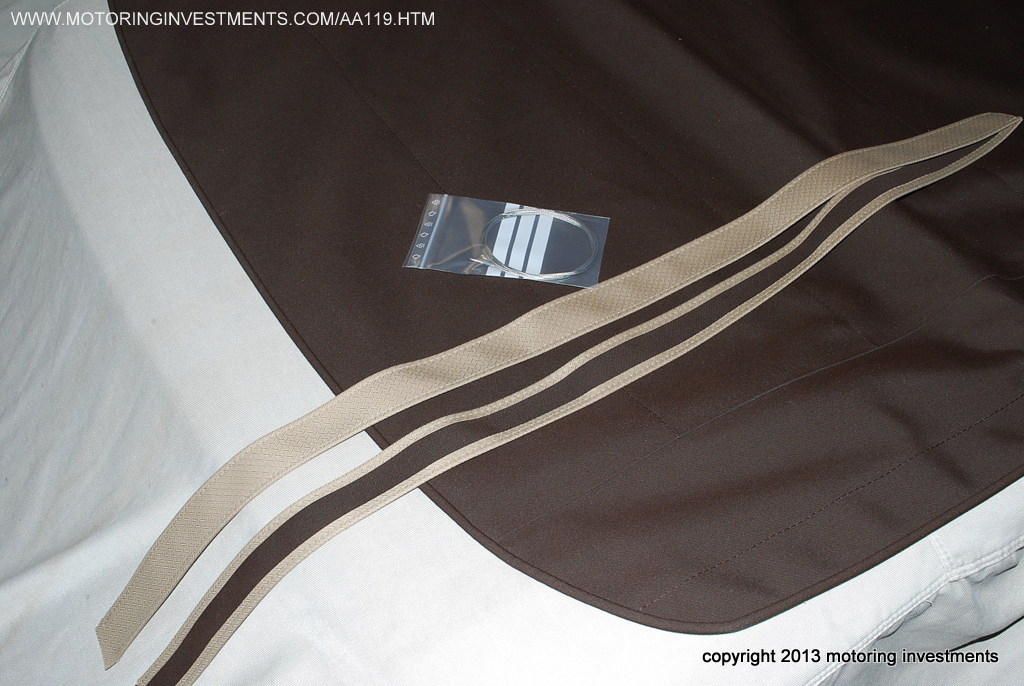
The photos above are of the New Old Stock (N.O.S.) hood limiting strap. The straps are labeled in the pictures and it is easy to see the difference that 40+ years make in the engine bay. In the picture above center, note that the weave is a perfect match to that of the original item. This item came from our "secret parts bin". What Mercedes typically supplies today is a reproduction, that is pure white. |
|||||
 |
 |
||||
 |
The
surrounding pictures show us the mounting plates on the hood and the new hood limiting strap in place. |
 |
|||
 |
 |
 |
|||
| The photos above and below show the hard top in the finished state. With nylon buffers installed to the locking latches and new screws and cup washers on the rear wood trim, the hard top is ready to go on the car. |
|||||
 |
 |
||||
 |
 |
 |
|||
 |
 |
 |
|||
| The images
above are of the glass being adjusted to fit the hard top. Then the soft top frame is adjusted to the respective glass position. |
|||||
 |
 |
 |
|||
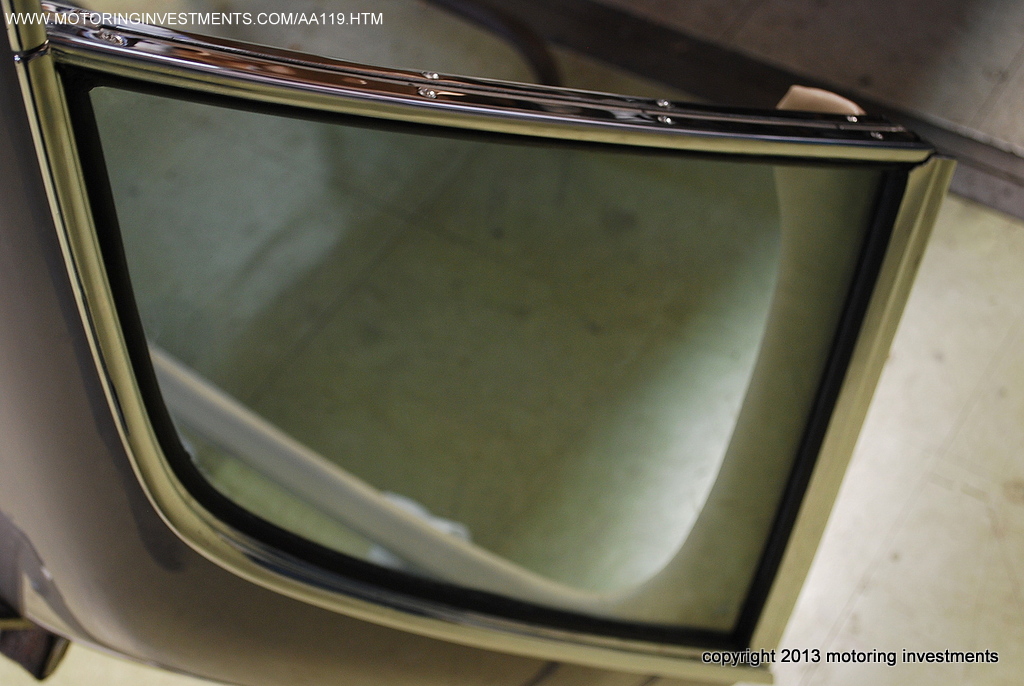
| The photos
above and below show the chrome trim and corners. |
|||||
 |
|
 |
|||
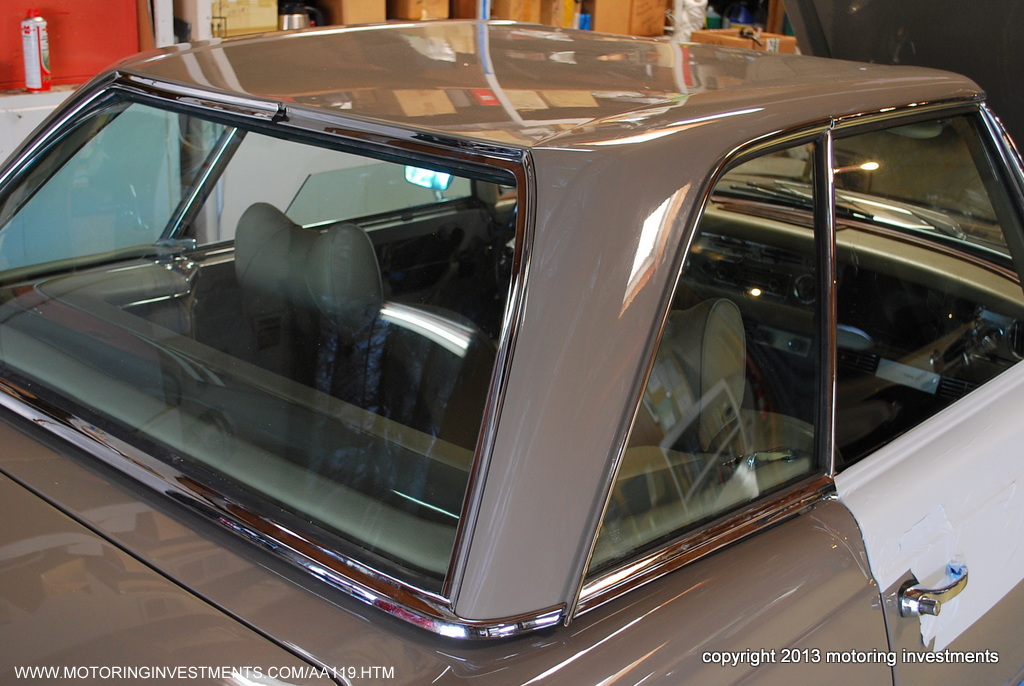
The hard top rests on the body with ease and the picture above highlights the clearance between the hard top and the body. |
|||||
 |
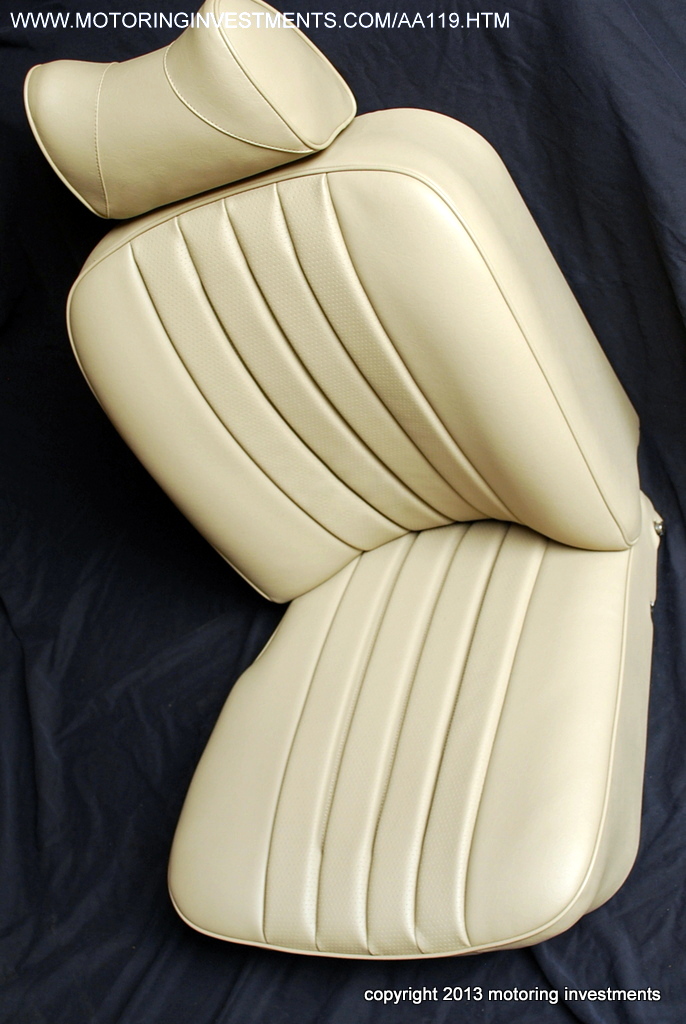
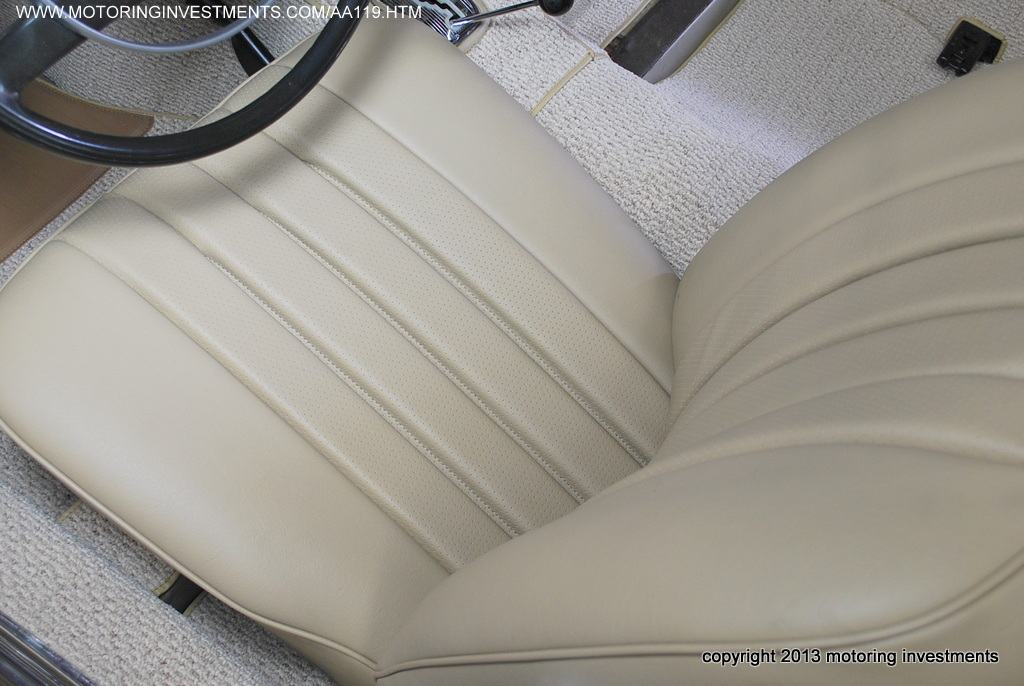
Here are
pictures of the seats before we disassemble and rebuild them. And the newly restored seats are pictured below. |
 |
|||
 |
 |
||||
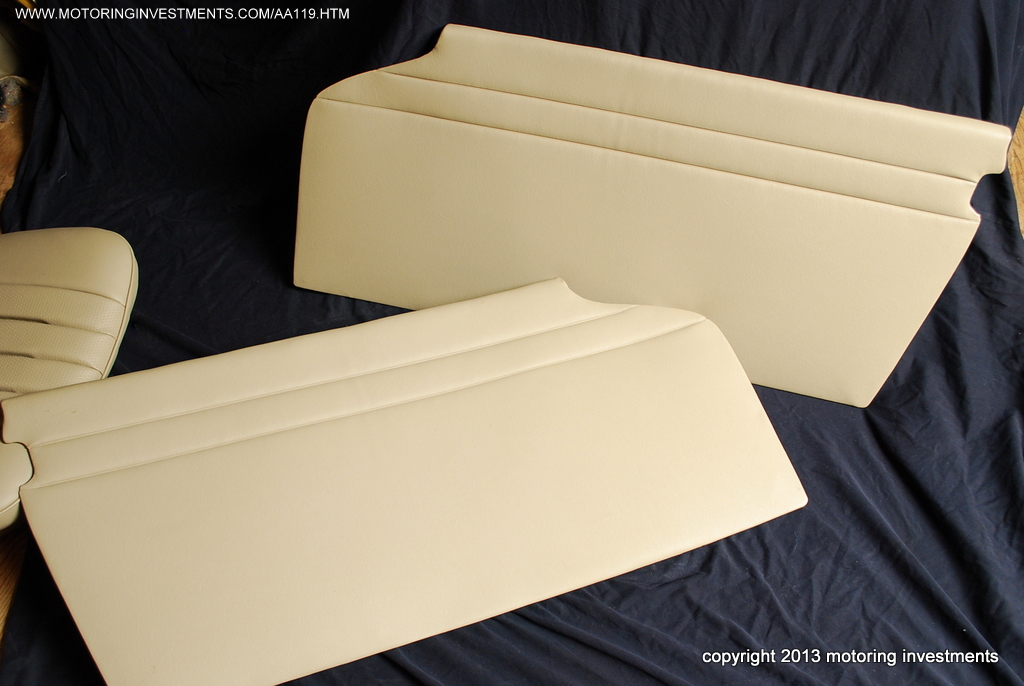
| The door
panels are shown below, restored and covered with new material (note:
differences in lighting are responsible for the drastic apparent difference in shade). |
|||||
 |
 |
||||
| The picture
below shows the just one of the many details that go into restoring a
car to this level. We obtained factory correct and color matching eyelets to fit the seat backs where the head rest rods pass through (made of "unobtainium"). |
|||||
 |
|||||
| Below are
some close up pictures of the ashtray lid and its completed look. We
carefully remove the bezel and have everything re-plated, followed by re-padding and recovering the center. Assembly is very tricky with the delicate tabs seen in the middle picture below. |
|||||
 |
 |
 |
|||
 |
 |
||||
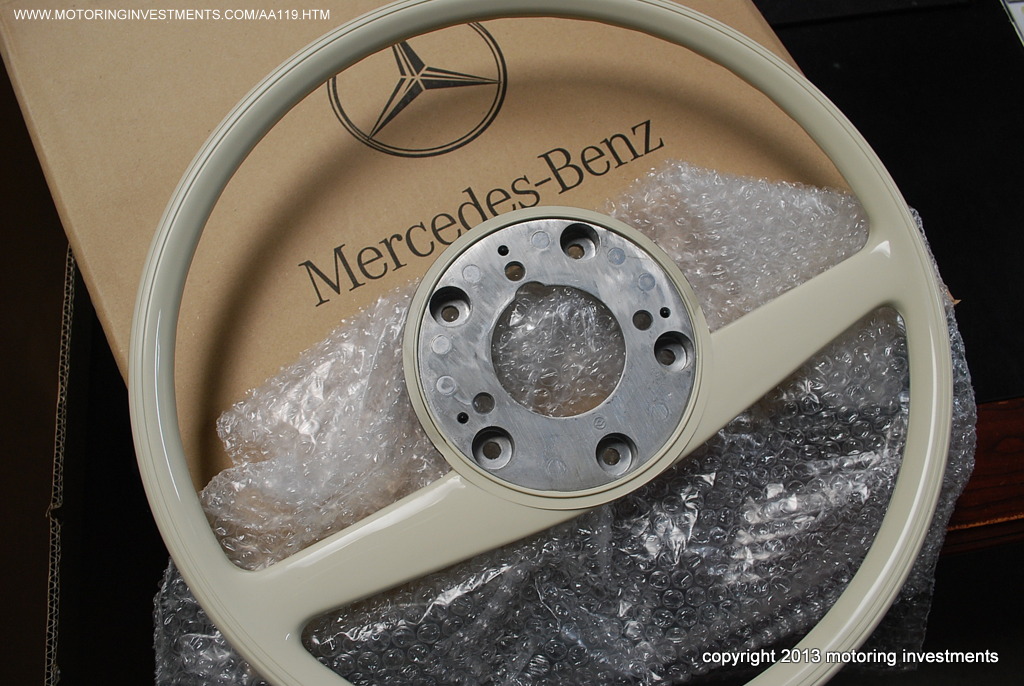
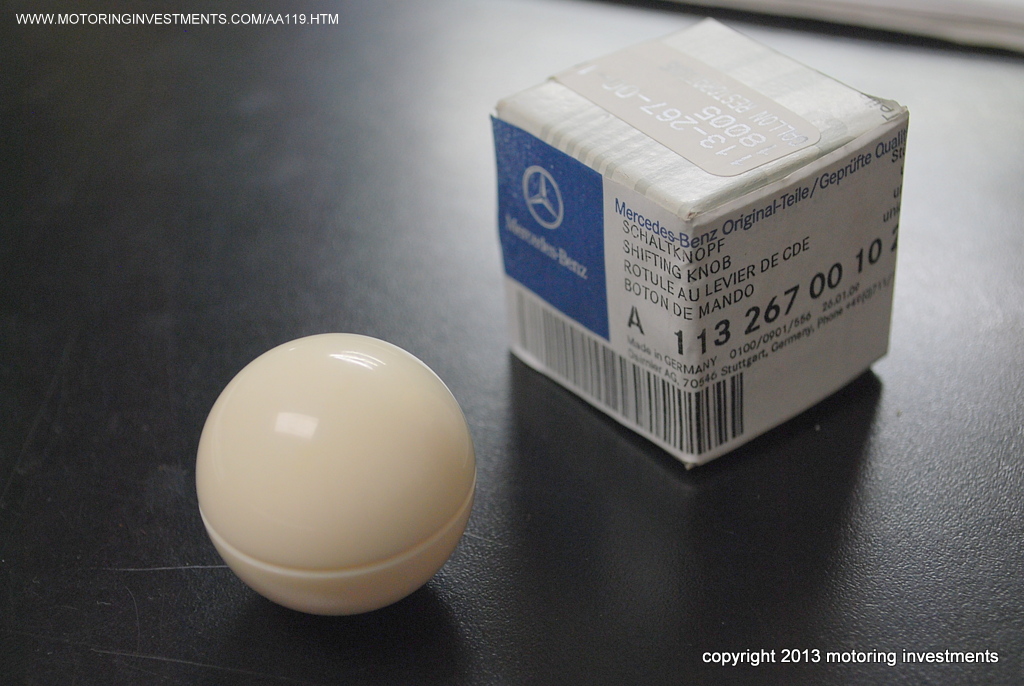
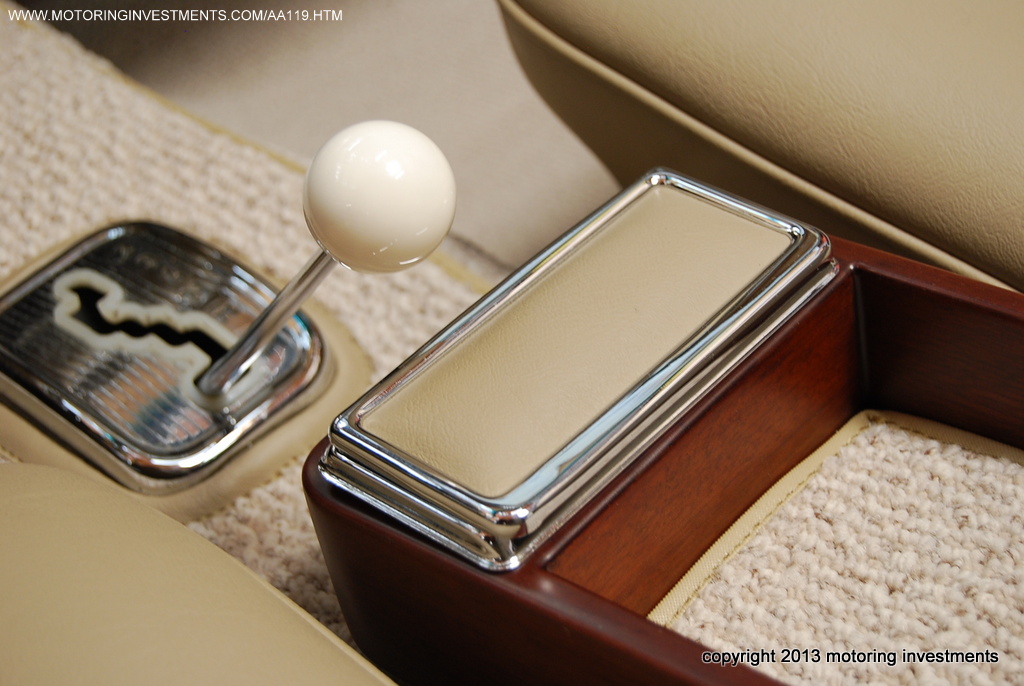
| The new
Mercedes Benz ivory steering wheel and shifter knob are ready to accept the horn ring and pad installation. |
|||||
 |
 |
||||
 |
 |
||||
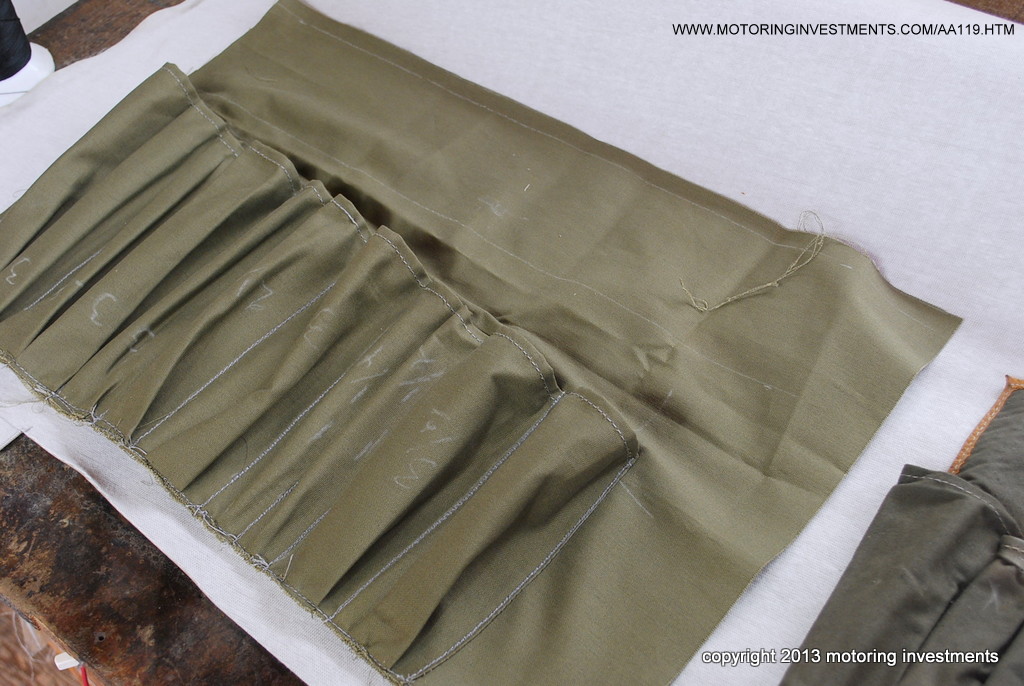
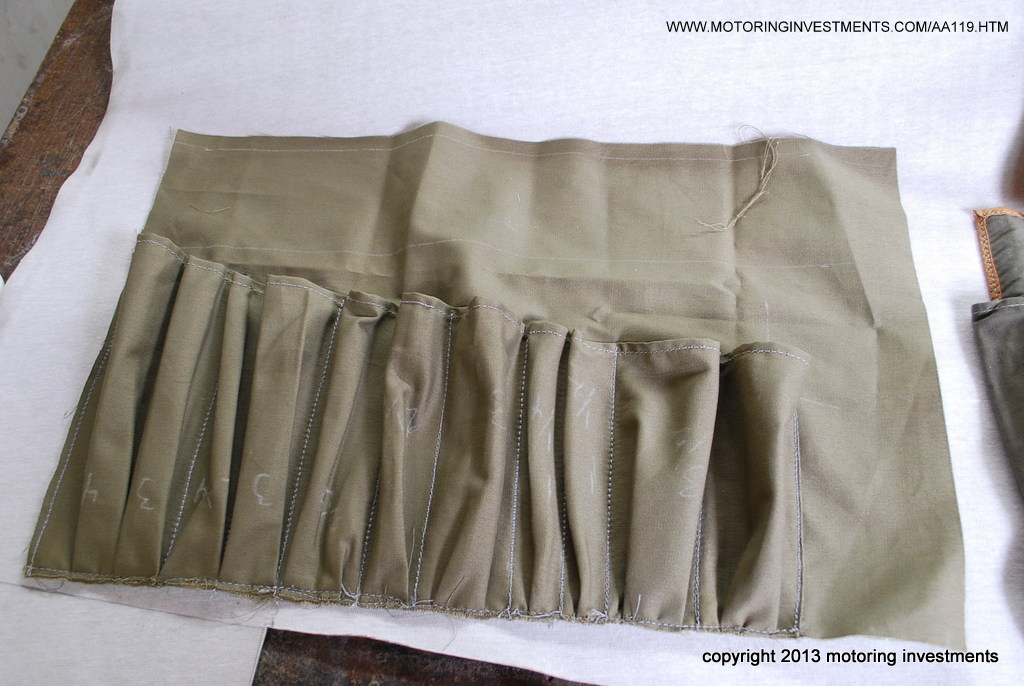
| Regarding tool bags,
the factory workman grabbed whatever bag happened to be on his tool bag
cart for the next car that came down the line. Sometimes a tool bag
happens to match a particular car's interior upholstery but this is
merely by chance. Most original 280SLs that I have experienced have had
a tool bag that differs from the upholstery color and material. The bags
were either M-B Tex or convertible top canvas.
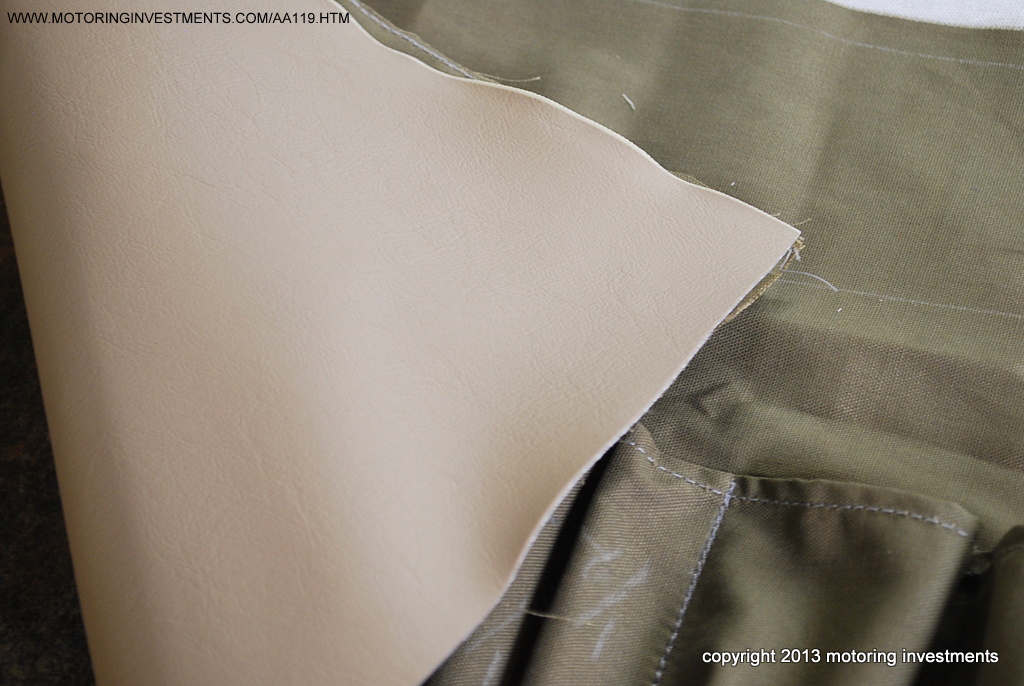
In this case our client has opted for a bag that matches his beige upholstery so we made one. |
|||||
 |
 |
||||
| An original tool bag shown above, was used this as a template. | The finished liner sitting atop the back of the beige M-B tex | ||||
 |
 |
||||
Every detail is duplicated right down to the snaps. |
|||||
 |
 |
||||
after.JPG) |
 |
||||
| The picture
above shows the before and after tool bags. |
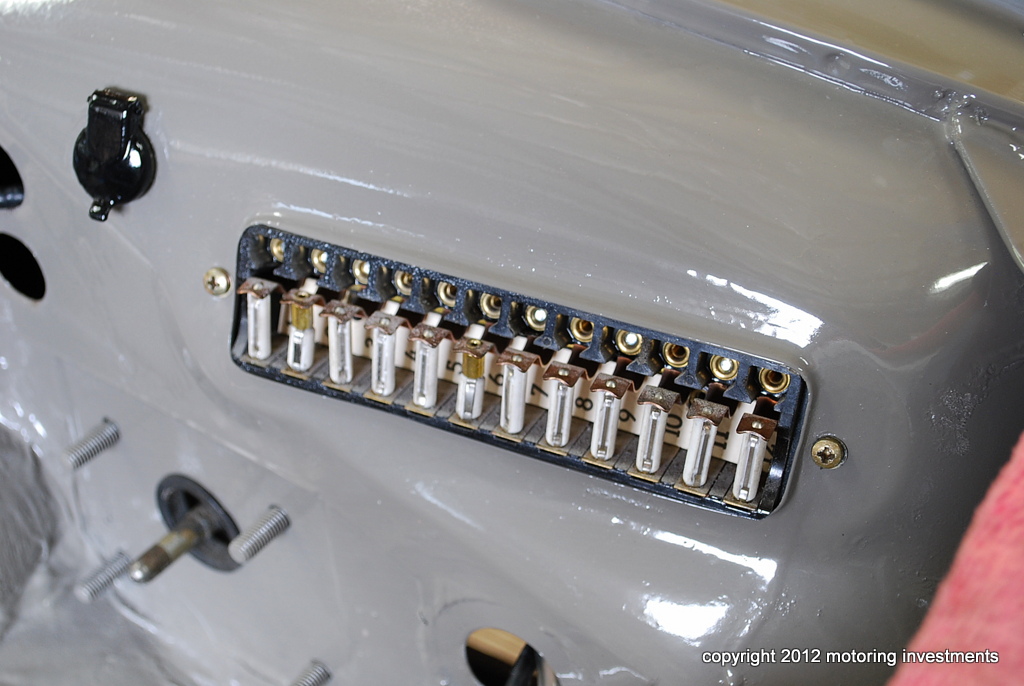
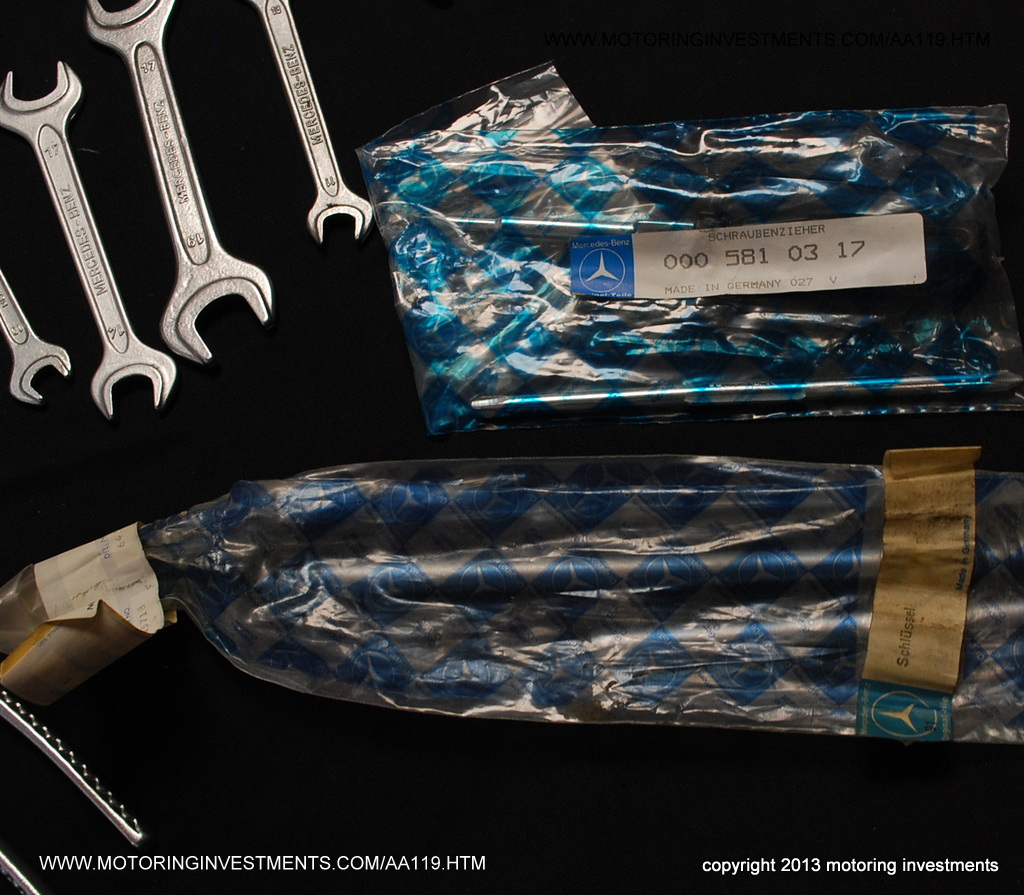
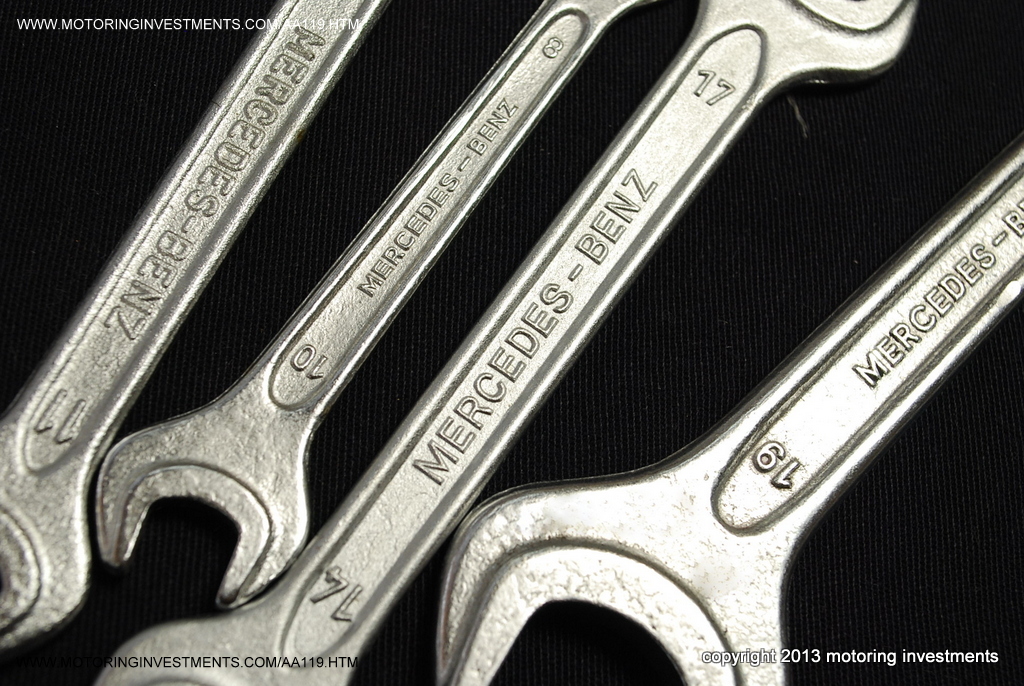
The tool bag
is completed with new tools and fuse box below. |
||||
 |
 |
||||
 |
 |
||||
| The picture above shows the correct number of fuses in the spare fuses box. | |||||
 |
 |
||||
 |
 |
||||
 |
 |
||||
| The photos
below on this column represent the BEFORE condition of the trunk interior panels. Made of a simple cardboard type material, these panels often break or become missing. |
Below here we
have pictures of the newly acquired trunk panels for the left and right sides. |
||||
 |
 |
||||
 |
 |
||||
| Pictured
above are shots of the panels before we replaced them. The foam has disintegrated from over 40 years. |
Below is a
picture of the NEW trunk panel and its backside shows the foam padding. |
||||
 |
 |
||||
 |
 |
||||
 |
 |
||||
 |
 |
||||
 |
 |
||||
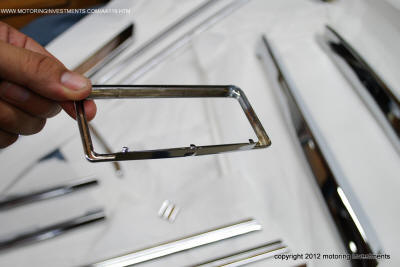
| The
trims at the windshield header bar are shown here. These will be re-plated to look like new. |
|||||
 |
 |
||||
In the images shown below, we have stripped all the previous plating and revealed the brass metal underneath. We then polish the surface to a smooth finish. Followed by the re-plating with nickel to achieve the factory correct look. These trims, along with the horn ring, were finished in a dull nickel/matte coating. These parts were as such on US version cars, due to the strict D.O.T ( Department of Transportation) regulations enacted. Mandating a non-reflective coating on parts that could hinder/obstruct a drivers view. |
|||||
 |
 |
||||
 |
 |
||||
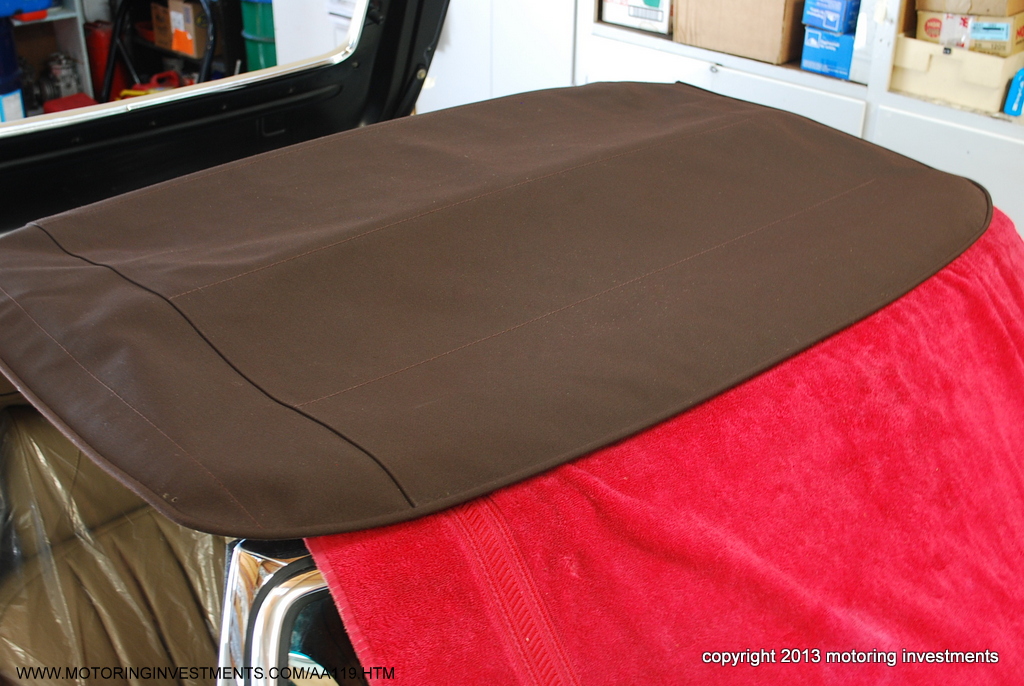
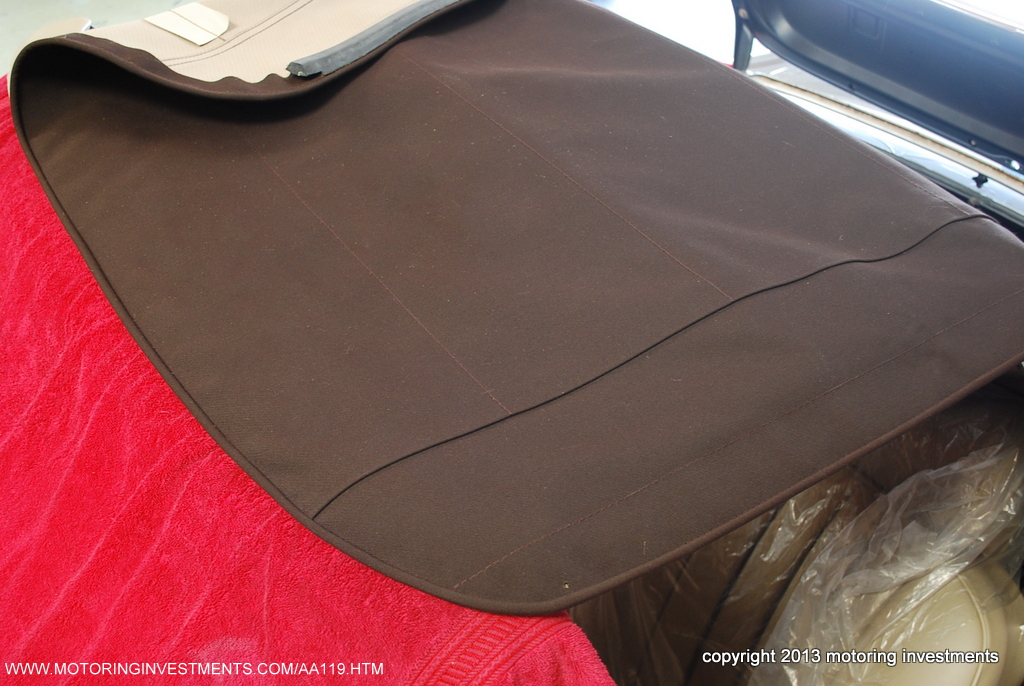
| The correct
OEM folding
canvas top arrives from Mercedes Benz. The Vehicle Data Card ( build sheet) reads as this car having a dark brown canvas top. |
|||||
 |
 |
||||
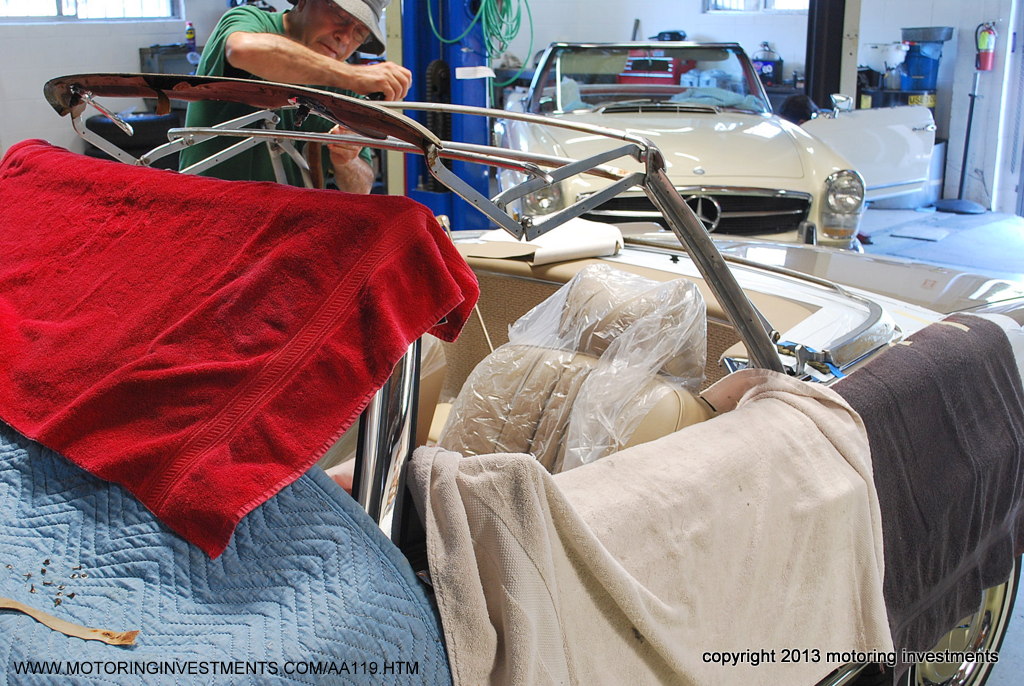
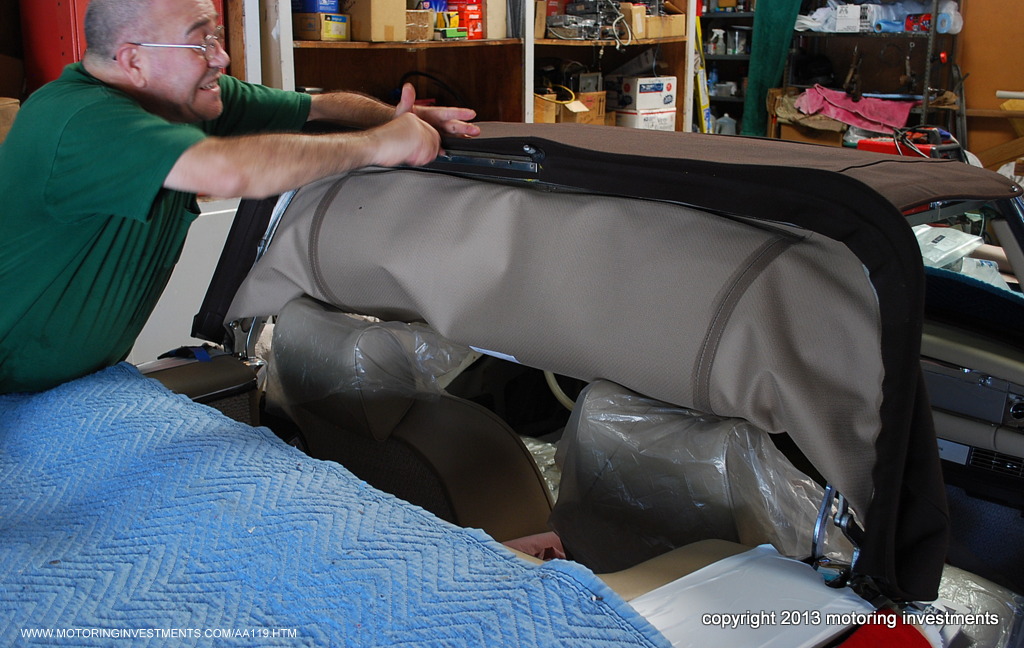
After we inspect the new canvas top for any imperfections, We will begin installation of the new material to the folding top frame. Mercedes Benz ships their folding canvas tops with the rear window piece still hanging in place protected with tissue paper. This helps to protect the rear window from shipping scuffs, creasing and bending. After installation is competed, the small threads will be cut out and will reveal a scratch free, flawless rear window.  |
|||||
 |
 |
||||
We start by stripping the folding top frame of all materials. After all folding top securing bolts are inspected and adjusted, we remove strapping from bows. We clean the entire folding top frame from old glue and any fabrics. This assures a proper adherence for the new glue and new canvas material. |
|||||
 |
 |
||||
| The header bar is also rewrapped with new vinyl. | |||||
 |
 |
||||
 |
 |
||||
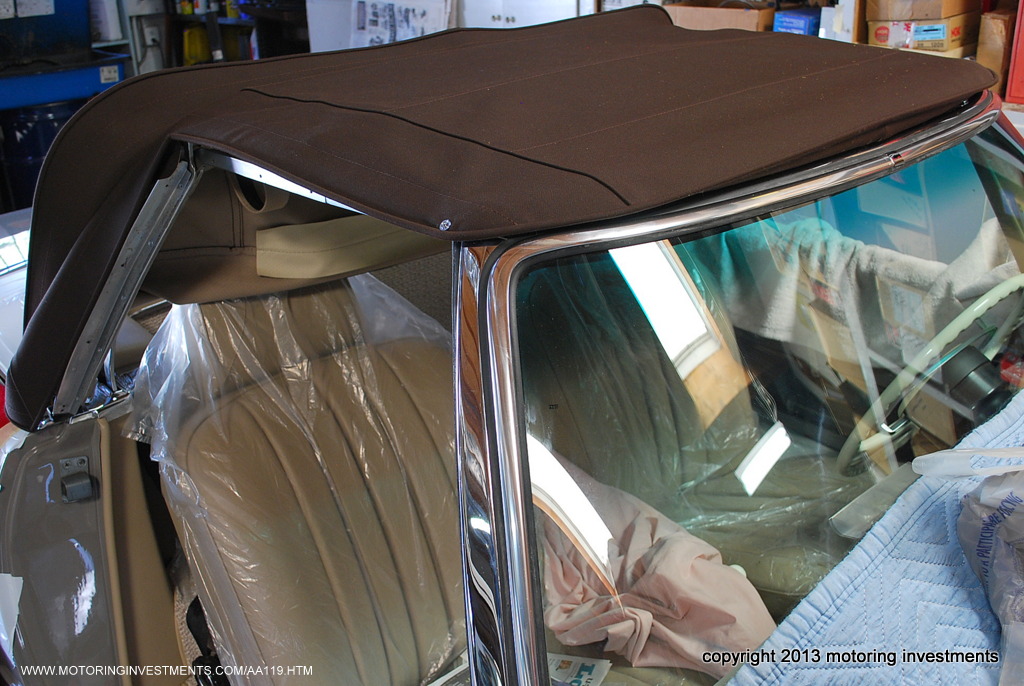
| Our expert upholstery technician installing the OEM canvas top. | |||||
 |
 |
||||
 |
 |
||||
 |
 |
||||
 |
 |
||||
 |
 |
||||
 |
 |
||||
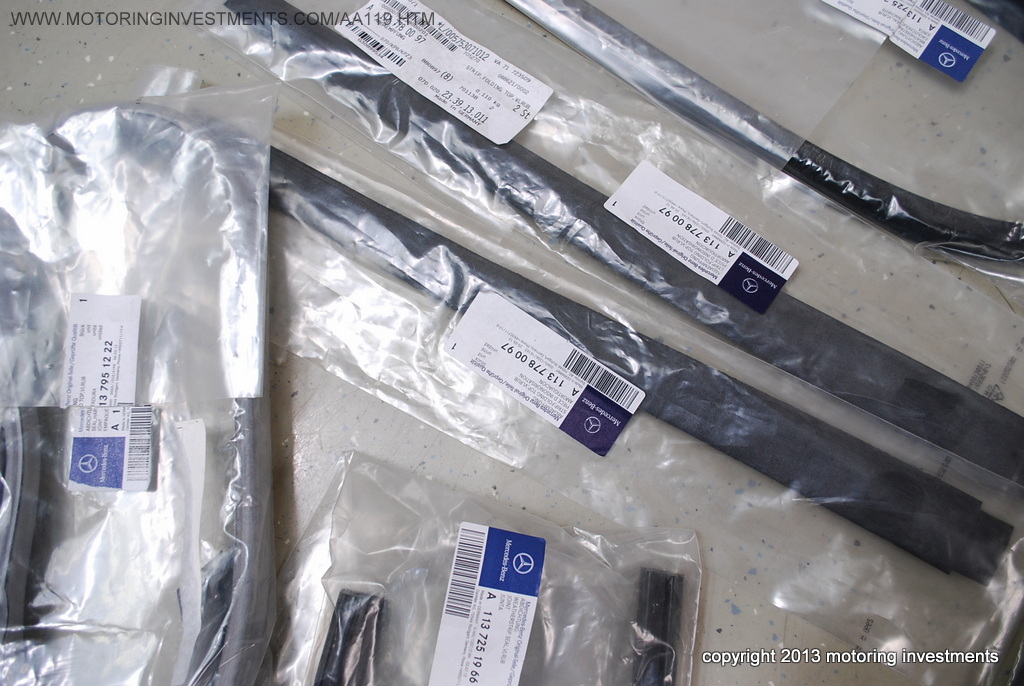
The weather seals for the folding top installation are all pictured above. We find that using the correct OEM (Original Equipment Manufacturer) weather seals provides for the best results. Non-OEM ( aftermarket) weather seals on the market today do not fit correctly and are NOT molded to fit like the correct OEM seals. |
|||||
 |
 |
||||
| The images of the glove box area and remaining crash pads are shown above. | |||||
 |
 |
||||
The images shown above are of the wrapping under the fresh air vents. The image on the left shows the wrapping and picture to the right, is with the crash pad/knee bolster in place. |
|||||
 |
 |
||||
| The images above and below are highlighting the finished dash panels. | |||||
 |
 |
||||
| The pictures above show the final fit of the wood to the dash, absolute perfection. | |||||
 |
 |
||||
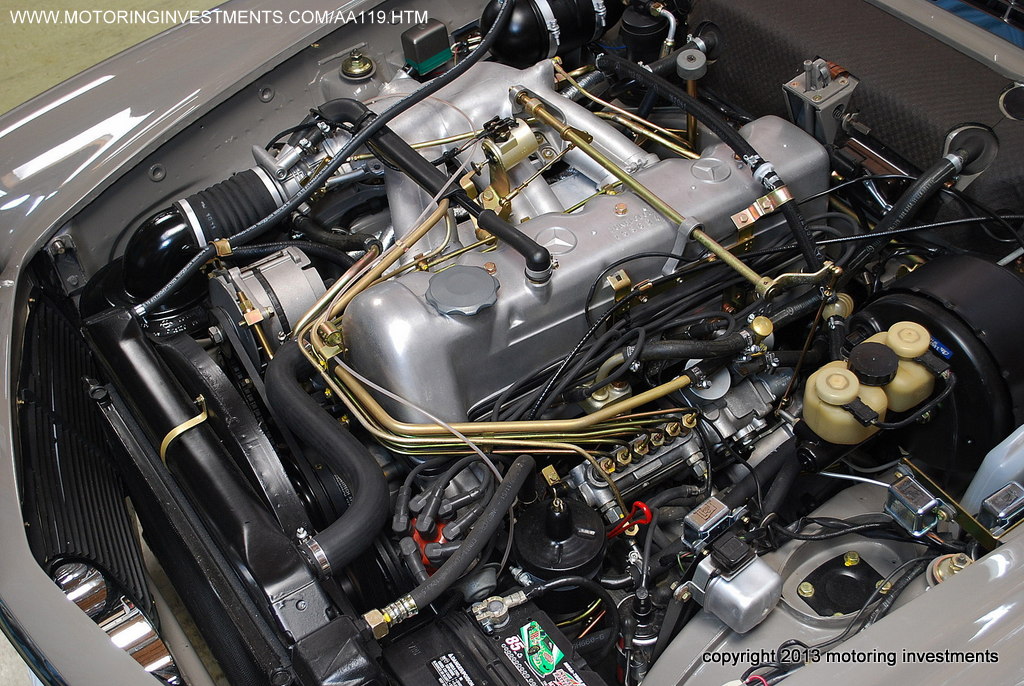
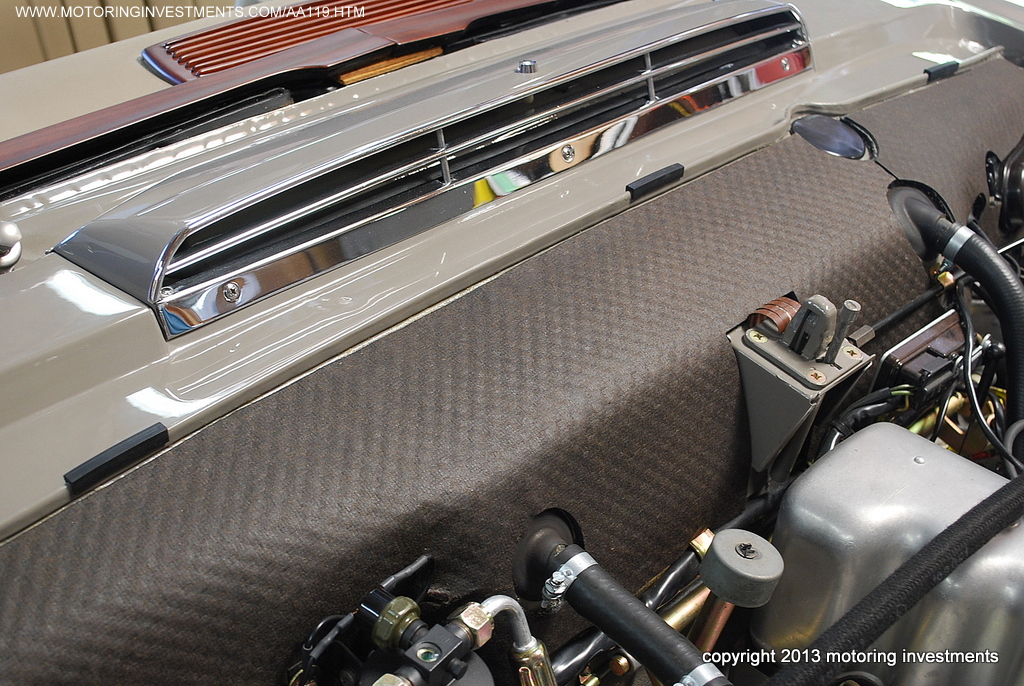
| The photos above and below highlight the engine bay in its current state. | |||||
 |
 |
 |
|||
| The firewall
lip to engine hood buffers are pictured above. Notice the lines on the
topside of the original buffers? We have exact duplicates to replace the original buffers that are over 40 years old. |
|||||
 |
 |
||||
| Valve Cover decal | Brake Booster decal | ||||
 |
 |
||||
A dot of red paint atop of the intake manifold. This dot symbolizes our foreman has inspected, tuned and all mechanical systems met factory standards. Just like the lead technician would have done over 40 years ago. |
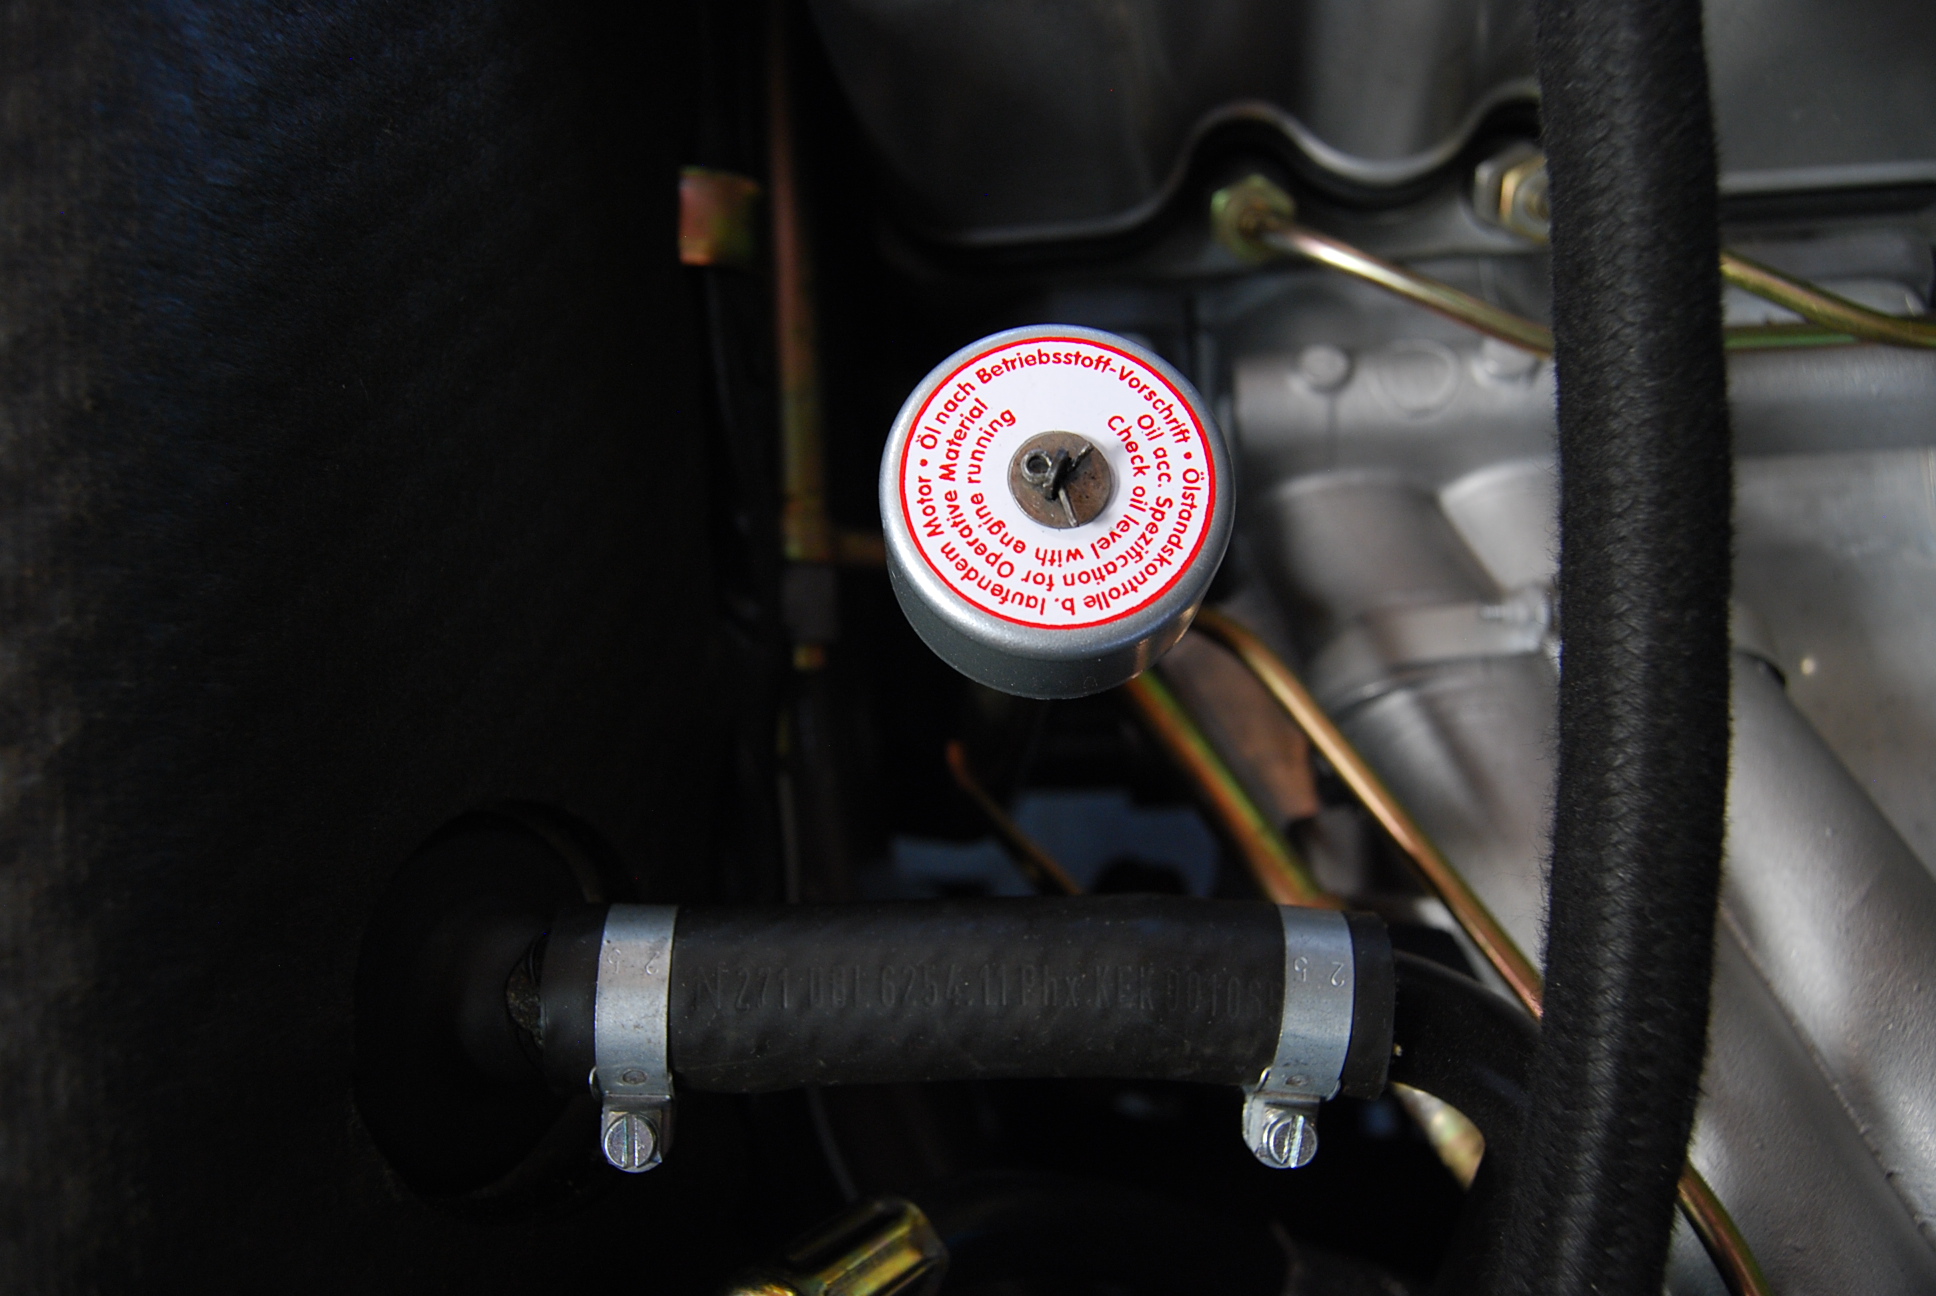
Correct decal
placed atop the transmission dipstick. |
||||
 |
 |
||||
| The folding top compartment instructions decal. | The decals are placed on water catch tank. |
||||
 |
 |
||||
 |
 |
||||
 |
 |
||||
|
|
|||||
 |
 |
||||
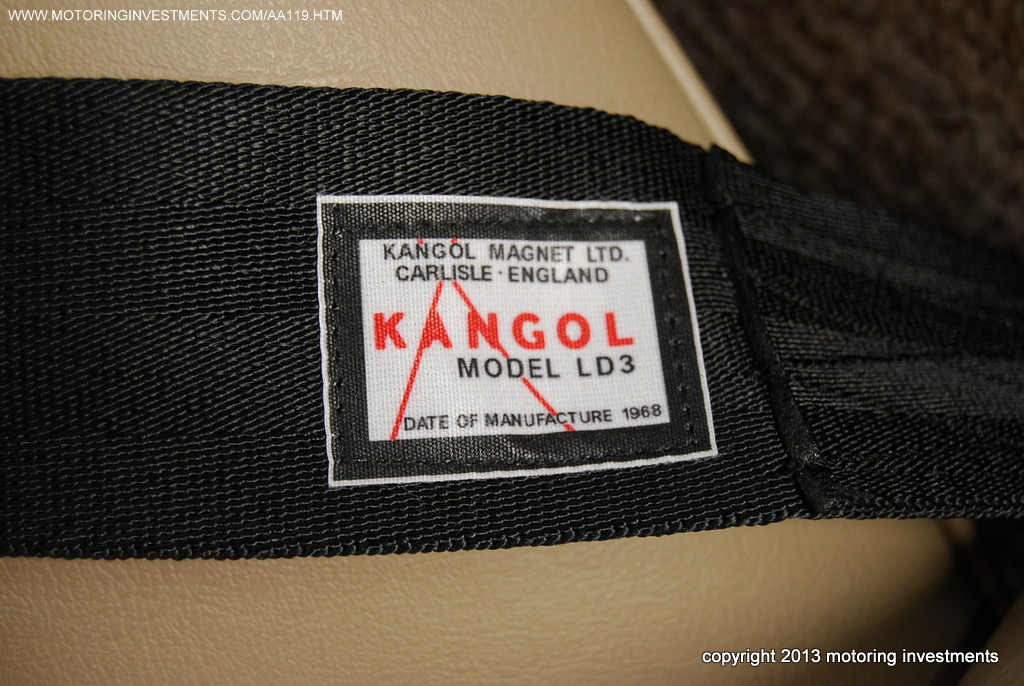
| Notice the
restored seat belts and the date codes? Labeled "date of manufacture 1968". We elevate these cars to a level that the original factory technicians would be proud of. From correct dotology through out the car to date codes on seat belts, every detail is duplicated and documented. |
|||||
 |
 |
||||
 |
 |
||||
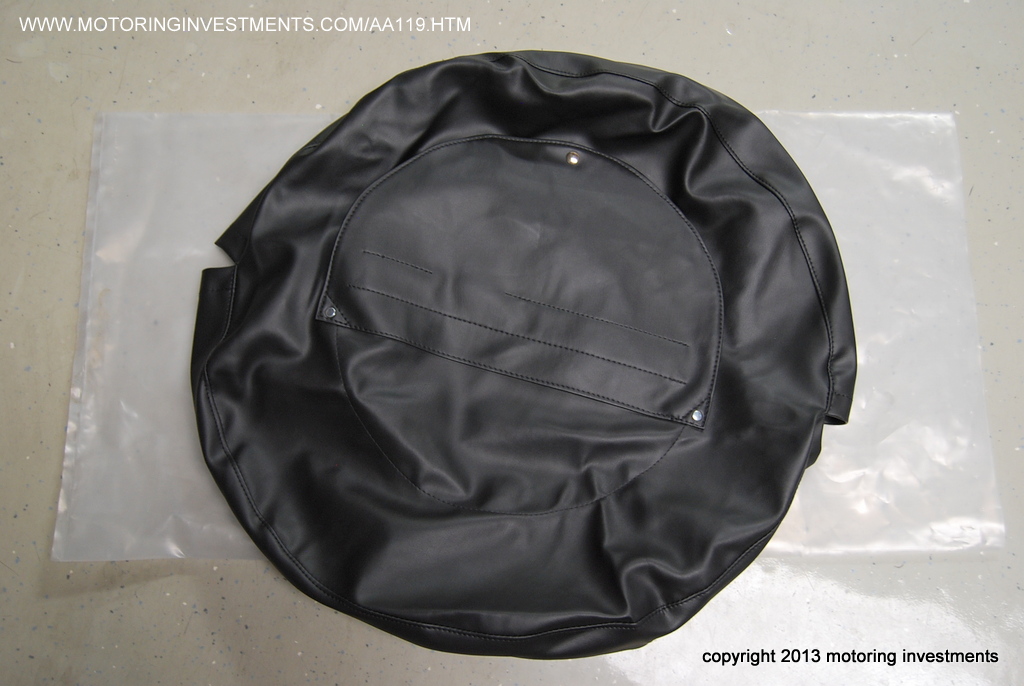
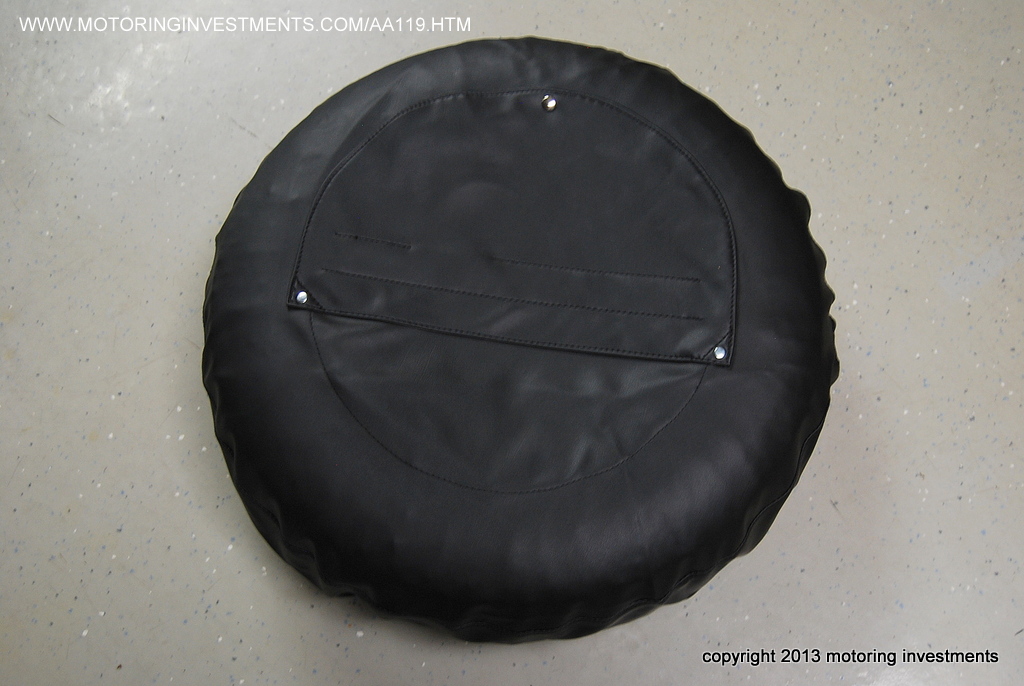
| The spare tire casing or "cover" as it arrives from Germany. | |||||
 |
 |
||||
| The
special compartment for the tire iron and wheel installation alignment tool is shown above. |
|||||
 |
 |
||||
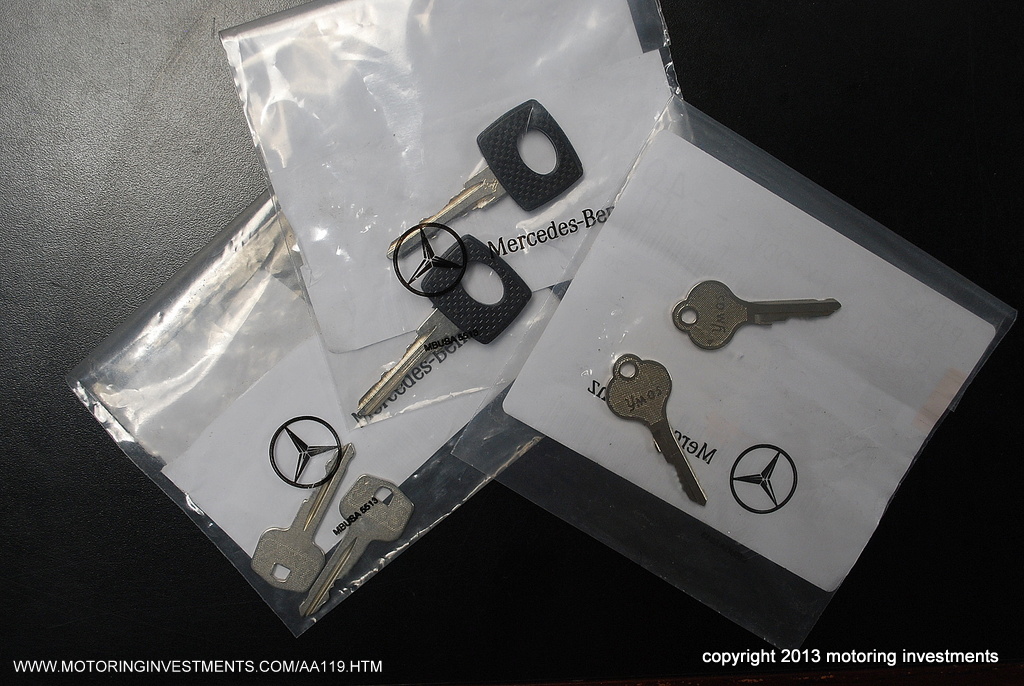
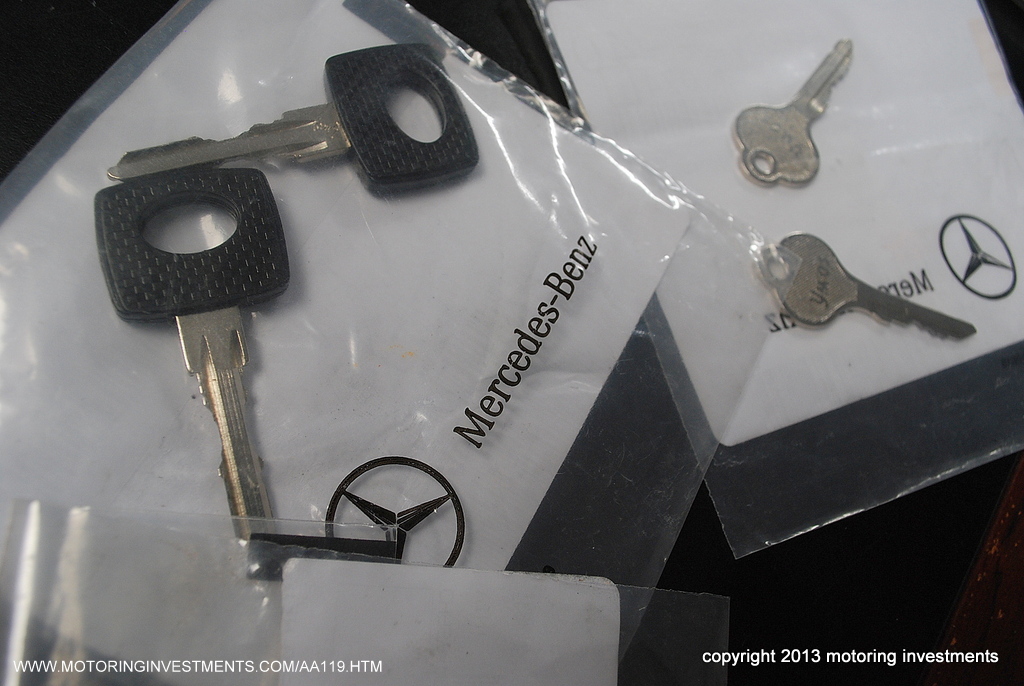
| The keys pictured below were ordered from the factory in Germany. These keys were cut to V.D.C (Vehicle Data Card) specifications and basically proves that the car has not been subject to a door handle replacement, lost keys or a re-keyed cylinder. This is an original 3-key car, meaning one key for ignition, another key worked the doors and gas cap, and lastly the glove box/trunk lock key. |
|||||
 |
 |
||||
 |
 |
||||
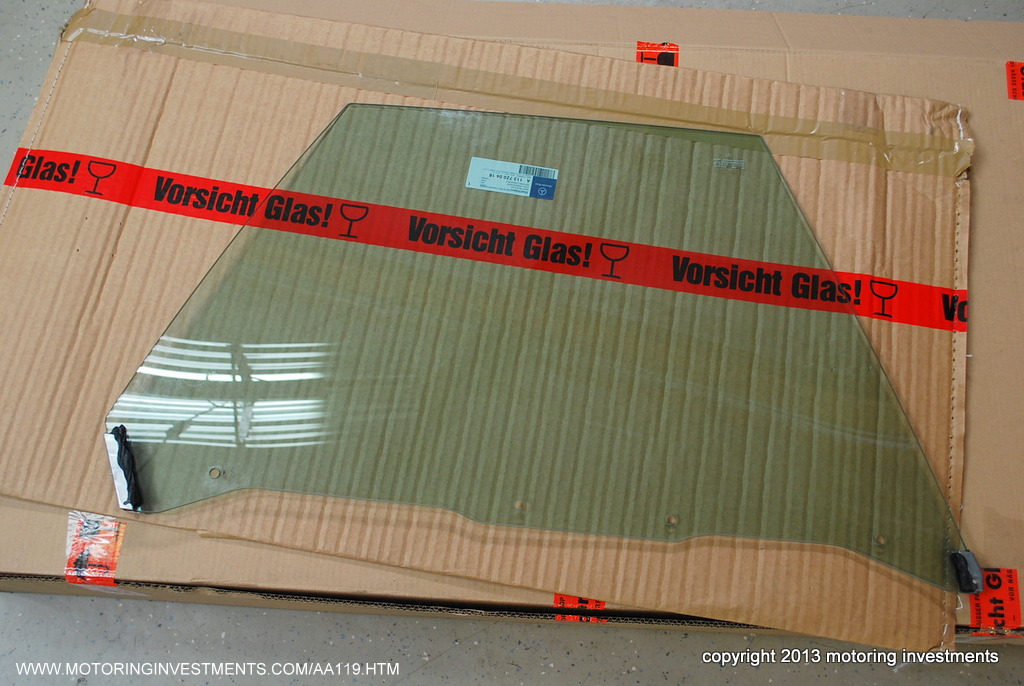
| New side glass arrives from the factory. | |||||
|
|
|||||